# Python

# An Introduction to Python

Python is a popular object-oriented programing language having the capabilities of high-level programming language. Its easy to learn syntax and portability capability makes it popular these days. The followings facts gives us the introduction to Python −

- Python was developed by Guido van Rossum at Stichting Mathematisch Centrum in the Netherlands.
- It was written as the successor of programming language named ‘ABC’.
- It’s first version was released in 1991.
- The name Python was picked by Guido van Rossum from a TV show named Monty Python’s Flying Circus.
- It is an open source programming language which means that we can freely download it and use it to develop programs. It can be downloaded from [www.python.org](https://www.python.org/).
- Python programming language is having the features of Java and C both. It is having the elegant ‘C’ code and on the other hand, it is having classes and objects like Java for object-oriented programming.
- It is an interpreted language, which means the source code of Python program would be first converted into bytecode and then executed by Python virtual machine.

# Strengths and Weaknesses of Python

Every programming language has some strengths as well as weaknesses, so does Python too.

### Strengths

According to studies and surveys, Python is the fifth most important language as well as the most popular language for machine learning and data science. It is because of the following strengths that Python has −

**Easy to learn and understand** − The syntax of Python is simpler; hence it is relatively easy, even for beginners also, to learn and understand the language.

**Multi-purpose language** − Python is a multi-purpose programming language because it supports structured programming, object-oriented programming as well as functional programming.

**Huge number of modules** − Python has huge number of modules for covering every aspect of programming. These modules are easily available for use hence making Python an extensible language.

**Support of open source community** − As being open source programming language, Python is supported by a very large developer community. Due to this, the bugs are easily fixed by the Python community. This characteristic makes Python very robust and adaptive.

**Scalability** − Python is a scalable programming language because it provides an improved structure for supporting large programs than shell-scripts.

### Weakness

Although Python is a popular and powerful programming language, it has its own weakness of slow execution speed.

The execution speed of Python is slow as compared to compiled languages because Python is an interpreted language. This can be the major area of improvement for Python community.

# Installing Python

For working in Python, we must first have to install it. You can perform the installation of Python in any of the following two ways −

Installing Python individually

Using Pre-packaged Python distribution − Anaconda

Let us discuss these each in detail.

### Installing Python Individually

If you want to install Python on your computer, then then you need to download only the binary code applicable for your platform. Python distribution is available for Windows, Linux and Mac platforms.

The following is a quick overview of installing Python on the above-mentioned platforms −

**On Unix and Linux platform**

With the help of following steps, we can install Python on Unix and Linux platform −

- First, go to [www.python.org/downloads/](https://www.python.org/downloads/).
- Next, click on the link to download zipped source code available for Unix/Linux.
- Now, Download and extract files.
- Next, we can edit the Modules/Setup file if we want to customize some options.
- Next, write the command **run ./configure script**
- make
- make install

**On Windows platform**

With the help of following steps, we can install Python on Windows platform −

- First, go to [www.python.org/downloads/](https://www.python.org/downloads/).
- Next, click on the link for Windows installer python-XYZ.msi file. Here XYZ is the version we wish to install.
- Now, we must run the file that is downloaded. It will take us to the Python install wizard, which is easy to use. Now, accept the default settings and wait until the install is finished.

**On Macintosh platform**

For Mac OS X, Homebrew, a great and easy to use package installer is recommended to install Python 3. In case if you don't have Homebrew, you can install it with the help of following command −

```
$ ruby -e "$(curl -fsSL
https://raw.githubusercontent.com/Homebrew/install/master/install)"
```

<div class="open_grepper_editor" id="bkmrk-" title="Edit & Save To Grepper">  
</div>It can be updated with the command below −

```
$ brew update
```

<div class="open_grepper_editor" id="bkmrk--0" title="Edit & Save To Grepper">  
</div>Now, to install Python3 on your system, we need to run the following command −

```
$ brew install python3
```

# Using Pre-packaged Python Distribution: Anaconda

Anaconda is a packaged compilation of Python which have all the libraries widely used in Data science. We can follow the following steps to setup Python environment using Anaconda −

- **Step 1** − First, we need to download the required installation package from Anaconda distribution. The link for the same is [www.anaconda.com/distribution/](https://www.anaconda.com/products/individual). You can choose from Windows, Mac and Linux OS as per your requirement.
- 
- **Step 2** − Next, select the Python version you want to install on your machine. The latest Python version is 3.7. There you will get the options for 64-bit and 32-bit Graphical installer both.
- 
- **Step 3** − After selecting the OS and Python version, it will download the Anaconda installer on your computer. Now, double click the file and the installer will install Anaconda package.
- 
- **Step 4** − For checking whether it is installed or not, open a command prompt and type Python as follows −
- 
- ![Python Distribution](https://www.tutorialspoint.com/machine_learning_with_python/images/python_distribution.jpg)
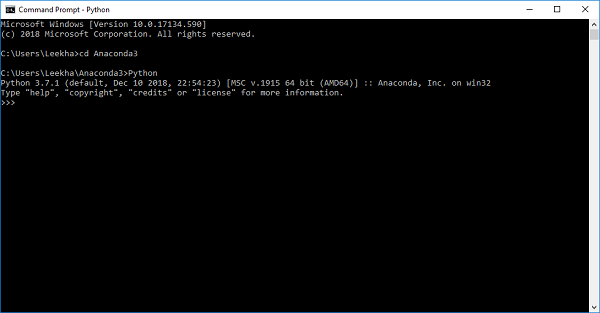
You can also check this in detailed video lecture at [www.tutorialspoint.com/python\_essentials\_online\_training/getting\_started\_with\_anaconda.asp](https://www.tutorialspoint.com/python_essentials_online_training/getting_started_with_anaconda.asp).

# Why Python for Data Science?

Python is the fifth most important language as well as most popular language for Machine learning and data science. The following are the features of Python that makes it the preferred choice of language for data science −

### Extensive set of packages

Python has an extensive and powerful set of packages which are ready to be used in various domains. It also has packages like **numpy, scipy, pandas, scikit-learn** etc. which are required for machine learning and data science.

### Easy prototyping

Another important feature of Python that makes it the choice of language for data science is the easy and fast prototyping. This feature is useful for developing new algorithm.

### Collaboration feature

The field of data science basically needs good collaboration and Python provides many useful tools that make this extremely.

### One language for many domains

A typical data science project includes various domains like data extraction, data manipulation, data analysis, feature extraction, modelling, evaluation, deployment and updating the solution. As Python is a multi-purpose language, it allows the data scientist to address all these domains from a common platform.

# Components of Python ML Ecosystem

In this section, let us discuss some core Data Science libraries that form the components of Python Machine learning ecosystem. These useful components make Python an important language for Data Science. Though there are many such components, let us discuss some of the importance components of Python ecosystem here −

## Jupyter Notebook

Jupyter notebooks basically provides an interactive computational environment for developing Python based Data Science applications. They are formerly known as ipython notebooks. The following are some of the features of Jupyter notebooks that makes it one of the best components of Python ML ecosystem −

- Jupyter notebooks can illustrate the analysis process step by step by arranging the stuff like code, images, text, output etc. in a step by step manner.
- It helps a data scientist to document the thought process while developing the analysis process.
- One can also capture the result as the part of the notebook.
- With the help of jupyter notebooks, we can share our work with a peer also.

### Installation and Execution

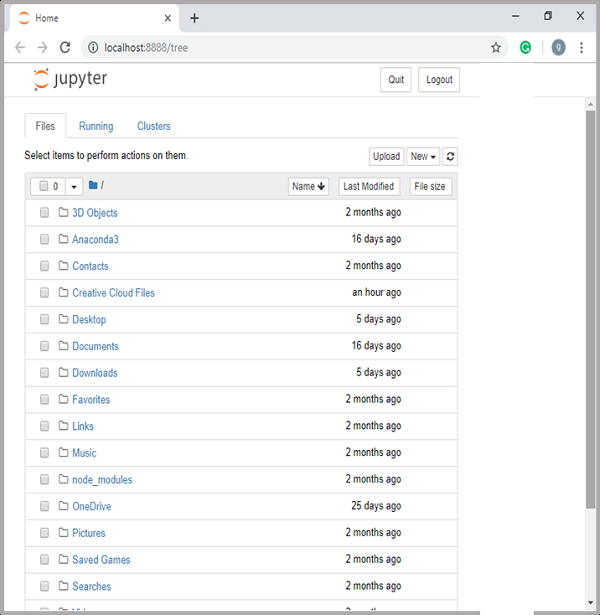
If you are using Anaconda distribution, then you need not install jupyter notebook separately as it is already installed with it. You just need to go to Anaconda Prompt and type the following command −

```
C:\>jupyter notebook
```

<div class="open_grepper_editor" id="bkmrk-" title="Edit & Save To Grepper">  
</div>After pressing enter, it will start a notebook server at localhost:8888 of your computer. It is shown in the following screen shot −

![Jupyter Notebook](https://www.tutorialspoint.com/machine_learning_with_python/images/jupyter_notebook.jpg)

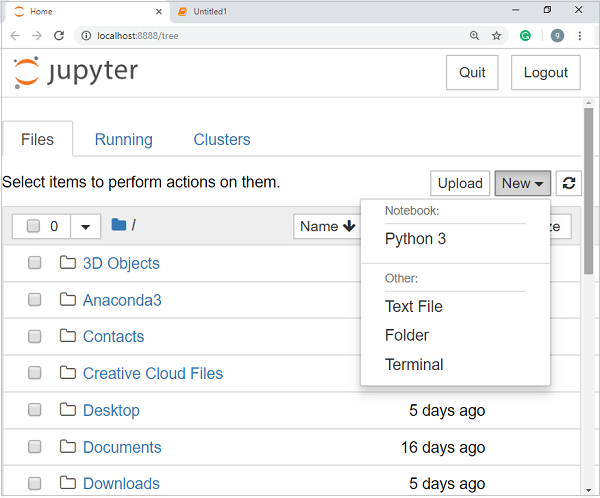
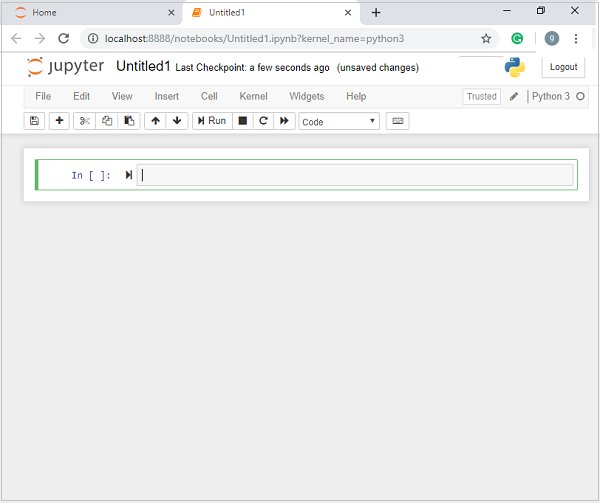
Now, after clicking the New tab, you will get a list of options. Select Python 3 and it will take you to the new notebook for start working in it. You will get a glimpse of it in the following screenshots −

![Python Table](https://www.tutorialspoint.com/machine_learning_with_python/images/python_table.jpg)

![Search Bar](https://www.tutorialspoint.com/machine_learning_with_python/images/search_bar.jpg)

On the other hand, if you are using standard Python distribution then jupyter notebook can be installed using popular python package installer, pip.

```
pip install jupyter
```

# Types of Cells in Jupyter Notebook

The following are the three types of cells in a jupyter notebook −

**Code cells** − As the name suggests, we can use these cells to write code. After writing the code/content, it will send it to the kernel that is associated with the notebook.

**Markdown cells** − We can use these cells for notating the computation process. They can contain the stuff like text, images, Latex equations, HTML tags etc.

**Raw cells** − The text written in them is displayed as it is. These cells are basically used to add the text that we do not wish to be converted by the automatic conversion mechanism of jupyter notebook.

For more detailed study of jupyter notebook, you can go to the link [www.tutorialspoint.com/jupyter/index.htm](https://www.tutorialspoint.com/jupyter/index.htm).

### NumPy

It is another useful component that makes Python as one of the favorite languages for Data Science. It basically stands for Numerical Python and consists of multidimensional array objects. By using NumPy, we can perform the following important operations −

- Mathematical and logical operations on arrays.
- Fourier transformation
- Operations associated with linear algebra.

We can also see NumPy as the replacement of MatLab because NumPy is mostly used along with Scipy (Scientific Python) and Mat-plotlib (plotting library).

**Installation and Execution**

If you are using Anaconda distribution, then no need to install NumPy separately as it is already installed with it. You just need to import the package into your Python script with the help of following −

```
import numpy as np
```

<div class="open_grepper_editor" id="bkmrk-" title="Edit & Save To Grepper">  
</div>On the other hand, if you are using standard Python distribution then NumPy can be installed using popular python package installer, pip.

```
pip install NumPy
```

<div class="open_grepper_editor" id="bkmrk--0" title="Edit & Save To Grepper">  
</div>For more detailed study of NumPy, you can go to the link[ www.tutorialspoint.com/numpy/index.htm](https://www.tutorialspoint.com/numpy/index.htm).

### Pandas

It is another useful Python library that makes Python one of the favorite languages for Data Science. Pandas is basically used for data manipulation, wrangling and analysis. It was developed by Wes McKinney in 2008. With the help of Pandas, in data processing we can accomplish the following five steps −

- Load
- Prepare
- Manipulate
- Model
- Analyze

### Data representation in Pandas

The entire representation of data in Pandas is done with the help of following three data structures −

**Series** − It is basically a one-dimensional ndarray with an axis label which means it is like a simple array with homogeneous data. For example, the following series is a collection of integers 1,5,10,15,24,25...

<table class="table table-bordered" id="bkmrk-1-5-10-15-24-25-28-3"><tbody><tr><td>1</td><td>5</td><td>10</td><td>15</td><td>24</td><td>25</td><td>28</td><td>36</td><td>40</td><td>89</td></tr></tbody></table>

**Data frame** − It is the most useful data structure and used for almost all kind of data representation and manipulation in pandas. It is basically a two-dimensional data structure which can contain heterogeneous data. Generally, tabular data is represented by using data frames. For example, the following table shows the data of students having their names and roll numbers, age and gender −

<table class="table table-bordered" id="bkmrk-name-roll-number-age"><tbody><tr><th>Name</th><th>Roll number</th><th>Age</th><th>Gender</th></tr><tr><td>Aarav</td><td>1</td><td>15</td><td>Male</td></tr><tr><td>Harshit</td><td>2</td><td>14</td><td>Male</td></tr><tr><td>Kanika</td><td>3</td><td>16</td><td>Female</td></tr><tr><td>Mayank</td><td>4</td><td>15</td><td>Male</td></tr></tbody></table>

**Panel** − It is a 3-dimensional data structure containing heterogeneous data. It is very difficult to represent the panel in graphical representation, but it can be illustrated as a container of DataFrame.

The following table gives us the dimension and description about above mentioned data structures used in Pandas −

<table class="table table-bordered" id="bkmrk-data-structure-dimen"><tbody><tr><th>Data Structure</th><th>Dimension</th><th>Description</th></tr><tr><td>Series</td><td>1-D</td><td>Size immutable, 1-D homogeneous data</td></tr><tr><td>DataFrames</td><td>2-D</td><td>Size Mutable, Heterogeneous data in tabular form</td></tr><tr><td>Panel</td><td>3-D</td><td>Size-mutable array, container of DataFrame.</td></tr></tbody></table>

We can understand these data structures as the higher dimensional data structure is the container of lower dimensional data structure.

### Installation and Execution

If you are using Anaconda distribution, then no need to install Pandas separately as it is already installed with it. You just need to import the package into your Python script with the help of following −

```
import pandas as pd
```

<div class="open_grepper_editor" id="bkmrk--1" title="Edit & Save To Grepper">  
</div>On the other hand, if you are using standard Python distribution then Pandas can be installed using popular python package installer, pip.

```
pip install Pandas
```

<div class="open_grepper_editor" id="bkmrk--2" title="Edit & Save To Grepper">  
</div>After installing Pandas, you can import it into your Python script as did above.

### Example

The following is an example of creating a series from ndarray by using Pandas −

```
In [1]: import pandas as pd

In [2]: import numpy as np

In [3]: data = np.array(['g','a','u','r','a','v'])

In [4]: s = pd.Series(data)

In [5]: print (s)

0 g
1 a
2 u
3 r
4 a
5 v

dtype: object
```

<div class="open_grepper_editor" id="bkmrk--3" title="Edit & Save To Grepper">  
</div>For more detailed study of Pandas you can go to the link [www.tutorialspoint.com/python\_pandas/index.htm](https://www.tutorialspoint.com/python_pandas/index.htm).

### Scikit-learn

Another useful and most important python library for Data Science and machine learning in Python is Scikit-learn. The following are some features of Scikit-learn that makes it so useful −

- It is built on NumPy, SciPy, and Matplotlib.
- It is an open source and can be reused under BSD license.
- It is accessible to everybody and can be reused in various contexts.
- Wide range of machine learning algorithms covering major areas of ML like classification, clustering, regression, dimensionality reduction, model selection etc. can be implemented with the help of it.

### Installation and Execution

If you are using Anaconda distribution, then no need to install Scikit-learn separately as it is already installed with it. You just need to use the package into your Python script. For example, with following line of script we are importing dataset of breast cancer patients from **Scikit-learn** −

```
from sklearn.datasets import load_breast_cancer
```

<div class="open_grepper_editor" id="bkmrk--4" title="Edit & Save To Grepper">  
</div>On the other hand, if you are using standard Python distribution and having NumPy and SciPy then Scikit-learn can be installed using popular python package installer, pip.

```
pip install -U scikit-learn
```

<div class="open_grepper_editor" id="bkmrk--5" title="Edit & Save To Grepper">  
</div>After installing Scikit-learn, you can use it into your Python script as you have done above.

# Django Tutorial

Django is a web development framework that assists in building and maintaining quality web applications. Django helps eliminate repetitive tasks making the development process an easy and time saving experience. This tutorial gives a complete understanding of Django.

# Django - Basics

Before you proceed, make sure that you understand the basics of procedural and object-oriented programming: control structures, data structures and variables, classes, objects, etc.

Django is a high-level Python web framework that encourages rapid development and clean, pragmatic design. Django makes it easier to build better web apps quickly and with less code.

**Note** − Django is a registered trademark of the Django Software Foundation, and is licensed under BSD License.

## History of Django

- **2003** − Started by Adrian Holovaty and Simon Willison as an internal project at the Lawrence Journal-World newspaper.
- **2005** − Released July 2005 and named it Django, after the jazz guitarist Django Reinhardt.
- **2005** − Mature enough to handle several high-traffic sites.
- **Current** − Django is now an open source project with contributors across the world.

## Django – Design Philosophies

Django comes with the following design philosophies −

- **Loosely Coupled** − Django aims to make each element of its stack independent of the others.
- **Less Coding** − Less code so in turn a quick development.
- **Don't Repeat Yourself (DRY)** − Everything should be developed only in exactly one place instead of repeating it again and again.
- **Fast Development** − Django's philosophy is to do all it can to facilitate hyper-fast development.
- **Clean Design** − Django strictly maintains a clean design throughout its own code and makes it easy to follow best web-development practices.

## Advantages of Django

Here are few advantages of using Django which can be listed out here −

- **Object-Relational Mapping (ORM) Support** − Django provides a bridge between the data model and the database engine, and supports a large set of database systems including MySQL, Oracle, Postgres, etc. Django also supports NoSQL database through Django-nonrel fork. For now, the only NoSQL databases supported are MongoDB and google app engine.
- **Multilingual Support** − Django supports multilingual websites through its built-in internationalization system. So you can develop your website, which would support multiple languages.
- **Framework Support** − Django has built-in support for Ajax, RSS, Caching and various other frameworks.
- **Administration GUI** − Django provides a nice ready-to-use user interface for administrative activities.
- **Development Environment** − Django comes with a lightweight web server to facilitate end-to-end application development and testing.

# Django - Overview

As you already know, Django is a Python web framework. And like most modern framework, Django supports the MVC pattern. First let's see what is the Model-View-Controller (MVC) pattern, and then we will look at Django’s specificity for the Model-View-Template (MVT) pattern.

## MVC Pattern

When talking about applications that provides UI (web or desktop), we usually talk about MVC architecture. And as the name suggests, MVC pattern is based on three components: Model, View, and Controller. [Check our MVC tutorial here](http://www.tutorialspoint.com/struts_2/basic_mvc_architecture.htm) to know more.

## DJANGO MVC - MVT Pattern

The Model-View-Template (MVT) is slightly different from MVC. In fact the main difference between the two patterns is that Django itself takes care of the Controller part (Software Code that controls the interactions between the Model and View), leaving us with the template. The template is a HTML file mixed with Django Template Language (DTL).

The following diagram illustrates how each of the components of the MVT pattern interacts with each other to serve a user request −

![DJANGO MVC - MVT Pattern](https://www.tutorialspoint.com/django/images/django_mvc_mvt_pattern.jpg)

The developer provides the Model, the view and the template then just maps it to a URL and Django does the magic to serve it to the user.

# Django - Environment

Django development environment consists of installing and setting up Python, Django, and a Database System. Since Django deals with web application, it's worth mentioning that you would need a web server setup as well.

## Step 1 – Installing Python

Django is written in 100% pure Python code, so you'll need to install Python on your system. Latest Django version requires Python 2.6.5 or higher

If you're on one of the latest Linux or Mac OS X distribution, you probably already have Python installed. You can verify it by typing *python* command at a command prompt. If you see something like this, then Python is installed.

```
$ python
Python 2.7.5 (default, Jun 17 2014, 18:11:42)
[GCC 4.8.2 20140120 (Red Hat 4.8.2-16)] on linux2
```

<div class="open_grepper_editor" id="bkmrk-" title="Edit & Save To Grepper">  
</div>Otherwise, you can download and install the latest version of Python from the link [http://www.python.org/download](https://www.python.org/downloads/).

## Step 2 - Installing Django

Installing Django is very easy, but the steps required for its installation depends on your operating system. Since Python is a platform-independent language, Django has one package that works everywhere regardless of your operating system.

You can download the latest version of Django from the link [http://www.djangoproject.com/download](https://www.djangoproject.com/download/).

### UNIX/Linux and Mac OS X Installation

You have two ways of installing Django if you are running Linux or Mac OS system −

- You can use the package manager of your OS, or use easy\_install or pip if installed.
- Install it manually using the official archive you downloaded before.

We will cover the second option as the first one depends on your OS distribution. If you have decided to follow the first option, just be careful about the version of Django you are installing.

Let's say you got your archive from the link above, it should be something like Django-x.xx.tar.gz:

Extract and install.

```
$ tar xzvf Django-x.xx.tar.gz
$ cd Django-x.xx
$ sudo python setup.py install
```

<div class="open_grepper_editor" id="bkmrk--0" title="Edit & Save To Grepper">  
</div>You can test your installation by running this command −

```
$ django-admin.py --version
```

<div class="open_grepper_editor" id="bkmrk--1" title="Edit & Save To Grepper">  
</div>If you see the current version of Django printed on the screen, then everything is set.

**Note** − For some version of Django it will be django-admin the ".py" is removed.

### Windows Installation

We assume you have your Django archive and python installed on your computer.

First, PATH verification.

On some version of windows (windows 7) you might need to make sure the Path system variable has the path the following `C:\Python34\;C:\Python34\Lib\site-packages\django\bin\` in it, of course depending on your Python version.

Then, extract and install Django.

```
c:\>cd c:\Django-x.xx
```

<div class="open_grepper_editor" id="bkmrk--2" title="Edit & Save To Grepper">  
</div>Next, install Django by running the following command for which you will need administrative privileges in windows shell "cmd" −

```
c:\Django-x.xx>python setup.py install
```

<div class="open_grepper_editor" id="bkmrk--3" title="Edit & Save To Grepper">  
</div>To test your installation, open a command prompt and type the following command −

```
c:\>python -c "import django; print(django.get_version())"
```

<div class="open_grepper_editor" id="bkmrk--4" title="Edit & Save To Grepper">  
</div>If you see the current version of Django printed on screen, then everything is set.

OR

Launch a "cmd" prompt and type python then −

```
c:\> python
>>> import django
>>> django.VERSION
```

<div class="open_grepper_editor" id="bkmrk--5" title="Edit & Save To Grepper">  
</div>## Step 3 – Database Setup

Django supports several major database engines and you can set up any of them based on your comfort.

- [MySQL (http://www.mysql.com/)](http://www.mysql.com/)
- [PostgreSQL (http://www.postgresql.org/)](http://www.postgresql.org/)
- [SQLite 3 (http://www.sqlite.org/)](http://www.sqlite.org/)
- [Oracle (http://www.oracle.com/)](http://www.oracle.com/index.html)
- [MongoDb (https://django-mongodb-engine.readthedocs.org)](https://django-mongodb-engine.readthedocs.org/en/latest/)
- [GoogleAppEngine Datastore (https://cloud.google.com/appengine/articles/django-nonrel)](https://cloud.google.com/appengine/articles/django-nonrel)

You can refer to respective documentation to installing and configuring a database of your choice.

**Note** − Number 5 and 6 are NoSQL databases.

## Step 4 – Web Server

Django comes with a lightweight web server for developing and testing applications. This server is pre-configured to work with Django, and more importantly, it restarts whenever you modify the code.

However, Django does support Apache and other popular web servers such as Lighttpd. We will discuss both the approaches in coming chapters while working with different examples.

# Django - Creating a Project

Now that we have installed Django, let's start using it. In Django, every web app you want to create is called a project; and a project is a sum of applications. An application is a set of code files relying on the MVT pattern. As example let's say we want to build a website, the website is our project and, the forum, news, contact engine are applications. This structure makes it easier to move an application between projects since every application is independent.

## Create a Project

Whether you are on Windows or Linux, just get a terminal or a **cmd** prompt and navigate to the place you want your project to be created, then use this code −

```
$ django-admin startproject myproject
```

<div class="open_grepper_editor" id="bkmrk-" title="Edit & Save To Grepper">  
</div>This will create a "myproject" folder with the following structure −

```
myproject/
   manage.py
   myproject/
      __init__.py
      settings.py
      urls.py
      wsgi.py
```

<div class="open_grepper_editor" id="bkmrk--0" title="Edit & Save To Grepper">  
</div>## The Project Structure

The “myproject” folder is just your project container, it actually contains two elements −

- **manage.py** − This file is kind of your project local django-admin for interacting with your project via command line (start the development server, sync db...). To get a full list of command accessible via manage.py you can use the code −

```
$ python manage.py help
```

<div class="open_grepper_editor" id="bkmrk--1" title="Edit & Save To Grepper">  
</div>- **The “myproject” subfolder** − This folder is the actual python package of your project. It contains four files −
    
    
    - **\_\_init\_\_.py** − Just for python, treat this folder as package.
    - **settings.py** − As the name indicates, your project settings.
    - **urls.py** − All links of your project and the function to call. A kind of ToC of your project.
    - **wsgi.py** − If you need to deploy your project over WSGI.

## Setting Up Your Project

Your project is set up in the subfolder myproject/settings.py. Following are some important options you might need to set −

```
DEBUG = True
```

<div class="open_grepper_editor" id="bkmrk--2" title="Edit & Save To Grepper">  
</div>This option lets you set if your project is in debug mode or not. Debug mode lets you get more information about your project's error. Never set it to ‘True’ for a live project. However, this has to be set to ‘True’ if you want the Django light server to serve static files. Do it only in the development mode.

```
DATABASES = {
   'default': {
      'ENGINE': 'django.db.backends.sqlite3',
      'NAME': 'database.sql',
      'USER': '',
      'PASSWORD': '',
      'HOST': '',
      'PORT': '',
   }
}
```

<div class="open_grepper_editor" id="bkmrk--3" title="Edit & Save To Grepper">  
</div>Database is set in the ‘Database’ dictionary. The example above is for SQLite engine. As stated earlier, Django also supports −

- MySQL (django.db.backends.mysql)
- PostGreSQL (django.db.backends.postgresql\_psycopg2)
- Oracle (django.db.backends.oracle) and NoSQL DB
- MongoDB (django\_mongodb\_engine)

Before setting any new engine, make sure you have the correct db driver installed.

You can also set others options like: TIME\_ZONE, LANGUAGE\_CODE, TEMPLATE…

Now that your project is created and configured make sure it's working −

```
$ python manage.py runserver
```

<div class="open_grepper_editor" id="bkmrk--4" title="Edit & Save To Grepper">  
</div>You will get something like the following on running the above code −

```
Validating models...

0 errors found
September 03, 2015 - 11:41:50
Django version 1.6.11, using settings 'myproject.settings'
Starting development server at http://127.0.0.1:8000/
Quit the server with CONTROL-C.
```

# Django - Apps Life Cycle

A project is a sum of many applications. Every application has an objective and can be reused into another project, like the contact form on a website can be an application, and can be reused for others. See it as a module of your project.

## Create an Application

We assume you are in your project folder. In our main “myproject” folder, the same folder then manage.py −

```
$ python manage.py startapp myapp
```

<div class="open_grepper_editor" id="bkmrk-" title="Edit & Save To Grepper">  
</div>You just created myapp application and like project, Django create a “myapp” folder with the application structure −

```
myapp/
   __init__.py
   admin.py
   models.py
   tests.py
   views.py
```

<div class="open_grepper_editor" id="bkmrk--0" title="Edit & Save To Grepper">  
</div>- **\_\_init\_\_.py** − Just to make sure python handles this folder as a package.
- **admin.py** − This file helps you make the app modifiable in the admin interface.
- **models.py** − This is where all the application models are stored.
- **tests.py** − This is where your unit tests are.
- **views.py** − This is where your application views are.

## Get the Project to Know About Your Application

At this stage we have our "myapp" application, now we need to register it with our Django project "myproject". To do so, update INSTALLED\_APPS tuple in the settings.py file of your project (add your app name) −

```
INSTALLED_APPS = (
   'django.contrib.admin',
   'django.contrib.auth',
   'django.contrib.contenttypes',
   'django.contrib.sessions',
   'django.contrib.messages',
   'django.contrib.staticfiles',
   'myapp',
)
```

# Django - Admin Interface

Django provides a ready-to-use user interface for administrative activities. We all know how an admin interface is important for a web project. Django automatically generates admin UI based on your project models.

## Starting the Admin Interface

The Admin interface depends on the django.countrib module. To have it working you need to make sure some modules are imported in the INSTALLED\_APPS and MIDDLEWARE\_CLASSES tuples of the myproject/settings.py file.

For INSTALLED\_APPS make sure you have −

```
INSTALLED_APPS = (
   'django.contrib.admin',
   'django.contrib.auth',
   'django.contrib.contenttypes',
   'django.contrib.sessions',
   'django.contrib.messages',
   'django.contrib.staticfiles',
   'myapp',
)
```

<div class="open_grepper_editor" id="bkmrk-" title="Edit & Save To Grepper">  
</div>For MIDDLEWARE\_CLASSES −

```
MIDDLEWARE_CLASSES = (
   'django.contrib.sessions.middleware.SessionMiddleware',
   'django.middleware.common.CommonMiddleware',
   'django.middleware.csrf.CsrfViewMiddleware',
   'django.contrib.auth.middleware.AuthenticationMiddleware',
   'django.contrib.messages.middleware.MessageMiddleware',
   'django.middleware.clickjacking.XFrameOptionsMiddleware',
)
```

<div class="open_grepper_editor" id="bkmrk--0" title="Edit & Save To Grepper">  
</div>Before launching your server, to access your Admin Interface, you need to initiate the database −

```
$ python manage.py migrate
```

<div class="open_grepper_editor" id="bkmrk--1" title="Edit & Save To Grepper">  
</div>syncdb will create necessary tables or collections depending on your db type, necessary for the admin interface to run. Even if you don't have a superuser, you will be prompted to create one.

If you already have a superuser or have forgotten it, you can always create one using the following code −

```
$ python manage.py createsuperuser
```

<div class="open_grepper_editor" id="bkmrk--2" title="Edit & Save To Grepper">  
</div>Now to start the Admin Interface, we need to make sure we have configured a URL for our admin interface. Open the myproject/url.py and you should have something like −

```
from django.conf.urls import patterns, include, url

from django.contrib import admin
admin.autodiscover()

urlpatterns = patterns('',
   # Examples:
   # url(r'^$', 'myproject.views.home', name = 'home'),
   # url(r'^blog/', include('blog.urls')),

   url(r'^admin/', include(admin.site.urls)),
)
```

<div class="open_grepper_editor" id="bkmrk--3" title="Edit & Save To Grepper">  
</div>Now just run the server.

```
$ python manage.py runserver
```

<div class="open_grepper_editor" id="bkmrk--4" title="Edit & Save To Grepper">  
</div>And your admin interface is accessible at: http://127.0.0.1:8000/admin/

![Admin Interface](https://www.tutorialspoint.com/django/images/admin_interface.jpg)

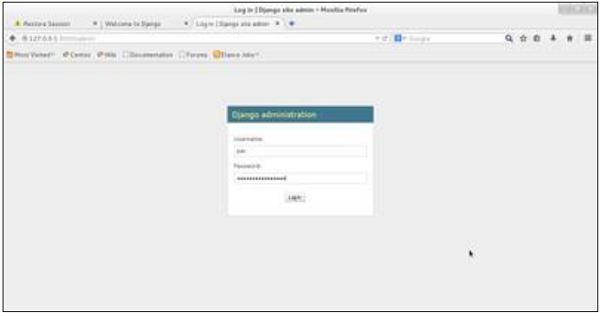
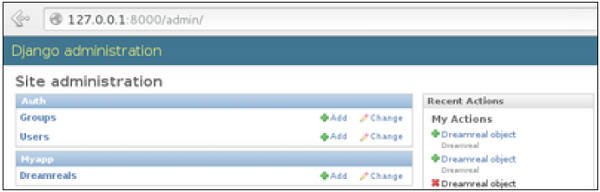
Once connected with your superuser account, you will see the following screen −

![Super User Account](https://www.tutorialspoint.com/django/images/super_user_account.jpg)

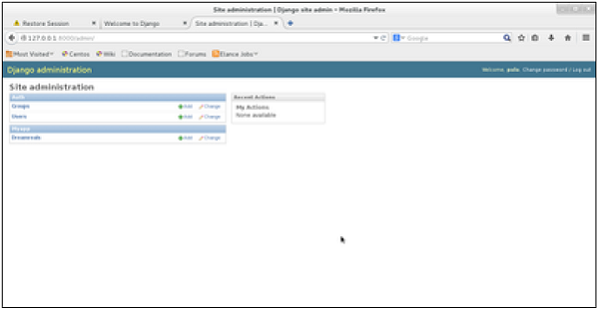
That interface will let you administrate Django groups and users, and all registered models in your app. The interface gives you the ability to do at least the "CRUD" (Create, Read, Update, Delete) operations on your models.

# Django - Creating Views

A view function, or “view” for short, is simply a Python function that takes a web request and returns a web response. This response can be the HTML contents of a Web page, or a redirect, or a 404 error, or an XML document, or an image, etc. Example: You use view to create web pages, note that you need to associate a view to a URL to see it as a web page.

In Django, views have to be created in the app views.py file.

## Simple View

We will create a simple view in myapp to say "welcome to my app!"

See the following view −

```
from django.http import HttpResponse

def hello(request):
   text = """<h1>welcome to my app !</h1>"""
   return HttpResponse(text)
```

<div class="open_grepper_editor" id="bkmrk-" title="Edit & Save To Grepper">  
</div>In this view, we use HttpResponse to render the HTML (as you have probably noticed we have the HTML hard coded in the view). To see this view as a page we just need to map it to a URL (this will be discussed in an upcoming chapter).

We used HttpResponse to render the HTML in the view before. This is not the best way to render pages. Django supports the MVT pattern so to make the precedent view, Django - MVT like, we will need −

A template: myapp/templates/hello.html

And now our view will look like −

```
from django.shortcuts import render

def hello(request):
   return render(request, "myapp/template/hello.html", {})
```

<div class="open_grepper_editor" id="bkmrk--0" title="Edit & Save To Grepper">  
</div>Views can also accept parameters −

```
from django.http import HttpResponse

def hello(request, number):
   text = "<h1>welcome to my app number %s!</h1>"% number
   return HttpResponse(text)
```

<div class="open_grepper_editor" id="bkmrk--1" title="Edit & Save To Grepper">  
</div>When linked to a URL, the page will display the number passed as a parameter. Note that the parameters will be passed via the URL (discussed in the next chapter).

# Django - URL Mapping

Now that we have a working view as explained in the previous chapters. We want to access that view via a URL. Django has his own way for URL mapping and it's done by editing your project url.py file **(myproject/url.py)**. The url.py file looks like −

```
from django.conf.urls import patterns, include, url
from django.contrib import admin
admin.autodiscover()

urlpatterns = patterns('',
   #Examples
   #url(r'^$', 'myproject.view.home', name = 'home'),
   #url(r'^blog/', include('blog.urls')),

   url(r'^admin', include(admin.site.urls)),
)
```

<div class="open_grepper_editor" id="bkmrk-" title="Edit & Save To Grepper">  
</div>When a user makes a request for a page on your web app, Django controller takes over to look for the corresponding view via the url.py file, and then return the HTML response or a 404 not found error, if not found. In url.py, the most important thing is the **"urlpatterns"** tuple. It’s where you define the mapping between URLs and views. A mapping is a tuple in URL patterns like −

```
from django.conf.urls import patterns, include, url
from django.contrib import admin
admin.autodiscover()

urlpatterns = patterns('',
   #Examples
   #url(r'^$', 'myproject.view.home', name = 'home'),
   #url(r'^blog/', include('blog.urls')),

   url(r'^admin', include(admin.site.urls)),
   url(r'^hello/', 'myapp.views.hello', name = 'hello'),
)
```

<div class="open_grepper_editor" id="bkmrk--0" title="Edit & Save To Grepper">  
</div>The marked line maps the URL "/home" to the hello view created in myapp/view.py file. As you can see above a mapping is composed of three elements −

- **The pattern** − A regexp matching the URL you want to be resolved and map. Everything that can work with the python 're' module is eligible for the pattern (useful when you want to pass parameters via url).
- **The python path to the view** − Same as when you are importing a module.
- **The name** − In order to perform URL reversing, you’ll need to use named URL patterns as done in the examples above. Once done, just start the server to access your view via :http://127.0.0.1/hello

## Organizing Your URLs

So far, we have created the URLs in “myprojects/url.py” file, however as stated earlier about Django and creating an app, the best point was to be able to reuse applications in different projects. You can easily see what the problem is, if you are saving all your URLs in the “projecturl.py” file. So best practice is to create an “url.py” per application and to include it in our main projects url.py file (we included admin URLs for admin interface before).

![Organize URLs](https://www.tutorialspoint.com/django/images/organize_urls.jpg)

## How is it Done?

We need to create an url.py file in myapp using the following code −

```
from django.conf.urls import patterns, include, url

urlpatterns = patterns('', url(r'^hello/', 'myapp.views.hello', name = 'hello'),)
```

<div class="open_grepper_editor" id="bkmrk--2" title="Edit & Save To Grepper">  
</div>Then myproject/url.py will change to the following −

```
from django.conf.urls import patterns, include, url
from django.contrib import admin
admin.autodiscover()

urlpatterns = patterns('',
   #Examples
   #url(r'^$', 'myproject.view.home', name = 'home'),
   #url(r'^blog/', include('blog.urls')),

   url(r'^admin', include(admin.site.urls)),
   url(r'^myapp/', include('myapp.urls')),
)
```

<div class="open_grepper_editor" id="bkmrk--3" title="Edit & Save To Grepper">  
</div>We have included all URLs from myapp application. The home.html that was accessed through “/hello” is now “/myapp/hello” which is a better and more understandable structure for the web app.

![Myproject](https://www.tutorialspoint.com/django/images/myproject.jpg)

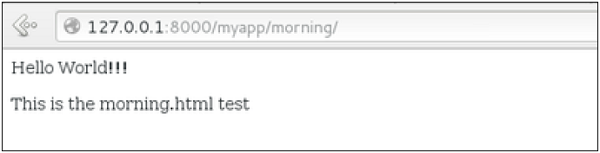
Now let's imagine we have another view in myapp “morning” and we want to map it in myapp/url.py, we will then change our myapp/url.py to −

```
from django.conf.urls import patterns, include, url

urlpatterns = patterns('',
   url(r'^hello/', 'myapp.views.hello', name = 'hello'),
   url(r'^morning/', 'myapp.views.morning', name = 'morning'),
)
```

<div class="open_grepper_editor" id="bkmrk--5" title="Edit & Save To Grepper">  
</div>This can be re-factored to −

```
from django.conf.urls import patterns, include, url

urlpatterns = patterns('myapp.views',
   url(r'^hello/', 'hello', name = 'hello'),
   url(r'^morning/', 'morning', name = 'morning'),)
```

<div class="open_grepper_editor" id="bkmrk--6" title="Edit & Save To Grepper">  
</div>As you can see, we now use the first element of our **urlpatterns** tuple. This can be useful when you want to change your app name.

![URL Patterns](https://www.tutorialspoint.com/django/images/urlpatterns.jpg)

## Sending Parameters to Views

We now know how to map URL, how to organize them, now let us see how to send parameters to views. A classic sample is the article example (you want to access an article via “/articles/article\_id”).

Passing parameters is done by capturing them with the **regexp** in the URL pattern. If we have a view like the following one in “myapp/view.py”

```
from django.shortcuts import render
from django.http import HttpResponse

def hello(request):
   return render(request, "hello.html", {})

def viewArticle(request, articleId):
   text = "Displaying article Number : %s"%articleId
   return HttpResponse(text)
```

<div class="open_grepper_editor" id="bkmrk--8" title="Edit & Save To Grepper">  
</div>We want to map it in myapp/url.py so we can access it via “/myapp/article/articleId”, we need the following in “myapp/url.py” −

```
from django.conf.urls import patterns, include, url

urlpatterns = patterns('myapp.views',
   url(r'^hello/', 'hello', name = 'hello'),
   url(r'^morning/', 'morning', name = 'morning'),
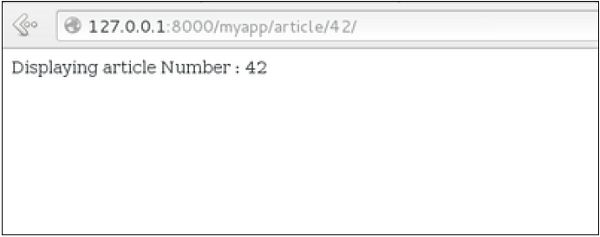
   url(r'^article/(\d+)/', 'viewArticle', name = 'article'),)
```

<div class="open_grepper_editor" id="bkmrk--9" title="Edit & Save To Grepper">  
</div>When Django will see the url: “/myapp/article/42” it will pass the parameters '42' to the viewArticle view, and in your browser you should get the following result −

![Passing parameters to viewArticle](https://www.tutorialspoint.com/django/images/passing_parameters_to_viewarticle.jpg)

Note that the order of parameters is important here. Suppose we want the list of articles of a month of a year, let's add a viewArticles view. Our view.py becomes −

```
from django.shortcuts import render
from django.http import HttpResponse

def hello(request):
   return render(request, "hello.html", {})

def viewArticle(request, articleId):
   text = "Displaying article Number : %s"%articleId
   return HttpResponse(text)

def viewArticle(request, month, year):
   text = "Displaying articles of : %s/%s"%(year, month)
   return HttpResponse(text)
```

<div class="open_grepper_editor" id="bkmrk--11" title="Edit & Save To Grepper">  
</div>The corresponding **url.py** file will look like −

```
from django.conf.urls import patterns, include, url

urlpatterns = patterns('myapp.views',
   url(r'^hello/', 'hello', name = 'hello'),
   url(r'^morning/', 'morning', name = 'morning'),
   url(r'^article/(\d+)/', 'viewArticle', name = 'article'),
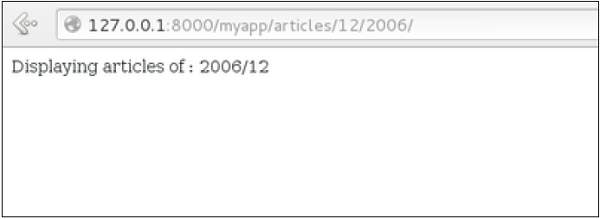
   url(r'^articles/(\d{2})/(\d{4})', 'viewArticles', name = 'articles'),)
```

<div class="open_grepper_editor" id="bkmrk--12" title="Edit & Save To Grepper">  
</div>Now when you go to “/myapp/articles/12/2006/” you will get 'Displaying articles of: 2006/12' but if you reverse the parameters you won’t get the same result.

![Displaying Articles](https://www.tutorialspoint.com/django/images/displaying_articles.jpg)

To avoid that, it is possible to link a URL parameter to the view parameter. For that, our **url.py** will become −

```
from django.conf.urls import patterns, include, url

urlpatterns = patterns('myapp.views',
   url(r'^hello/', 'hello', name = 'hello'),
   url(r'^morning/', 'morning', name = 'morning'),
   url(r'^article/(\d+)/', 'viewArticle', name = 'article'),
   url(r'^articles/(?P\d{2})/(?P\d{4})', 'viewArticles', name = 'articles'),)
```

# Django - Template System

Django makes it possible to separate python and HTML, the python goes in views and HTML goes in templates. To link the two, Django relies on the render function and the Django Template language.

## The Render Function

This function takes three parameters −

- **Request** − The initial request.
- **The path to the template** − This is the path relative to the TEMPLATE\_DIRS option in the project settings.py variables.
- **Dictionary of parameters** − A dictionary that contains all variables needed in the template. This variable can be created or you can use locals() to pass all local variable declared in the view.

## Django Template Language (DTL)

Django’s template engine offers a mini-language to define the user-facing layer of the application.

### Displaying Variables

A variable looks like this: {{variable}}. The template replaces the variable by the variable sent by the view in the third parameter of the render function. Let's change our hello.html to display today’s date −

**hello.html**

```
<html>
   
   <body>
      Hello World!!!<p>Today is {{today}}</p>
   </body>
   
</html>
```

<div class="open_grepper_editor" id="bkmrk-" title="Edit & Save To Grepper">  
</div>Then our view will change to −

```
def hello(request):
   today = datetime.datetime.now().date()
   return render(request, "hello.html", {"today" : today})
```

<div class="open_grepper_editor" id="bkmrk--0" title="Edit & Save To Grepper">  
</div>We will now get the following output after accessing the URL/myapp/hello −

```
Hello World!!!
Today is Sept. 11, 2015
```

<div class="open_grepper_editor" id="bkmrk--1" title="Edit & Save To Grepper">  
</div>As you have probably noticed, if the variable is not a string, Django will use the \_\_str\_\_ method to display it; and with the same principle you can access an object attribute just like you do it in Python. For example: if we wanted to display the date year, my variable would be: {{today.year}}.

## Filters

They help you modify variables at display time. Filters structure looks like the following: {{var|filters}}.

**Some examples** −

- **{{string|truncatewords:80}}** − This filter will truncate the string, so you will see only the first 80 words.
- **{{string|lower}}** − Converts the string to lowercase.
- **{{string|escape|linebreaks}}** − Escapes string contents, then converts line breaks to tags.

You can also set the default for a variable.

## Tags

Tags lets you perform the following operations: if condition, for loop, template inheritance and more.

### Tag if

Just like in Python you can use if, else and elif in your template −

```
<html>
   <body>
   
      Hello World!!!<p>Today is {{today}}</p>
      We are
      {% if today.day == 1 %}
      
      the first day of month.
      {% elif today.day == 30 %}
      
      the last day of month.
      {% else %}
      
      I don't know.
      {%endif%}
      
   </body>
</html>
```

<div class="open_grepper_editor" id="bkmrk--2" title="Edit & Save To Grepper">  
</div>In this new template, depending on the date of the day, the template will render a certain value.

### Tag for

Just like 'if', we have the 'for' tag, that works exactly like in Python. Let's change our hello view to transmit a list to our template −

```
def hello(request):
   today = datetime.datetime.now().date()
   
   daysOfWeek = ['Mon', 'Tue', 'Wed', 'Thu', 'Fri', 'Sat', 'Sun']
   return render(request, "hello.html", {"today" : today, "days_of_week" : daysOfWeek})
```

<div class="open_grepper_editor" id="bkmrk--3" title="Edit & Save To Grepper">  
</div>The template to display that list using {{ for }} −

```
<html>
   <body>
      
      Hello World!!!<p>Today is {{today}}</p>
      We are
      {% if today.day == 1 %}
      
      the first day of month.
      {% elif today.day == 30 %}
      
      the last day of month.
      {% else %}
      
      I don't know.
      {%endif%}
      
      <p>
         {% for day in days_of_week %}
         {{day}}
      </p>
		
      {% endfor %}
      
   </body>
</html>
```

<div class="open_grepper_editor" id="bkmrk--4" title="Edit & Save To Grepper">  
</div>
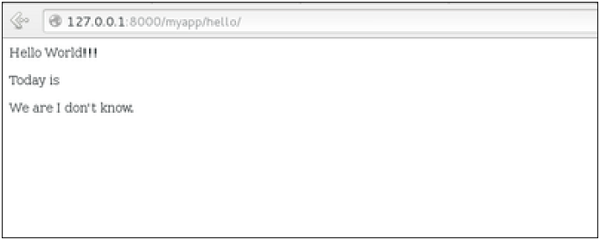
And we should get something like −

```
Hello World!!!
Today is Sept. 11, 2015
We are I don't know.
Mon
Tue
Wed
Thu
Fri
Sat
Sun
```

<div class="open_grepper_editor" id="bkmrk--5" title="Edit & Save To Grepper">  
</div>### Block and Extend Tags

A template system cannot be complete without template inheritance. Meaning when you are designing your templates, you should have a main template with holes that the child's template will fill according to his own need, like a page might need a special css for the selected tab.

Let’s change the hello.html template to inherit from a main\_template.html.

**main\_template.html**

```
<html>
   <head>
      
      <title>
         {% block title %}Page Title{% endblock %}
      </title>
      
   </head>
	
   <body>
   
      {% block content %}
         Body content
      {% endblock %}
      
   </body>
</html>
```

<div class="open_grepper_editor" id="bkmrk--6" title="Edit & Save To Grepper">  
</div>**hello.html**

```
{% extends "main_template.html" %}
{% block title %}My Hello Page{% endblock %}
{% block content %}

Hello World!!!<p>Today is {{today}}</p>
We are
{% if today.day == 1 %}

the first day of month.
{% elif today.day == 30 %}

the last day of month.
{% else %}

I don't know.
{%endif%}

<p>
   {% for day in days_of_week %}
   {{day}}
</p>

{% endfor %}
{% endblock %}
```

<div class="open_grepper_editor" id="bkmrk--7" title="Edit & Save To Grepper">  
</div>In the above example, on calling /myapp/hello we will still get the same result as before but now we rely on extends and block to refactor our code −

In the main\_template.html we define blocks using the tag block. The title block will contain the page title and the content block will have the page main content. In home.html we use extends to inherit from the main\_template.html then we fill the block define above (content and title).

### Comment Tag

The comment tag helps to define comments into templates, not HTML comments, they won’t appear in HTML page. It can be useful for documentation or just commenting a line of code.

</body></html>

# Django - Models

A model is a class that represents table or collection in our DB, and where every attribute of the class is a field of the table or collection. Models are defined in the app/models.py (in our example: myapp/models.py)

## Creating a Model

Following is a Dreamreal model created as an example −

```
from django.db import models

class Dreamreal(models.Model):

   website = models.CharField(max_length = 50)
   mail = models.CharField(max_length = 50)
   name = models.CharField(max_length = 50)
   phonenumber = models.IntegerField()

   class Meta:
      db_table = "dreamreal"
```

<div class="open_grepper_editor" id="bkmrk-" title="Edit & Save To Grepper">  
</div>Every model inherits from django.db.models.Model.

Our class has 4 attributes (3 CharField and 1 Integer), those will be the table fields.

The Meta class with the db\_table attribute lets us define the actual table or collection name. Django names the table or collection automatically: myapp\_modelName. This class will let you force the name of the table to what you like.

There is more field's type in django.db.models, you can learn more about them on [https://docs.djangoproject.com/en/1.5/ref/models/fields/#field-types](https://docs.djangoproject.com/en/1.5/ref/models/fields/#field-types)

After creating your model, you will need Django to generate the actual database −

```
$python manage.py syncdb
```

<div class="open_grepper_editor" id="bkmrk--0" title="Edit & Save To Grepper">  
</div>### Manipulating Data (CRUD)

Let's create a "crudops" view to see how we can do CRUD operations on models. Our myapp/views.py will then look like −

**myapp/views.py**

```
from myapp.models import Dreamreal
from django.http import HttpResponse

def crudops(request):
   #Creating an entry
   
   dreamreal = Dreamreal(
      website = "www.polo.com", mail = "sorex@polo.com", 
      name = "sorex", phonenumber = "002376970"
   )
   
   dreamreal.save()
   
   #Read ALL entries
   objects = Dreamreal.objects.all()
   res ='Printing all Dreamreal entries in the DB : <br>'
   
   for elt in objects:
      res += elt.name+"<br>"
   
   #Read a specific entry:
   sorex = Dreamreal.objects.get(name = "sorex")
   res += 'Printing One entry <br>'
   res += sorex.name
   
   #Delete an entry
   res += '<br> Deleting an entry <br>'
   sorex.delete()
   
   #Update
   dreamreal = Dreamreal(
      website = "www.polo.com", mail = "sorex@polo.com", 
      name = "sorex", phonenumber = "002376970"
   )
   
   dreamreal.save()
   res += 'Updating entry<br>'
   
   dreamreal = Dreamreal.objects.get(name = 'sorex')
   dreamreal.name = 'thierry'
   dreamreal.save()
   
   return HttpResponse(res)
```

<div class="open_grepper_editor" id="bkmrk--1" title="Edit & Save To Grepper">  
</div>### Other Data Manipulation

Let's explore other manipulations we can do on Models. Note that the CRUD operations were done on instances of our model, now we will be working directly with the class representing our model.

Let's create a 'datamanipulation' view in **myapp/views.py**

```
from myapp.models import Dreamreal
from django.http import HttpResponse

def datamanipulation(request):
   res = ''
   
   #Filtering data:
   qs = Dreamreal.objects.filter(name = "paul")
   res += "Found : %s results<br>"%len(qs)
   
   #Ordering results
   qs = Dreamreal.objects.order_by("name")
   
   for elt in qs:
      res += elt.name + '<br>'
   
   return HttpResponse(res)
```

<div class="open_grepper_editor" id="bkmrk--2" title="Edit & Save To Grepper">  
</div>## Linking Models

Django ORM offers 3 ways to link models −

One of the first case we will see here is the one-to-many relationships. As you can see in the above example, Dreamreal company can have multiple online websites. Defining that relation is done by using django.db.models.ForeignKey −

**myapp/models.py**

```
from django.db import models

class Dreamreal(models.Model):
   website = models.CharField(max_length = 50)
   mail = models.CharField(max_length = 50)
   name = models.CharField(max_length = 50)
   phonenumber = models.IntegerField()
   online = models.ForeignKey('Online', default = 1)
   
   class Meta:
      db_table = "dreamreal"

class Online(models.Model):
      domain = models.CharField(max_length = 30)
   
   class Meta:
      db_table = "online"
```

<div class="open_grepper_editor" id="bkmrk--3" title="Edit & Save To Grepper">  
</div>As you can see in our updated myapp/models.py, we added the online model and linked it to our Dreamreal model.

Let's check how all of this is working via manage.py shell −

First let’s create some companies (Dreamreal entries) for testing in our Django shell −

```
$python manage.py shell

>>> from myapp.models import Dreamreal, Online
>>> dr1 = Dreamreal()
>>> dr1.website = 'company1.com'
>>> dr1.name = 'company1'
>>> dr1.mail = 'contact@company1'
>>> dr1.phonenumber = '12345'
>>> dr1.save()
>>> dr2 = Dreamreal()
>>> dr1.website = 'company2.com'
>>> dr2.website = 'company2.com'
>>> dr2.name = 'company2'
>>> dr2.mail = 'contact@company2'
>>> dr2.phonenumber = '56789'
>>> dr2.save()
```

<div class="open_grepper_editor" id="bkmrk--4" title="Edit & Save To Grepper">  
</div>Now some hosted domains −

```
>>> on1 = Online()
>>> on1.company = dr1
>>> on1.domain = "site1.com"
>>> on2 = Online()
>>> on2.company = dr1
>>> on2.domain = "site2.com"
>>> on3 = Online()
>>> on3.domain = "site3.com"
>>> dr2 = Dreamreal.objects.all()[2]
>>> on3.company = dr2
>>> on1.save()
>>> on2.save()
>>> on3.save()
```

<div class="open_grepper_editor" id="bkmrk--5" title="Edit & Save To Grepper">  
</div>Accessing attribute of the hosting company (Dreamreal entry) from an online domain is simple −

```
>>> on1.company.name
```

<div class="open_grepper_editor" id="bkmrk--6" title="Edit & Save To Grepper">  
</div>And if we want to know all the online domain hosted by a Company in Dreamreal we will use the code −

```
>>> dr1.online_set.all()
```

<div class="open_grepper_editor" id="bkmrk--7" title="Edit & Save To Grepper">  
</div>To get a QuerySet, note that all manipulating method we have seen before (filter, all, exclude, order\_by....)

You can also access the linked model attributes for filtering operations, let's say you want to get all online domains where the Dreamreal name contains 'company' −

```
>>> Online.objects.filter(company__name__contains = 'company'
```

<div class="open_grepper_editor" id="bkmrk--8" title="Edit & Save To Grepper">  
</div>**Note** − That kind of query is just supported for SQL DB. It won’t work for non-relational DB where joins doesn’t exist and there are two '\_'.

But that's not the only way to link models, you also have OneToOneField, a link that guarantees that the relation between two objects is unique. If we used the OneToOneField in our example above, that would mean for every Dreamreal entry only one Online entry is possible and in the other way to.

And the last one, the ManyToManyField for (n-n) relation between tables. Note, those are relevant for SQL based DB.

# Django - Page Redirection

Page redirection is needed for many reasons in web application. You might want to redirect a user to another page when a specific action occurs, or basically in case of error. For example, when a user logs in to your website, he is often redirected either to the main home page or to his personal dashboard. In Django, redirection is accomplished using the 'redirect' method.

The 'redirect' method takes as argument: The URL you want to be redirected to as string A view's name.

The myapp/views looks like the following so far −

```
def hello(request):
   today = datetime.datetime.now().date()
   daysOfWeek = ['Mon', 'Tue', 'Wed', 'Thu', 'Fri', 'Sat', 'Sun']
   return render(request, "hello.html", {"today" : today, "days_of_week" : daysOfWeek})
	
def viewArticle(request, articleId):
   """ A view that display an article based on his ID"""
   text = "Displaying article Number : %s" %articleId
   return HttpResponse(text)
	
def viewArticles(request, year, month):
   text = "Displaying articles of : %s/%s"%(year, month)
   return HttpResponse(text)
```

<div class="open_grepper_editor" id="bkmrk-" title="Edit & Save To Grepper">  
</div>Let's change the hello view to redirect to djangoproject.com and our viewArticle to redirect to our internal '/myapp/articles'. To do so the myapp/view.py will change to −

```
from django.shortcuts import render, redirect
from django.http import HttpResponse
import datetime

# Create your views here.
def hello(request):
   today = datetime.datetime.now().date()
   daysOfWeek = ['Mon', 'Tue', 'Wed', 'Thu', 'Fri', 'Sat', 'Sun']
   return redirect("https://www.djangoproject.com")
	
def viewArticle(request, articleId):
   """ A view that display an article based on his ID"""
   text = "Displaying article Number : %s" %articleId
   return redirect(viewArticles, year = "2045", month = "02")
	
def viewArticles(request, year, month):
   text = "Displaying articles of : %s/%s"%(year, month)
   return HttpResponse(text)
```

<div class="open_grepper_editor" id="bkmrk--0" title="Edit & Save To Grepper">  
</div>In the above example, first we imported redirect from django.shortcuts and for redirection to the Django official website we just pass the full URL to the 'redirect' method as string, and for the second example (the viewArticle view) the 'redirect' method takes the view name and his parameters as arguments.

Accessing /myapp/hello, will give you the following screen −

![Django page Redirection Example1](https://www.tutorialspoint.com/django/images/django_page_redirection_example1.jpg)

And accessing /myapp/article/42, will give you the following screen −

![Django page Redirection Example2](https://www.tutorialspoint.com/django/images/django_page_redirection_example2.jpg)

It is also possible to specify whether the 'redirect' is temporary or permanent by adding permanent = True parameter. The user will see no difference, but these are details that search engines take into account when ranking of your website.

Also remember that 'name' parameter we defined in our url.py while mapping the URLs −

```
url(r'^articles/(?P\d{2})/(?P\d{4})/', 'viewArticles', name = 'articles'),
```

<div class="open_grepper_editor" id="bkmrk--3" title="Edit & Save To Grepper">  
</div>That name (here article) can be used as argument for the 'redirect' method, then our viewArticle redirection can be changed from −

```
def viewArticle(request, articleId):
   """ A view that display an article based on his ID"""
   text = "Displaying article Number : %s" %articleId
   return redirect(viewArticles, year = "2045", month = "02")
```

<div class="open_grepper_editor" id="bkmrk--4" title="Edit & Save To Grepper">  
</div>**To** −

```
def viewArticle(request, articleId):
   """ A view that display an article based on his ID"""
   text = "Displaying article Number : %s" %articleId
   return redirect(articles, year = "2045", month = "02")
```

<div class="open_grepper_editor" id="bkmrk--5" title="Edit & Save To Grepper">  
</div>**Note** − There is also a function to generate URLs; it is used in the same way as redirect; the 'reverse' method (django.core.urlresolvers.reverse). This function does not return a HttpResponseRedirect object, but simply a string containing the URL to the view compiled with any passed argument.

# Django - Sending E-mails

Django comes with a ready and easy-to-use light engine to send e-mail. Similar to Python you just need an import of smtplib. In Django you just need to import django.core.mail. To start sending e-mail, edit your project settings.py file and set the following options −

- **EMAIL\_HOST** − smtp server.
- **EMAIL\_HOST\_USER** − Login credential for the smtp server.
- **EMAIL\_HOST\_PASSWORD** − Password credential for the smtp server.
- **EMAIL\_PORT** − smtp server port.
- **EMAIL\_USE\_TLS or \_SSL** − True if secure connection.

## Sending a Simple E-mail

Let's create a "sendSimpleEmail" view to send a simple e-mail.

```
from django.core.mail import send_mail
from django.http import HttpResponse

def sendSimpleEmail(request,emailto):
   res = send_mail("hello paul", "comment tu vas?", "paul@polo.com", [emailto])
   return HttpResponse('%s'%res)
```

<div class="open_grepper_editor" id="bkmrk-" title="Edit & Save To Grepper">  
</div>Here is the details of the parameters of send\_mail −

- **subject** − E-mail subject.
- **message** − E-mail body.
- **from\_email** − E-mail from.
- **recipient\_list** − List of receivers’ e-mail address.
- **fail\_silently** − Bool, if false send\_mail will raise an exception in case of error.
- **auth\_user** − User login if not set in settings.py.
- **auth\_password** − User password if not set in settings.py.
- **connection** − E-mail backend.
- **html\_message** − (new in Django 1.7) if present, the e-mail will be multipart/alternative.

Let's create a URL to access our view −

```
from django.conf.urls import patterns, url

urlpatterns = paterns('myapp.views', url(r'^simpleemail/(?P<emailto>
   [\w.%+-]+@[A-Za-z0-9.-]+\.[A-Za-z]{2,4})/', 
   'sendSimpleEmail' , name = 'sendSimpleEmail'),)
```

<div class="open_grepper_editor" id="bkmrk--0" title="Edit & Save To Grepper">  
</div>So when accessing /myapp/simpleemail/polo@gmail.com, you will get the following page −

![Sending Simple E-mail](https://www.tutorialspoint.com/django/images/sending_simple_email.jpg)

## Sending Multiple Mails with send\_mass\_mail

The method returns the number of messages successfully delivered. This is same as send\_mail but takes an extra parameter; datatuple, our sendMassEmail view will then be −

```
from django.core.mail import send_mass_mail
from django.http import HttpResponse

def sendMassEmail(request,emailto):
   msg1 = ('subject 1', 'message 1', 'polo@polo.com', [emailto1])
   msg2 = ('subject 2', 'message 2', 'polo@polo.com', [emailto2])
   res = send_mass_mail((msg1, msg2), fail_silently = False)
   return HttpResponse('%<strong>s</strong>'%res)
```

<div class="open_grepper_editor" id="bkmrk--2" title="Edit & Save To Grepper">  
</div>Let's create a URL to access our view −

```
from django.conf.urls import patterns, url

urlpatterns = paterns('myapp.views', url(r'^massEmail/(?P<emailto1>
   [\w.%+-]+@[A-Za-z0-9.-]+\.[A-Za-z]{2,4})/(?P<emailto2>
   [\w.%+-]+@[A-Za-z0-9.-]+\.[A-Za-z]{2,4})', 'sendMassEmail' , name = 'sendMassEmail'),)
```

<div class="open_grepper_editor" id="bkmrk--3" title="Edit & Save To Grepper">  
</div>When accessing /myapp/massemail/polo@gmail.com/sorex@gmail.com/, we get −

![Sending Multiple Mails](https://www.tutorialspoint.com/django/images/sending_multiple_mails.jpg)

send\_mass\_mail parameters details are −

- **datatuples** − A tuple where each element is like (subject, message, from\_email, recipient\_list).
- **fail\_silently** − Bool, if false send\_mail will raise an exception in case of error.
- **auth\_user** − User login if not set in settings.py.
- **auth\_password** − User password if not set in settings.py.
- **connection** − E-mail backend.

As you can see in the above image, two messages were sent successfully.

**Note** − In this example we are using Python smtp debuggingserver, that you can launch using −

```
$python -m smtpd -n -c DebuggingServer localhost:1025
```

<div class="open_grepper_editor" id="bkmrk--5" title="Edit & Save To Grepper">  
</div>This means all your sent e-mails will be printed on stdout, and the dummy server is running on localhost:1025.

**Sending e-mails to admins and managers using mail\_admins and mail\_managers methods**

These methods send e-mails to site administrators as defined in the ADMINS option of the settings.py file, and to site managers as defined in MANAGERS option of the settings.py file. Let's assume our ADMINS and MANAGERS options look like −

**ADMINS** = (('polo', 'polo@polo.com'),)

**MANAGERS** = (('popoli', 'popoli@polo.com'),)

```
from django.core.mail import mail_admins
from django.http import HttpResponse

def sendAdminsEmail(request):
   res = mail_admins('my subject', 'site is going down.')
   return HttpResponse('<strong>%s</strong>'%res)
```

<div class="open_grepper_editor" id="bkmrk--6" title="Edit & Save To Grepper">  
</div>The above code will send an e-mail to every admin defined in the ADMINS section.

```
from django.core.mail import mail_managers
from django.http import HttpResponse

def sendManagersEmail(request):
   res = mail_managers('my subject 2', 'Change date on the site.')
   return HttpResponse('<strong>%s</strong>'%res)
```

<div class="open_grepper_editor" id="bkmrk--7" title="Edit & Save To Grepper">  
</div>The above code will send an e-mail to every manager defined in the MANAGERS section.

Parameters details −

- **Subject** − E-mail subject.
- **message** − E-mail body.
- **fail\_silently** − Bool, if false send\_mail will raise an exception in case of error.
- **connection** − E-mail backend.
- **html\_message** − (new in Django 1.7) if present, the e-mail will be multipart/alternative.

## Sending HTML E-mail

Sending HTML message in Django &gt;= 1.7 is as easy as −

```
from django.core.mail import send_mail

from django.http import HttpResponse
   res = send_mail("hello paul", "comment tu vas?", "paul@polo.com", 
         ["polo@gmail.com"], html_message=")
```

<div class="open_grepper_editor" id="bkmrk--8" title="Edit & Save To Grepper">  
</div>This will produce a multipart/alternative e-mail.

But for Django &lt; 1.7 sending HTML messages is done via the django.core.mail.EmailMessage class then calling 'send' on the object −

Let's create a "sendHTMLEmail" view to send an HTML e-mail.

```
from django.core.mail import EmailMessage
from django.http import HttpResponse

def sendHTMLEmail(request , emailto):
   html_content = "<strong>Comment tu vas?</strong>"
   email = EmailMessage("my subject", html_content, "paul@polo.com", [emailto])
   email.content_subtype = "html"
   res = email.send()
   return HttpResponse('<strong>%s</strong>'%res)
```

<div class="open_grepper_editor" id="bkmrk--9" title="Edit & Save To Grepper">  
</div>Parameters details for the EmailMessage class creation −

- **Subject** − E-mail subject.
- **message** − E-mail body in HTML.
- **from\_email** − E-mail from.
- **to** − List of receivers’ e-mail address.
- **bcc** − List of “Bcc” receivers’ e-mail address.
- **connection** − E-mail backend.

Let's create a URL to access our view −

```
from django.conf.urls import patterns, url

urlpatterns = paterns('myapp.views', url(r'^htmlemail/(?P<emailto>
   [\w.%+-]+@[A-Za-z0-9.-]+\.[A-Za-z]{2,4})/', 
   'sendHTMLEmail' , name = 'sendHTMLEmail'),)
```

<div class="open_grepper_editor" id="bkmrk--10" title="Edit & Save To Grepper">  
</div>When accessing /myapp/htmlemail/polo@gmail.com, we get −

![Sending HTML E-mail](https://www.tutorialspoint.com/django/images/sending_html_email.jpg)

## Sending E-mail with Attachment

This is done by using the 'attach' method on the EmailMessage object.

A view to send an e-mail with attachment will be −

```
from django.core.mail import EmailMessage
from django.http import HttpResponse

def sendEmailWithAttach(request, emailto):
   html_content = "<strong>Comment tu vas?</strong>"
   email = EmailMessage("my subject", html_content, "paul@polo.com", emailto])
   email.content_subtype = "html"
   
   fd = open('manage.py', 'r')
   email.attach('manage.py', fd.read(), 'text/plain')
   
   res = email.send()
   return HttpResponse('<strong>%s</strong>'%res)
```

<div class="open_grepper_editor" id="bkmrk--12" title="Edit & Save To Grepper">  
</div>Details on attach arguments −

- **filename** − The name of the file to attach.
- **content** − The content of the file to attach.
- **mimetype** − The attachment's content mime type.

# Django - Generic Views

In some cases, writing views, as we have seen earlier is really heavy. Imagine you need a static page or a listing page. Django offers an easy way to set those simple views that is called generic views.

Unlike classic views, generic views are classes not functions. Django offers a set of classes for generic views in django.views.generic, and every generic view is one of those classes or a class that inherits from one of them.

There are 10+ generic classes −

```
>>> import django.views.generic
>>> dir(django.views.generic)

['ArchiveIndexView', 'CreateView', 'DateDetailView', 'DayArchiveView', 
   'DeleteView', 'DetailView', 'FormView', 'GenericViewError', 'ListView', 
   'MonthArchiveView', 'RedirectView', 'TemplateView', 'TodayArchiveView', 
   'UpdateView', 'View', 'WeekArchiveView', 'YearArchiveView', '__builtins__', 
   '__doc__', '__file__', '__name__', '__package__', '__path__', 'base', 'dates', 
   'detail', 'edit', 'list']
```

<div class="open_grepper_editor" id="bkmrk-" title="Edit & Save To Grepper">  
</div>This you can use for your generic view. Let's look at some example to see how it works.

## Static Pages

Let's publish a static page from the “static.html” template.

Our static.html −

```
<html>
   <body> 
      This is a static page!!! 
   </body>
</html>
```

<div class="open_grepper_editor" id="bkmrk--0" title="Edit & Save To Grepper">  
</div>If we did that the way we learned before, we would have to change the **myapp/views.py** to be −

```
from django.shortcuts import render

def static(request):
   return render(request, 'static.html', {})
```

<div class="open_grepper_editor" id="bkmrk--1" title="Edit & Save To Grepper">  
</div>and **myapp/urls.py** to be −

```
from django.conf.urls import patterns, url

urlpatterns = patterns("myapp.views", url(r'^static/', 'static', name = 'static'),)
```

<div class="open_grepper_editor" id="bkmrk--2" title="Edit & Save To Grepper">  
</div>The best way is to use generic views. For that, our myapp/views.py will become −

```
from django.views.generic import TemplateView

class StaticView(TemplateView):
   template_name = "static.html"
```

<div class="open_grepper_editor" id="bkmrk--3" title="Edit & Save To Grepper">  
</div>And our myapp/urls.py we will be −

```
from myapp.views import StaticView
from django.conf.urls import patterns

urlpatterns = patterns("myapp.views", (r'^static/$', StaticView.as_view()),)
```

<div class="open_grepper_editor" id="bkmrk--4" title="Edit & Save To Grepper">  
</div>When accessing /myapp/static you get −

![Static Page](https://www.tutorialspoint.com/django/images/static_page.jpg)

For the same result we can also, do the following −

- No change in the views.py
- Change the url.py file to be −

```
from django.views.generic import TemplateView
from django.conf.urls import patterns, url

urlpatterns = patterns("myapp.views",
   url(r'^static/',TemplateView.as_view(template_name = 'static.html')),)
```

<div class="open_grepper_editor" id="bkmrk--6" title="Edit & Save To Grepper">  
</div>As you can see, you just need to change the url.py file in the second method.

### List and Display Data from DB

We are going to list all entries in our Dreamreal model. Doing so is made easy by using the ListView generic view class. Edit the url.py file and update it as −

```
from django.views.generic import ListView
from django.conf.urls import patterns, url

urlpatterns = patterns(
   "myapp.views", url(r'^dreamreals/', ListView.as_view(model = Dreamreal, 
      template_name = "dreamreal_list.html")),
)
```

<div class="open_grepper_editor" id="bkmrk--7" title="Edit & Save To Grepper">  
</div>Important to note at this point is that the variable pass by the generic view to the template is object\_list. If you want to name it yourself, you will need to add a context\_object\_name argument to the as\_view method. Then the url.py will become −

```
from django.views.generic import ListView
from django.conf.urls import patterns, url

urlpatterns = patterns("myapp.views",
   url(r'^dreamreals/', ListView.as_view(
      template_name = "dreamreal_list.html")),
      model = Dreamreal, context_object_name = ”dreamreals_objects” ,)
```

<div class="open_grepper_editor" id="bkmrk--8" title="Edit & Save To Grepper">  
</div>The associated template will then be −

```
{% extends "main_template.html" %}
{% block content %}
Dreamreals:<p>
{% for dr in object_list %}
{{dr.name}}</p>
{% endfor %}
{% endblock %}
```

<div class="open_grepper_editor" id="bkmrk--9" title="Edit & Save To Grepper">  
</div>Accessing /myapp/dreamreals/ will produce the following page −

![List and Display Data from DB](https://www.tutorialspoint.com/django/images/list_display_data_from_db.jpg)

</body></html>

# Django - Form Processing

Creating forms in Django, is really similar to creating a model. Here again, we just need to inherit from Django class and the class attributes will be the form fields. Let's add a **forms.py** file in myapp folder to contain our app forms. We will create a login form.

**myapp/forms.py**

```
#-*- coding: utf-8 -*-
from django import forms

class LoginForm(forms.Form):
   user = forms.CharField(max_length = 100)
   password = forms.CharField(widget = forms.PasswordInput())
```

<div class="open_grepper_editor" id="bkmrk-" title="Edit & Save To Grepper">  
</div>As seen above, the field type can take "widget" argument for html rendering; in our case, we want the password to be hidden, not displayed. Many others widget are present in Django: **DateInput** for dates, **CheckboxInput** for checkboxes, etc.

## Using Form in a View

There are two kinds of HTTP requests, GET and POST. In Django, the request object passed as parameter to your view has an attribute called "method" where the type of the request is set, and all data passed via POST can be accessed via the request.POST dictionary.

Let's create a login view in our myapp/views.py −

```
#-*- coding: utf-8 -*-
from myapp.forms import LoginForm

def login(request):
   username = "not logged in"
   
   if request.method == "POST":
      #Get the posted form
      MyLoginForm = LoginForm(request.POST)
      
      if MyLoginForm.is_valid():
         username = MyLoginForm.cleaned_data['username']
   else:
      MyLoginForm = Loginform()
		
   return render(request, 'loggedin.html', {"username" : username})
```

<div class="open_grepper_editor" id="bkmrk--0" title="Edit & Save To Grepper">  
</div>The view will display the result of the login form posted through the **loggedin.html**. To test it, we will first need the login form template. Let's call it login.html.

```
<html>
   <body>
      
      <form name = "form" action = "{% url "myapp.views.login" %}" 
         method = "POST" >{% csrf_token %}
         
         <div style = "max-width:470px;">
            <center> 
               <input type = "text" style = "margin-left:20%;" 
                  placeholder = "Identifiant" name = "username" />
            </center>
         </div>
			
         <br>
         
         <div style = "max-width:470px;">
            <center>
               <input type = "password" style = "margin-left:20%;" 
                  placeholder = "password" name = "password" />
            </center>
         </div>
			
         <br>
         
         <div style = "max-width:470px;">
            <center> 
            
               <button style = "border:0px; background-color:#4285F4; margin-top:8%;
                  height:35px; width:80%;margin-left:19%;" type = "submit" 
                  value = "Login" >
                  <strong>Login</strong>
               </button>
               
            </center>
         </div>
         
      </form>
      
   </body>
</html>
```

<div class="open_grepper_editor" id="bkmrk--1" title="Edit & Save To Grepper">  
</div>The template will display a login form and post the result to our login view above. You have probably noticed the tag in the template, which is just to prevent Cross-site Request Forgery (CSRF) attack on your site.

```
{% csrf_token %}
```

<div class="open_grepper_editor" id="bkmrk--2" title="Edit & Save To Grepper">  
</div>Once we have the login template, we need the loggedin.html template that will be rendered after form treatment.

```
<html>
   
   <body>
      You are : <strong>{{username}}</strong>
   </body>
   
</html>
```

<div class="open_grepper_editor" id="bkmrk--3" title="Edit & Save To Grepper">  
</div>Now, we just need our pair of URLs to get started: myapp/urls.py

```
from django.conf.urls import patterns, url
from django.views.generic import TemplateView

urlpatterns = patterns('myapp.views',
   url(r'^connection/',TemplateView.as_view(template_name = 'login.html')),
   url(r'^login/', 'login', name = 'login'))
```

<div class="open_grepper_editor" id="bkmrk--4" title="Edit & Save To Grepper">  
</div>When accessing "/myapp/connection", we will get the following login.html template rendered −

![Login HTML Template](https://www.tutorialspoint.com/django/images/login_html_template.jpg)

On the form post, the form is valid. In our case make sure to fill the two fields and you will get −

![Form Validation](https://www.tutorialspoint.com/django/images/form_validation.jpg)

In case your username is polo, and you forgot the password. You will get the following message −

![Form Invalid Message](https://www.tutorialspoint.com/django/images/form_invalid_message.jpg)

### Using Our Own Form Validation

In the above example, when validating the form −

```
MyLoginForm.is_valid()
```

<div class="open_grepper_editor" id="bkmrk--8" title="Edit & Save To Grepper">  
</div>We only used Django self-form validation engine, in our case just making sure the fields are required. Now let’s try to make sure the user trying to login is present in our DB as Dreamreal entry. For this, change the myapp/forms.py to −

```
#-*- coding: utf-8 -*-
from django import forms
from myapp.models import Dreamreal

class LoginForm(forms.Form):
   user = forms.CharField(max_length = 100)
   password = forms.CharField(widget = forms.PasswordInput())

   def clean_message(self):
      username = self.cleaned_data.get("username")
      dbuser = Dreamreal.objects.filter(name = username)
      
      if not dbuser:
         raise forms.ValidationError("User does not exist in our db!")
      return username
```

<div class="open_grepper_editor" id="bkmrk--9" title="Edit & Save To Grepper">  
</div>Now, after calling the "is\_valid" method, we will get the correct output, only if the user is in our database. If you want to check a field of your form, just add a method starting by "clean\_" then your field name to your form class. Raising a forms.ValidationError is important.

</body></html>

# Django - File Uploading

It is generally useful for a web app to be able to upload files (profile picture, songs, pdf, words.....). Let's discuss how to upload files in this chapter.

## Uploading an Image

Before starting to play with an image, make sure you have the Python Image Library (PIL) installed. Now to illustrate uploading an image, let's create a profile form, in our myapp/forms.py −

```
#-*- coding: utf-8 -*-
from django import forms

class ProfileForm(forms.Form):
   name = forms.CharField(max_length = 100)
   picture = forms.ImageFields()
```

<div class="open_grepper_editor" id="bkmrk-" title="Edit & Save To Grepper">  
</div>As you can see, the main difference here is just the **forms.ImageField**. ImageField will make sure the uploaded file is an image. If not, the form validation will fail.

Now let's create a "Profile" model to save our uploaded profile. This is done in myapp/models.py −

```
from django.db import models

class Profile(models.Model):
   name = models.CharField(max_length = 50)
   picture = models.ImageField(upload_to = 'pictures')

   class Meta:
      db_table = "profile"
```

<div class="open_grepper_editor" id="bkmrk--0" title="Edit & Save To Grepper">  
</div>As you can see for the model, the ImageField takes a compulsory argument: **upload\_to**. This represents the place on the hard drive where your images will be saved. Note that the parameter will be added to the MEDIA\_ROOT option defined in your settings.py file.

Now that we have the Form and the Model, let's create the view, in myapp/views.py −

```
#-*- coding: utf-8 -*-
from myapp.forms import ProfileForm
from myapp.models import Profile

def SaveProfile(request):
   saved = False
   
   if request.method == "POST":
      #Get the posted form
      MyProfileForm = ProfileForm(request.POST, request.FILES)
      
      if MyProfileForm.is_valid():
         profile = Profile()
         profile.name = MyProfileForm.cleaned_data["name"]
         profile.picture = MyProfileForm.cleaned_data["picture"]
         profile.save()
         saved = True
   else:
      MyProfileForm = Profileform()
		
   return render(request, 'saved.html', locals())
```

<div class="open_grepper_editor" id="bkmrk--1" title="Edit & Save To Grepper">  
</div>The part not to miss is, there is a change when creating a ProfileForm, we added a second parameters: **request.FILES**. If not passed the form validation will fail, giving a message that says the picture is empty.

Now, we just need the **saved.html** template and the **profile.html** template, for the form and the redirection page −

**myapp/templates/saved.html** −

```
<html>
   <body>
   
      {% if saved %}
         <strong>Your profile was saved.</strong>
      {% endif %}
      
      {% if not saved %}
         <strong>Your profile was not saved.</strong>
      {% endif %}
      
   </body>
</html>
```

<div class="open_grepper_editor" id="bkmrk--2" title="Edit & Save To Grepper">  
</div>**myapp/templates/profile.html** −

```
<html>
   <body>
   
      <form name = "form" enctype = "multipart/form-data" 
         action = "{% url "myapp.views.SaveProfile" %}" method = "POST" >{% csrf_token %}
         
         <div style = "max-width:470px;">
            <center>  
               <input type = "text" style = "margin-left:20%;" 
               placeholder = "Name" name = "name" />
            </center>
         </div>
			
         <br>
         
         <div style = "max-width:470px;">
            <center> 
               <input type = "file" style = "margin-left:20%;" 
                  placeholder = "Picture" name = "picture" />
            </center>
         </div>
			
         <br>
         
         <div style = "max-width:470px;">
            <center> 
            
               <button style = "border:0px;background-color:#4285F4; margin-top:8%; 
                  height:35px; width:80%; margin-left:19%;" type = "submit" value = "Login" >
                  <strong>Login</strong>
               </button>
               
            </center>
         </div>
         
      </form>
      
   </body>
</html>
```

<div class="open_grepper_editor" id="bkmrk--3" title="Edit & Save To Grepper">  
</div>Next, we need our pair of URLs to get started: myapp/urls.py

```
from django.conf.urls import patterns, url
from django.views.generic import TemplateView

urlpatterns = patterns(
   'myapp.views', url(r'^profile/',TemplateView.as_view(
      template_name = 'profile.html')), url(r'^saved/', 'SaveProfile', name = 'saved')
)
```

<div class="open_grepper_editor" id="bkmrk--4" title="Edit & Save To Grepper">  
</div>When accessing "/myapp/profile", we will get the following profile.html template rendered −

![Uploading Image](https://www.tutorialspoint.com/django/images/uploading_image.jpg)

And on form post, the saved template will be rendered −

![Form Post Template](https://www.tutorialspoint.com/django/images/form_post_template.jpg)

We have a sample for image, but if you want to upload another type of file, not just image, just replace the **ImageField** in both Model and Form with **FileField**.

</body></html>

# Django - Apache Setup

So far, in our examples, we have used the Django dev web server. But this server is just for testing and is not fit for production environment. Once in production, you need a real server like Apache, Nginx, etc. Let's discuss Apache in this chapter.

Serving Django applications via Apache is done by using mod\_wsgi. So the first thing is to make sure you have Apache and mod\_wsgi installed. Remember, when we created our project and we looked at the project structure, it looked like −

```
myproject/
   manage.py
   myproject/
      __init__.py
      settings.py
      urls.py
      wsgi.py
```

<div class="open_grepper_editor" id="bkmrk-" title="Edit & Save To Grepper">  
</div>The wsgi.py file is the one taking care of the link between Django and Apache.

Let's say we want to share our project (myproject) with Apache. We just need to set Apache to access our folder. Assume we put our myproject folder in the default "/var/www/html". At this stage, accessing the project will be done via 127.0.0.1/myproject. This will result in Apache just listing the folder as shown in the following snapshot.

![Django Apache Setup](https://www.tutorialspoint.com/django/images/django_apache_setup.jpg)

As seen, Apache is not handling Django stuff. For this to be taken care of, we need to configure Apache in httpd.conf. So open the httpd.conf and add the following line −

```
WSGIScriptAlias / /var/www/html/myproject/myproject/wsgi.py
WSGIPythonPath /var/www/html/myproject/

<Directory /var/www/html/myproject/>
   <Files wsgi.py>
      Order deny,allow
      Allow from all
   </Files>
</Directory>
```

<div class="open_grepper_editor" id="bkmrk--1" title="Edit & Save To Grepper">  
</div>If you can access the login page as 127.0.0.1/myapp/connection, you will get to see the following page −

![Login Page](https://www.tutorialspoint.com/django/images/login_page.jpg)

# Django - Cookies Handling

Sometimes you might want to store some data on a per-site-visitor basis as per the requirements of your web application. Always keep in mind, that cookies are saved on the client side and depending on your client browser security level, setting cookies can at times work and at times might not.

To illustrate cookies handling in Django, let's create a system using the login system we created before. The system will keep you logged in for X minute of time, and beyond that time, you will be out of the app.

For this, you will need to set up two cookies, last\_connection and username.

At first, let's change our login view to store our username and last\_connection cookies −

```
from django.template import RequestContext

def login(request):
   username = "not logged in"
   
   if request.method == "POST":
      #Get the posted form
      MyLoginForm = LoginForm(request.POST)
   
   if MyLoginForm.is_valid():
      username = MyLoginForm.cleaned_data['username']
   else:
      MyLoginForm = LoginForm()
   
   response = render_to_response(request, 'loggedin.html', {"username" : username}, 
      context_instance = RequestContext(request))
   
   response.set_cookie('last_connection', datetime.datetime.now())
   response.set_cookie('username', datetime.datetime.now())
	
   return response
```

<div class="open_grepper_editor" id="bkmrk-" title="Edit & Save To Grepper">  
</div>As seen in the view above, setting cookie is done by the **set\_cookie** method called on the response not the request, and also note that all cookies values are returned as string.

Let’s now create a formView for the login form, where we won’t display the form if cookie is set and is not older than 10 second −

```
def formView(request):
   if 'username' in request.COOKIES and 'last_connection' in request.COOKIES:
      username = request.COOKIES['username']
      
      last_connection = request.COOKIES['last_connection']
      last_connection_time = datetime.datetime.strptime(last_connection[:-7], 
         "%Y-%m-%d %H:%M:%S")
      
      if (datetime.datetime.now() - last_connection_time).seconds < 10:
         return render(request, 'loggedin.html', {"username" : username})
      else:
         return render(request, 'login.html', {})
			
   else:
      return render(request, 'login.html', {})
```

<div class="open_grepper_editor" id="bkmrk--0" title="Edit & Save To Grepper">  
</div>As you can see in the formView above accessing the cookie you set, is done via the COOKIES attribute (dict) of the request.

Now let’s change the url.py file to change the URL so it pairs with our new view −

```
from django.conf.urls import patterns, url
from django.views.generic import TemplateView

urlpatterns = patterns('myapp.views',
   url(r'^connection/','formView', name = 'loginform'),
   url(r'^login/', 'login', name = 'login'))
```

<div class="open_grepper_editor" id="bkmrk--1" title="Edit & Save To Grepper">  
</div>When accessing /myapp/connection, you will get the following page −

![Django Cookies Handling](https://www.tutorialspoint.com/django/images/django_cookies_handling.jpg)

And you will get redirected to the following screen on submit −

![Cookies Handling Redirected Page](https://www.tutorialspoint.com/django/images/cookies_handling_redirected_page.jpg)

Now, if you try to access /myapp/connection again in the 10 seconds range, you will get redirected to the second screen directly. And if you access /myapp/connection again out of this range you will get the login form (screen 1).

# Django - Sessions

As discussed earlier, we can use client side cookies to store a lot of useful data for the web app. We have seen before that we can use client side cookies to store various data useful for our web app. This leads to lot of security holes depending on the importance of the data you want to save.

For security reasons, Django has a session framework for cookies handling. Sessions are used to abstract the receiving and sending of cookies, data is saved on server side (like in database), and the client side cookie just has a session ID for identification. Sessions are also useful to avoid cases where the user browser is set to ‘not accept’ cookies.

## Setting Up Sessions

In Django, enabling session is done in your project **settings.py**, by adding some lines to the **MIDDLEWARE\_CLASSES** and the **INSTALLED\_APPS** options. This should be done while creating the project, but it's always good to know, so **MIDDLEWARE\_CLASSES** should have −

```
'django.contrib.sessions.middleware.SessionMiddleware'
```

<div class="open_grepper_editor" id="bkmrk-" title="Edit & Save To Grepper">  
</div>And **INSTALLED\_APPS** should have −

```
'django.contrib.sessions'
```

<div class="open_grepper_editor" id="bkmrk--0" title="Edit & Save To Grepper">  
</div>By default, Django saves session information in database (django\_session table or collection), but you can configure the engine to store information using other ways like: in **file** or in **cache**.

When session is enabled, every request (first argument of any view in Django) has a session (dict) attribute.

Let's create a simple sample to see how to create and save sessions. We have built a simple login system before (see Django form processing chapter and Django Cookies Handling chapter). Let us save the username in a cookie so, if not signed out, when accessing our login page you won’t see the login form. Basically, let's make our login system we used in Django Cookies handling more secure, by saving cookies server side.

For this, first lets change our login view to save our username cookie server side −

```
def login(request):
   username = 'not logged in'
   
   if request.method == 'POST':
      MyLoginForm = LoginForm(request.POST)
      
      if MyLoginForm.is_valid():
         username = MyLoginForm.cleaned_data['username']
         request.session['username'] = username
      else:
         MyLoginForm = LoginForm()
			
   return render(request, 'loggedin.html', {"username" : username}
```

<div class="open_grepper_editor" id="bkmrk--1" title="Edit & Save To Grepper">  
</div>Then let us create formView view for the login form, where we won’t display the form if cookie is set −

```
def formView(request):
   if request.session.has_key('username'):
      username = request.session['username']
      return render(request, 'loggedin.html', {"username" : username})
   else:
      return render(request, 'login.html', {})
```

<div class="open_grepper_editor" id="bkmrk--2" title="Edit & Save To Grepper">  
</div>Now let us change the url.py file to change the url so it pairs with our new view −

```
from django.conf.urls import patterns, url
from django.views.generic import TemplateView

urlpatterns = patterns('myapp.views',
   url(r'^connection/','formView', name = 'loginform'),
   url(r'^login/', 'login', name = 'login'))
```

<div class="open_grepper_editor" id="bkmrk--3" title="Edit & Save To Grepper">  
</div>When accessing /myapp/connection, you will get to see the following page −

![Setting Up Sessions](https://www.tutorialspoint.com/django/images/setting_up_sessions.jpg)

And you will get redirected to the following page −

![Sessions Redirected Page](https://www.tutorialspoint.com/django/images/sessions_redirected_page.jpg)

Now if you try to access /myapp/connection again, you will get redirected to the second screen directly.

Let's create a simple logout view that erases our cookie.

```
def logout(request):
   try:
      del request.session['username']
   except:
      pass
   return HttpResponse("<strong>You are logged out.</strong>")
```

<div class="open_grepper_editor" id="bkmrk--6" title="Edit & Save To Grepper">  
</div>And pair it with a logout URL in myapp/url.py

```
url(r'^logout/', 'logout', name = 'logout'),
```

<div class="open_grepper_editor" id="bkmrk--7" title="Edit & Save To Grepper">  
</div>Now, if you access /myapp/logout, you will get the following page −

![Logged Out Page](https://www.tutorialspoint.com/django/images/logged_out_page.jpg)

If you access /myapp/connection again, you will get the login form (screen 1).

### Some More Possible Actions Using Sessions

We have seen how to store and access a session, but it's good to know that the session attribute of the request have some other useful actions like −

- **set\_expiry (*value*)** − Sets the expiration time for the session.
- **get\_expiry\_age()** − Returns the number of seconds until this session expires.
- **get\_expiry\_date()** − Returns the date this session will expire.
- **clear\_expired()** − Removes expired sessions from the session store.
- **get\_expire\_at\_browser\_close()** − Returns either True or False, depending on whether the user’s session cookies have expired when the user’s web browser is closed.

# Django - Caching

To cache something is to save the result of an expensive calculation, so that you don’t perform it the next time you need it. Following is a pseudo code that explains how caching works −

```
given a URL, try finding that page in the cache

if the page is in the cache:
   return the cached page
else:
   generate the page
   save the generated page in the cache (for next time)
   return the generated page
```

<div class="open_grepper_editor" id="bkmrk-" title="Edit & Save To Grepper">  
</div>Django comes with its own caching system that lets you save your dynamic pages, to avoid calculating them again when needed. The good point in Django Cache framework is that you can cache −

- The output of a specific view.
- A part of a template.
- Your entire site.

To use cache in Django, first thing to do is to set up where the cache will stay. The cache framework offers different possibilities - cache can be saved in database, on file system or directly in memory. Setting is done in the **settings.py** file of your project.

## Setting Up Cache in Database

Just add the following in the project settings.py file −

```
CACHES = {
   'default': {
      'BACKEND': 'django.core.cache.backends.db.DatabaseCache',
      'LOCATION': 'my_table_name',
   }
}
```

<div class="open_grepper_editor" id="bkmrk--0" title="Edit & Save To Grepper">  
</div>For this to work and to complete the setting, we need to create the cache table 'my\_table\_name'. For this, you need to do the following −

```
python manage.py createcachetable
```

<div class="open_grepper_editor" id="bkmrk--1" title="Edit & Save To Grepper">  
</div>## Setting Up Cache in File System

Just add the following in the project settings.py file −

```
CACHES = {
   'default': {
      'BACKEND': 'django.core.cache.backends.filebased.FileBasedCache',
      'LOCATION': '/var/tmp/django_cache',
   }
}
```

<div class="open_grepper_editor" id="bkmrk--2" title="Edit & Save To Grepper">  
</div>## Setting Up Cache in Memory

This is the most efficient way of caching, to use it you can use one of the following options depending on the Python binding library you choose for the memory cache −

```
CACHES = {
   'default': {
      'BACKEND': 'django.core.cache.backends.memcached.MemcachedCache',
      'LOCATION': '127.0.0.1:11211',
   }
}
```

<div class="open_grepper_editor" id="bkmrk--3" title="Edit & Save To Grepper">  
</div>**Or**

```
CACHES = {
   'default': {
      'BACKEND': 'django.core.cache.backends.memcached.MemcachedCache',
      'LOCATION': 'unix:/tmp/memcached.sock',
   }
}
```

<div class="open_grepper_editor" id="bkmrk--4" title="Edit & Save To Grepper">  
</div>## Caching the Entire Site

The simplest way of using cache in Django is to cache the entire site. This is done by editing the MIDDLEWARE\_CLASSES option in the project settings.py. The following need to be added to the option −

```
MIDDLEWARE_CLASSES += (
   'django.middleware.cache.UpdateCacheMiddleware',
   'django.middleware.common.CommonMiddleware',
   'django.middleware.cache.FetchFromCacheMiddleware',
)
```

<div class="open_grepper_editor" id="bkmrk--5" title="Edit & Save To Grepper">  
</div>Note that the order is important here, Update should come before Fetch middleware.

Then in the same file, you need to set −

```
CACHE_MIDDLEWARE_ALIAS – The cache alias to use for storage.
CACHE_MIDDLEWARE_SECONDS – The number of seconds each page should be cached.
```

<div class="open_grepper_editor" id="bkmrk--6" title="Edit & Save To Grepper">  
</div>## Caching a View

If you don’t want to cache the entire site you can cache a specific view. This is done by using the **cache\_page** decorator that comes with Django. Let us say we want to cache the result of the **viewArticles** view −

```
from django.views.decorators.cache import cache_page

@cache_page(60 * 15)

def viewArticles(request, year, month):
   text = "Displaying articles of : %s/%s"%(year, month)
   return HttpResponse(text)
```

<div class="open_grepper_editor" id="bkmrk--7" title="Edit & Save To Grepper">  
</div>As you can see **cache\_page** takes the number of seconds you want the view result to be cached as parameter. In our example above, the result will be cached for 15 minutes.

**Note** − As we have seen before the above view was map to −

```
urlpatterns = patterns('myapp.views',
   url(r'^articles/(?P<month>\d{2})/(?P<year>\d{4})/', 'viewArticles', name = 'articles'),)
```

<div class="open_grepper_editor" id="bkmrk--8" title="Edit & Save To Grepper">  
</div>Since the URL is taking parameters, each different call will be cached separately. For example, request to /myapp/articles/02/2007 will be cached separately to /myapp/articles/03/2008.

Caching a view can also directly be done in the url.py file. Then the following has the same result as the above. Just edit your myapp/url.py file and change the related mapped URL (above) to be −

```
urlpatterns = patterns('myapp.views',
   url(r'^articles/(?P<month>\d{2})/(?P<year>\d{4})/', 
   cache_page(60 * 15)('viewArticles'), name = 'articles'),)
```

<div class="open_grepper_editor" id="bkmrk--9" title="Edit & Save To Grepper">  
</div>And, of course, it's no longer needed in myapp/views.py.

## Caching a Template Fragment

You can also cache parts of a template, this is done by using the **cache** tag. Let's take our **hello.html** template −

```
{% extends "main_template.html" %}
{% block title %}My Hello Page{% endblock %}
{% block content %}

Hello World!!!<p>Today is {{today}}</p>
We are
{% if today.day == 1 %}

the first day of month.
{% elif today == 30 %}

the last day of month.
{% else %}

I don't know.
{%endif%}

<p>
   {% for day in days_of_week %}
   {{day}}
</p>

{% endfor %}
{% endblock %}
```

<div class="open_grepper_editor" id="bkmrk--10" title="Edit & Save To Grepper">  
</div>And to cache the content block, our template will become −

```
{% load cache %}
{% extends "main_template.html" %}
{% block title %}My Hello Page{% endblock %}
{% cache 500 content %}
{% block content %}

Hello World!!!<p>Today is {{today}}</p>
We are
{% if today.day == 1 %}

the first day of month.
{% elif today == 30 %}

the last day of month.
{% else %}

I don't know.
{%endif%}

<p>
   {% for day in days_of_week %}
   {{day}}
</p>

{% endfor %}
{% endblock %}
{% endcache %}
```

<div class="open_grepper_editor" id="bkmrk--11" title="Edit & Save To Grepper">  
</div>As you can see above, the cache tag will take 2 parameters − the time you want the block to be cached (in seconds) and the name to be given to the cache fragment.

# Django - Comments

Before starting, note that the Django Comments framework is deprecated, since the 1.5 version. Now you can use external feature for doing so, but if you still want to use it, it's still included in version 1.6 and 1.7. Starting version 1.8 it's absent but you can still get the code on a different GitHub account.

The comments framework makes it easy to attach comments to any model in your app.

To start using the Django comments framework −

Edit the project settings.py file and add **'django.contrib.sites'**, and **'django.contrib.comments'**, to INSTALLED\_APPS option −

```
INSTALLED_APPS += ('django.contrib.sites', 'django.contrib.comments',)
```

<div class="open_grepper_editor" id="bkmrk-" title="Edit & Save To Grepper">  
</div>Get the site id −

```
>>> from django.contrib.sites.models import Site
>>> Site().save()
>>> Site.objects.all()[0].id
u'56194498e13823167dd43c64'
```

<div class="open_grepper_editor" id="bkmrk--0" title="Edit & Save To Grepper">  
</div>Set the id you get in the settings.py file −

```
SITE_ID = u'56194498e13823167dd43c64'
```

<div class="open_grepper_editor" id="bkmrk--1" title="Edit & Save To Grepper">  
</div>Sync db, to create all the comments table or collection −

```
python manage.py syncdb
```

<div class="open_grepper_editor" id="bkmrk--2" title="Edit & Save To Grepper">  
</div>Add the comment app’s URLs to your project’s urls.py −

```
from django.conf.urls import include
url(r'^comments/', include('django.contrib.comments.urls')),
```

<div class="open_grepper_editor" id="bkmrk--3" title="Edit & Save To Grepper">  
</div>Now that we have the framework installed, let's change our hello templates to tracks comments on our Dreamreal model. We will list, save comments for a specific Dreamreal entry whose name will be passed as parameter to the /myapp/hello URL.

## Dreamreal Model

```
class Dreamreal(models.Model):

   website = models.CharField(max_length = 50)
   mail = models.CharField(max_length = 50)
   name = models.CharField(max_length = 50)
   phonenumber = models.IntegerField()

   class Meta:
      db_table = "dreamreal"
```

<div class="open_grepper_editor" id="bkmrk--4" title="Edit & Save To Grepper">  
</div>## hello view

```
def hello(request, Name):
   today = datetime.datetime.now().date()
   daysOfWeek = ['Mon', 'Tue', 'Wed', 'Thu', 'Fri', 'Sat', 'Sun']
   dreamreal = Dreamreal.objects.get(name = Name)
   return render(request, 'hello.html', locals())
```

<div class="open_grepper_editor" id="bkmrk--5" title="Edit & Save To Grepper">  
</div>## hello.html template

```
{% extends "main_template.html" %}
{% load comments %}
{% block title %}My Hello Page{% endblock %}
{% block content %}

<p>
   Our Dreamreal Entry:
   <p><strong>Name :</strong> {{dreamreal.name}}</p>
   <p><strong>Website :</strong> {{dreamreal.website}}</p>
   <p><strong>Phone :</strong> {{dreamreal.phonenumber}}</p>
   <p><strong>Number of comments :<strong> 
   {% get_comment_count for dreamreal as comment_count %} {{ comment_count }}</p>
   <p>List of comments :</p>
   {% render_comment_list for dreamreal %}
</p>

{% render_comment_form for dreamreal %}
{% endblock %}
```

<div class="open_grepper_editor" id="bkmrk--6" title="Edit & Save To Grepper">  
</div>Finally the mapping URL to our hello view −

```
url(r'^hello/(?P<Name>\w+)/', 'hello', name = 'hello'),
```

<div class="open_grepper_editor" id="bkmrk--7" title="Edit & Save To Grepper">  
</div>Now,

- In our template (hello.html), load the comments framework with − {% load comments %}
- We get the number of comments for the Dreamreal object pass by the view − {% get\_comment\_count for dreamreal as comment\_count %}
- We get the list of comments for the objects − {% render\_comment\_list for dreamreal %}
- We display the default comments form − {% render\_comment\_form for dreamreal %}

When accessing /myapp/hello/steve you will get the comments info for the Dreamreal entry whose name is Steve. Accessing that URL will get you −

![Django Comments Example](https://www.tutorialspoint.com/django/images/django_comments_example.jpg)

On posting a comment, you will get redirected to the following page −

![Comments Redirected Page](https://www.tutorialspoint.com/django/images/comments_redirected_page.jpg)

If you go to /myapp/hello/steve again, you will get to see the following page −

![Number of Comments](https://www.tutorialspoint.com/django/images/number_of_comments.jpg)

As you can see, the number of comments is 1 now and you have the comment under the list of comments line.

# Django - RSS

Django comes with a syndication feed generating framework. With it you can create RSS or Atom feeds just by subclassing ***django.contrib.syndication.views.Feed class***.

Let's create a feed for the latest comments done on the app (Also see Django - Comments Framework chapter). For this, let's create a myapp/feeds.py and define our feed (You can put your feeds classes anywhere you want in your code structure).

```
from django.contrib.syndication.views import Feed
from django.contrib.comments import Comment
from django.core.urlresolvers import reverse

class DreamrealCommentsFeed(Feed):
   title = "Dreamreal's comments"
   link = "/drcomments/"
   description = "Updates on new comments on Dreamreal entry."

   def items(self):
      return Comment.objects.all().order_by("-submit_date")[:5]
		
   def item_title(self, item):
      return item.user_name
		
   def item_description(self, item):
      return item.comment
		
   def item_link(self, item):
      return reverse('comment', kwargs = {'object_pk':item.pk})
```

<div class="open_grepper_editor" id="bkmrk-" title="Edit & Save To Grepper">  
</div>- In our feed class, **title**, **link**, and **description** attributes correspond to the standard RSS **&lt;title&gt;**, **&lt;link&gt;** and **&lt;description&gt;** elements.
- The **items** method, return the elements that should go in the feed as item element. In our case the last five comments.
- The **item\_title** method, will get what will go as title for our feed item. In our case the title, will be the user name.
- The **item\_description** method, will get what will go as description for our feed item. In our case the comment itself.
- The **item\_link** method will build the link to the full item. In our case it will get you to the comment.

Now that we have our feed, let's add a comment view in views.py to display our comment −

```
from django.contrib.comments import Comment

def comment(request, object_pk):
   mycomment = Comment.objects.get(object_pk = object_pk)
   text = '<strong>User :</strong> %s <p>'%mycomment.user_name</p>
   text += '<strong>Comment :</strong> %s <p>'%mycomment.comment</p>
   return HttpResponse(text)
```

<div class="open_grepper_editor" id="bkmrk--0" title="Edit & Save To Grepper">  
</div>We also need some URLs in our myapp urls.py for mapping −

```
from myapp.feeds import DreamrealCommentsFeed
from django.conf.urls import patterns, url

urlpatterns += patterns('',
   url(r'^latest/comments/', DreamrealCommentsFeed()),
   url(r'^comment/(?P\w+)/', 'comment', name = 'comment'),
)
```

<div class="open_grepper_editor" id="bkmrk--1" title="Edit & Save To Grepper">  
</div>When accessing /myapp/latest/comments/ you will get our feed −

![Django RSS Example](https://www.tutorialspoint.com/django/images/django_rss_example.jpg)

Then clicking on one of the usernames will get you to: /myapp/comment/comment\_id as defined in our comment view before and you will get −

![Django RSS Redirected Page](https://www.tutorialspoint.com/django/images/django_rss_redirected_page.jpg)

Thus, defining a RSS feed is just a matter of sub-classing the Feed class and making sure the URLs (one for accessing the feed and one for accessing the feed elements) are defined. Just as comment, this can be attached to any model in your app.

# Django - Ajax

Ajax essentially is a combination of technologies that are integrated together to reduce the number of page loads. We generally use Ajax to ease end-user experience. Using Ajax in Django can be done by directly using an Ajax library like JQuery or others. Let's say you want to use JQuery, then you need to download and serve the library on your server through Apache or others. Then use it in your template, just like you might do while developing any Ajax-based application.

Another way of using Ajax in Django is to use the Django Ajax framework. The most commonly used is django-dajax which is a powerful tool to easily and super-quickly develop asynchronous presentation logic in web applications, using Python and almost no JavaScript source code. It supports four of the most popular Ajax frameworks: Prototype, jQuery, Dojo and MooTools.

## Using Django-dajax

First thing to do is to install django-dajax. This can be done using easy\_install or pip −

```
$ pip install django_dajax
$ easy_install django_dajax
```

<div class="open_grepper_editor" id="bkmrk-" title="Edit & Save To Grepper">  
</div>This will automatically install django-dajaxice, required by django-dajax. We then need to configure both dajax and dajaxice.

Add dajax and dajaxice in your project settings.py in INSTALLED\_APPS option −

```
INSTALLED_APPS += (
   'dajaxice',
   'dajax'
)
```

<div class="open_grepper_editor" id="bkmrk--0" title="Edit & Save To Grepper">  
</div>Make sure in the same settings.py file, you have the following −

```
TEMPLATE_LOADERS = (
   'django.template.loaders.filesystem.Loader',
   'django.template.loaders.app_directories.Loader',
   'django.template.loaders.eggs.Loader',
)

TEMPLATE_CONTEXT_PROCESSORS = (
   'django.contrib.auth.context_processors.auth',
   'django.core.context_processors.debug',
   'django.core.context_processors.i18n',
   'django.core.context_processors.media',
   'django.core.context_processors.static',
   'django.core.context_processors.request',
   'django.contrib.messages.context_processors.messages'
)

STATICFILES_FINDERS = (
   'django.contrib.staticfiles.finders.FileSystemFinder',
   'django.contrib.staticfiles.finders.AppDirectoriesFinder',
   'dajaxice.finders.DajaxiceFinder',
)

DAJAXICE_MEDIA_PREFIX = 'dajaxice'
```

<div class="open_grepper_editor" id="bkmrk--1" title="Edit & Save To Grepper">  
</div>Now go to the myapp/url.py file and make sure you have the following to set dajax URLs and to load dajax statics js files −

```
from dajaxice.core import dajaxice_autodiscover, dajaxice_config
from django.contrib.staticfiles.urls import staticfiles_urlpatterns
from django.conf import settings

Then dajax urls:

urlpatterns += patterns('',
   url(r'^%s/' % settings.DAJAXICE_MEDIA_PREFIX, include('dajaxice.urls')),)
	
urlpatterns += staticfiles_urlpatterns()
```

<div class="open_grepper_editor" id="bkmrk--2" title="Edit & Save To Grepper">  
</div>Let us create a simple form based on our Dreamreal model to store it, using Ajax (means no refresh).

At first, we need our Dreamreal form in myapp/form.py.

```
class DreamrealForm(forms.Form):
   website = forms.CharField(max_length = 100)
   name = forms.CharField(max_length = 100)
   phonenumber = forms.CharField(max_length = 50)
   email = forms.CharField(max_length = 100)
```

<div class="open_grepper_editor" id="bkmrk--3" title="Edit & Save To Grepper">  
</div>Then we need an ajax.py file in our application: myapp/ajax.py. That's where is our logic, that's where we put the function that will be saving our form then return the popup −

```
from dajaxice.utils import deserialize_form
from myapp.form import DreamrealForm
from dajax.core import Dajax
from myapp.models import Dreamreal

@dajaxice_register
def send_form(request, form):
   dajax = Dajax()
   form = DreamrealForm(deserialize_form(form))
   
   if form.is_valid():
      dajax.remove_css_class('#my_form input', 'error')
      dr = Dreamreal()
      dr.website = form.cleaned_data.get('website')
      dr.name = form.cleaned_data.get('name')
      dr.phonenumber = form.cleaned_data.get('phonenumber')
      dr.save()
      
      dajax.alert("Dreamreal Entry %s was successfully saved." % 
         form.cleaned_data.get('name'))
   else:
      dajax.remove_css_class('#my_form input', 'error')
      for error in form.errors:
         dajax.add_css_class('#id_%s' % error, 'error')
			
   return dajax.json()
```

<div class="open_grepper_editor" id="bkmrk--4" title="Edit & Save To Grepper">  
</div>Now let's create the dreamreal.html template, which has our form −

```
<html>
   <head></head>
   <body>
   
      <form action = "" method = "post" id = "my_form" accept-charset = "utf-8">
         {{ form.as_p }}
         <p><input type = "button" value = "Send" onclick = "send_form();"></p>
      </form>
      
   </body>
</html>
```

<div class="open_grepper_editor" id="bkmrk--5" title="Edit & Save To Grepper">  
</div>Add the view that goes with the template in myapp/views.py −

```
def dreamreal(request):
   form = DreamrealForm()
   return render(request, 'dreamreal.html', locals())
```

<div class="open_grepper_editor" id="bkmrk--6" title="Edit & Save To Grepper">  
</div>Add the corresponding URL in myapp/urls.py −

```
url(r'^dreamreal/', 'dreamreal', name = 'dreamreal'),
```

<div class="open_grepper_editor" id="bkmrk--7" title="Edit & Save To Grepper">  
</div>Now let's add the necessary in our template to make the Ajax work −

At the top of the file add −

```
{% load static %}
{% load dajaxice_templatetags %}
```

<div class="open_grepper_editor" id="bkmrk--8" title="Edit & Save To Grepper">  
</div>And in the &lt;head&gt; section of our dreamreal.html template add −

We are using the JQuery library for this example, so add −

```
<script src = "{% static '/static/jquery-1.11.3.min.js' %}" 
   type = "text/javascript" charset = "utf-8"></script>
<script src = "{% static '/static/dajax/jquery.dajax.core.js' %}"></script>
```

<div class="open_grepper_editor" id="bkmrk--9" title="Edit & Save To Grepper">  
</div>The Ajax function that will be called on click −

```
<script>

   function send_form(){
      Dajaxice.myapp.send_form(Dajax.process,{'form':$('#my_form').serialize(true)});
   }
</script>
```

<div class="open_grepper_editor" id="bkmrk--10" title="Edit & Save To Grepper">  
</div>Note that you need the “jquery-1.11.3.min.js” in your static files directory, and also the jquery.dajax.core.js. To make sure all dajax static files are served under your static directory, run −

```
$python manage.py collectstatic
```

<div class="open_grepper_editor" id="bkmrk--11" title="Edit & Save To Grepper">  
</div>**Note** − Sometimes the jquery.dajax.core.js can be missing, if that happens, just download the source and take that file and put it under your static folder.

You will get to see the following screen, upon accessing /myapp/dreamreal/ −

![Using Django-dajax](https://www.tutorialspoint.com/django/images/using_django_dajax.jpg)

On submit, you will get the following screen −

![Using Django-dajax Response](https://www.tutorialspoint.com/django/images/using_django_dajax_response.jpg)

</body></html>

# Flask Tutorial

Flask is a web application framework written in Python. Armin Ronacher, who leads an international group of Python enthusiasts named Pocco, develops it. Flask is based on Werkzeug WSGI toolkit and Jinja2 template engine. Both are Pocco projects.

# Flask – Overview

## What is Web Framework?

Web Application Framework or simply Web Framework represents a collection of libraries and modules that enables a web application developer to write applications without having to bother about low-level details such as protocols, thread management etc.

## What is Flask?

Flask is a web application framework written in Python. It is developed by **Armin Ronacher**, who leads an international group of Python enthusiasts named Pocco. Flask is based on the Werkzeug WSGI toolkit and Jinja2 template engine. Both are Pocco projects.

## WSGI

Web Server Gateway Interface (WSGI) has been adopted as a standard for Python web application development. WSGI is a specification for a universal interface between the web server and the web applications.

## Werkzeug

It is a WSGI toolkit, which implements requests, response objects, and other utility functions. This enables building a web framework on top of it. The Flask framework uses Werkzeug as one of its bases.

## Jinja2

Jinja2 is a popular templating engine for Python. A web templating system combines a template with a certain data source to render dynamic web pages.

Flask is often referred to as a micro framework. It aims to keep the core of an application simple yet extensible. Flask does not have built-in abstraction layer for database handling, nor does it have form a validation support. Instead, Flask supports the extensions to add such functionality to the application. Some of the popular Flask extensions are discussed later in the tutorial.

# Flask – Environment

## Prerequisite

Python 2.6 or higher is usually required for installation of Flask. Although Flask and its dependencies work well with Python 3 (Python 3.3 onwards), many Flask extensions do not support it properly. Hence, it is recommended that Flask should be installed on Python 2.7.

## Install virtualenv for development environment

**virtualenv** is a virtual Python environment builder. It helps a user to create multiple Python environments side-by-side. Thereby, it can avoid compatibility issues between the different versions of the libraries.

The following command installs **virtualenv**

```
pip install virtualenv
```

<div class="open_grepper_editor" id="bkmrk-" title="Edit & Save To Grepper">  
</div>This command needs administrator privileges. Add **sudo** before **pip** on Linux/Mac OS. If you are on Windows, log in as Administrator. On Ubuntu **virtualenv** may be installed using its package manager.

```
Sudo apt-get install virtualenv
```

<div class="open_grepper_editor" id="bkmrk--0" title="Edit & Save To Grepper">  
</div>Once installed, new virtual environment is created in a folder.

```
mkdir newproj
cd newproj
virtualenv venv
```

<div class="open_grepper_editor" id="bkmrk--1" title="Edit & Save To Grepper">  
</div>To activate corresponding environment, on **Linux/OS X**, use the following −

```
venv/bin/activate
```

<div class="open_grepper_editor" id="bkmrk--2" title="Edit & Save To Grepper">  
</div>On **Windows**, following can be used

```
venv\scripts\activate
```

<div class="open_grepper_editor" id="bkmrk--3" title="Edit & Save To Grepper">  
</div>We are now ready to install Flask in this environment.

```
pip install Flask
```

<div class="open_grepper_editor" id="bkmrk--4" title="Edit & Save To Grepper">  
</div>The above command can be run directly, without virtual environment for system-wide installation.

# Flask – Application

In order to test **Flask** installation, type the following code in the editor as **Hello.py**

```
from flask import Flask
app = Flask(__name__)

@app.route('/')
def hello_world():
   return 'Hello World’

if __name__ == '__main__':
   app.run()
```

<div class="open_grepper_editor" id="bkmrk-" title="Edit & Save To Grepper">  
</div>Importing flask module in the project is mandatory. An object of Flask class is our **WSGI** application.

Flask constructor takes the name of **current module (\_\_name\_\_)** as argument.

The **route()** function of the Flask class is a decorator, which tells the application which URL should call the associated function.

```
app.route(rule, options)
```

<div class="open_grepper_editor" id="bkmrk--0" title="Edit & Save To Grepper">  
</div>- The **rule** parameter represents URL binding with the function.
- The **options** is a list of parameters to be forwarded to the underlying Rule object.

In the above example, **‘/’** URL is bound with **hello\_world()** function. Hence, when the home page of web server is opened in browser, the output of this function will be rendered.

Finally the **run()** method of Flask class runs the application on the local development server.

```
app.run(host, port, debug, options)
```

<div class="open_grepper_editor" id="bkmrk--1" title="Edit & Save To Grepper">  
</div>All parameters are optional

<table class="table table-bordered" id="bkmrk-sr.no.-parameters-%26-"><tbody><tr><th>Sr.No.</th><th class="ts">Parameters &amp; Description</th></tr><tr><td class="ts">1</td><td>**host**

Hostname to listen on. Defaults to 127.0.0.1 (localhost). Set to ‘0.0.0.0’ to have server available externally

</td></tr><tr><td class="ts">2</td><td>**port**

Defaults to 5000

</td></tr><tr><td class="ts">3</td><td>**debug**

Defaults to false. If set to true, provides a debug information

</td></tr><tr><td class="ts">4</td><td>**options**

To be forwarded to underlying Werkzeug server.

</td></tr></tbody></table>

The above given **Python** script is executed from Python shell.

```
Python Hello.py
```

<div class="open_grepper_editor" id="bkmrk--2" title="Edit & Save To Grepper">  
</div>A message in Python shell informs you that

```
* Running on http://127.0.0.1:5000/ (Press CTRL+C to quit)
```

<div class="open_grepper_editor" id="bkmrk--3" title="Edit & Save To Grepper">  
</div>Open the above URL **(localhost:5000)** in the browser. **‘Hello World’** message will be displayed on it.

## Debug mode

A **Flask** application is started by calling the **run()** method. However, while the application is under development, it should be restarted manually for each change in the code. To avoid this inconvenience, enable **debug support**. The server will then reload itself if the code changes. It will also provide a useful debugger to track the errors if any, in the application.

The **Debug** mode is enabled by setting the **debug** property of the **application** object to **True** before running or passing the debug parameter to the **run()** method.

```
app.debug = True
app.run()
app.run(debug = True)
```

# Flask – Routing

Modern web frameworks use the routing technique to help a user remember application URLs. It is useful to access the desired page directly without having to navigate from the home page.

The **route()** decorator in Flask is used to bind URL to a function. For example −

```
@app.route(‘/hello’)
def hello_world():
   return ‘hello world’
```

<div class="open_grepper_editor" id="bkmrk-" title="Edit & Save To Grepper">  
</div>Here, URL **‘/hello’** rule is bound to the **hello\_world()** function. As a result, if a user visits **http://localhost:5000/hello** URL, the output of the **hello\_world()** function will be rendered in the browser.

The **add\_url\_rule()** function of an application object is also available to bind a URL with a function as in the above example, **route()** is used.

A decorator’s purpose is also served by the following representation −

```
def hello_world():
   return ‘hello world’
app.add_url_rule(‘/’, ‘hello’, hello_world)
```

# Flask – Variable Rules

It is possible to build a URL dynamically, by adding variable parts to the rule parameter. This variable part is marked as **&lt;variable-name&gt;**. It is passed as a keyword argument to the function with which the rule is associated.

In the following example, the rule parameter of **route()** decorator contains **&lt;name&gt;** variable part attached to URL **‘/hello’**. Hence, if the **http://localhost:5000/hello/TutorialsPoint** is entered as a **URL** in the browser, **‘TutorialPoint’** will be supplied to **hello()** function as argument.

```
from flask import Flask
app = Flask(__name__)

@app.route('/hello/<name>')
def hello_name(name):
   return 'Hello %s!' % name

if __name__ == '__main__':
   app.run(debug = True)
```

<div class="open_grepper_editor" id="bkmrk-" title="Edit & Save To Grepper">  
</div>Save the above script as **hello.py** and run it from Python shell. Next, open the browser and enter URL **http://localhost:5000/hello/TutorialsPoint.**

The following output will be displayed in the browser.

```
Hello TutorialsPoint!
```

<div class="open_grepper_editor" id="bkmrk--0" title="Edit & Save To Grepper">  
</div>In addition to the default string variable part, rules can be constructed using the following converters −

<table class="table table-bordered" id="bkmrk-sr.no.-converters-%26-"><tbody><tr><th width="10%">Sr.No.</th><th class="ts">Converters &amp; Description</th></tr><tr><td class="ts">1</td><td>**int**

accepts integer

</td></tr><tr><td class="ts">2</td><td>**float**

For floating point value

</td></tr><tr><td class="ts">3</td><td>**path**

accepts slashes used as directory separator character

</td></tr></tbody></table>

In the following code, all these constructors are used.

```
from flask import Flask
app = Flask(__name__)

@app.route('/blog/<int:postID>')
def show_blog(postID):
   return 'Blog Number %d' % postID

@app.route('/rev/<float:revNo>')
def revision(revNo):
   return 'Revision Number %f' % revNo

if __name__ == '__main__':
   app.run()
```

<div class="open_grepper_editor" id="bkmrk--1" title="Edit & Save To Grepper">  
</div>Run the above code from Python Shell. Visit the URL **http://localhost:5000/blog/11** in the browser.

The given number is used as argument to the **show\_blog()** function. The browser displays the following output −

```
Blog Number 11
```

<div class="open_grepper_editor" id="bkmrk--2" title="Edit & Save To Grepper">  
</div>Enter this URL in the browser − **http://localhost:5000/rev/1.1**

The **revision()** function takes up the floating point number as argument. The following result appears in the browser window −

```
Revision Number 1.100000
```

<div class="open_grepper_editor" id="bkmrk--3" title="Edit & Save To Grepper">  
</div>The URL rules of Flask are based on **Werkzeug’s** routing module. This ensures that the URLs formed are unique and based on precedents laid down by Apache.

Consider the rules defined in the following script −

```
from flask import Flask
app = Flask(__name__)

@app.route('/flask')
def hello_flask():
   return 'Hello Flask'

@app.route('/python/')
def hello_python():
   return 'Hello Python'

if __name__ == '__main__':
   app.run()
```

<div class="open_grepper_editor" id="bkmrk--4" title="Edit & Save To Grepper">  
</div>Both the rules appear similar but in the second rule, trailing slash **(/)** is used. As a result, it becomes a canonical URL. Hence, using <u>**/python**</u> or <u>**/python/**</u> returns the same output. However, in case of the first rule, <u>**/flask/**</u> URL results in <u>**404 Not Found**</u> page.

# Flask – URL Building

The **url\_for()** function is very useful for dynamically building a URL for a specific function. The function accepts the name of a function as first argument, and one or more keyword arguments, each corresponding to the variable part of URL.

The following script demonstrates use of **url\_for()** function.

```
from flask import Flask, redirect, url_for
app = Flask(__name__)

@app.route('/admin')
def hello_admin():
   return 'Hello Admin'

@app.route('/guest/<guest>')
def hello_guest(guest):
   return 'Hello %s as Guest' % guest

@app.route('/user/<name>')
def hello_user(name):
   if name =='admin':
      return redirect(url_for('hello_admin'))
   else:
      return redirect(url_for('hello_guest',guest = name))

if __name__ == '__main__':
   app.run(debug = True)
```

<div class="open_grepper_editor" id="bkmrk-" title="Edit & Save To Grepper">  
</div>The above script has a function **user(name)** which accepts a value to its argument from the URL.

The **User()** function checks if an argument received matches **‘admin’** or not. If it matches, the application is redirected to the **hello\_admin()** function using **url\_for()**, otherwise to the **hello\_guest()** function passing the received argument as guest parameter to it.

Save the above code and run from Python shell.

Open the browser and enter URL as − **http://localhost:5000/user/admin**

The application response in browser is −

```
Hello Admin
```

<div class="open_grepper_editor" id="bkmrk--0" title="Edit & Save To Grepper">  
</div>Enter the following URL in the browser − **http://localhost:5000/user/mvl**

The application response now changes to −

```
Hello mvl as Guest
```

# Flask – HTTP methods

Http protocol is the foundation of data communication in world wide web. Different methods of data retrieval from specified URL are defined in this protocol.

The following table summarizes different http methods −

<table class="table table-bordered" id="bkmrk-sr.no.-methods-%26-des"><tbody><tr><th>Sr.No.</th><th class="ts">Methods &amp; Description</th></tr><tr><td class="ts">1</td><td>**GET**

Sends data in unencrypted form to the server. Most common method.

</td></tr><tr><td class="ts">2</td><td>**HEAD**

Same as GET, but without response body

</td></tr><tr><td class="ts">3</td><td>**POST**

Used to send HTML form data to server. Data received by POST method is not cached by server.

</td></tr><tr><td class="ts">4</td><td>**PUT**

Replaces all current representations of the target resource with the uploaded content.

</td></tr><tr><td class="ts">5</td><td>**DELETE**

Removes all current representations of the target resource given by a URL

</td></tr></tbody></table>

By default, the Flask route responds to the **GET** requests. However, this preference can be altered by providing methods argument to **route()** decorator.

In order to demonstrate the use of **POST** method in URL routing, first let us create an HTML form and use the **POST** method to send form data to a URL.

Save the following script as login.html

```
<html>
   <body>
      <form action = "http://localhost:5000/login" method = "post">
         <p>Enter Name:</p>
         <p><input type = "text" name = "nm" /></p>
         <p><input type = "submit" value = "submit" /></p>
      </form>
   </body>
</html>
```

<div class="open_grepper_editor" id="bkmrk-" title="Edit & Save To Grepper">  
</div>Now enter the following script in Python shell.

```
from flask import Flask, redirect, url_for, request
app = Flask(__name__)

@app.route('/success/<name>')
def success(name):
   return 'welcome %s' % name

@app.route('/login',methods = ['POST', 'GET'])
def login():
   if request.method == 'POST':
      user = request.form['nm']
      return redirect(url_for('success',name = user))
   else:
      user = request.args.get('nm')
      return redirect(url_for('success',name = user))

if __name__ == '__main__':
   app.run(debug = True)
```

<div class="open_grepper_editor" id="bkmrk--0" title="Edit & Save To Grepper">  
</div>After the development server starts running, open **login.html** in the browser, enter name in the text field and click **Submit**.

![Post Method Example](https://www.tutorialspoint.com/flask/images/post_method_example.jpg)

Form data is POSTed to the URL in action clause of form tag.

**http://localhost/login** is mapped to the **login()** function. Since the server has received data by **POST** method, value of ‘nm’ parameter obtained from the form data is obtained by −

```
user = request.form['nm']
```

<div class="open_grepper_editor" id="bkmrk--2" title="Edit & Save To Grepper">  
</div>It is passed to **‘/success’** URL as variable part. The browser displays a **welcome** message in the window.

![Welcome Message](https://www.tutorialspoint.com/flask/images/welcome_message.jpg)

Change the method parameter to **‘GET’** in **login.html** and open it again in the browser. The data received on server is by the **GET** method. The value of ‘nm’ parameter is now obtained by −

```
User = request.args.get(‘nm’)
```

<div class="open_grepper_editor" id="bkmrk--4" title="Edit & Save To Grepper">  
</div>Here, **args** is dictionary object containing a list of pairs of form parameter and its corresponding value. The value corresponding to ‘nm’ parameter is passed on to ‘/success’ URL as before.

</body></html>

# Flask – Templates

It is possible to return the output of a function bound to a certain URL in the form of HTML. For instance, in the following script, **hello()** function will render **‘Hello World’** with **&lt;h1&gt;** tag attached to it.

```
from flask import Flask
app = Flask(__name__)

@app.route('/')
def index():
   return '<html><body><h1>Hello World</h1></body></html>'

if __name__ == '__main__':
   app.run(debug = True)
```

<div class="open_grepper_editor" id="bkmrk-" title="Edit & Save To Grepper">  
</div>However, generating HTML content from Python code is cumbersome, especially when variable data and Python language elements like conditionals or loops need to be put. This would require frequent escaping from HTML.

This is where one can take advantage of **Jinja2** template engine, on which Flask is based. Instead of returning hardcode HTML from the function, a HTML file can be rendered by the **render\_template()** function.

```
from flask import Flask
app = Flask(__name__)

@app.route('/')
def index():
   return render_template(‘hello.html’)

if __name__ == '__main__':
   app.run(debug = True)
```

<div class="open_grepper_editor" id="bkmrk--0" title="Edit & Save To Grepper">  
</div>Flask will try to find the HTML file in the templates folder, in the same folder in which this script is present.

- Application folder 
    - Hello.py
    - templates 
        - hello.html

The term **‘web templating system’** refers to designing an HTML script in which the variable data can be inserted dynamically. A web template system comprises of a template engine, some kind of data source and a template processor.

Flask uses **jinja2** template engine. A web template contains HTML syntax interspersed placeholders for variables and expressions (in these case Python expressions) which are replaced values when the template is rendered.

The following code is saved as **hello.html** in the templates folder.

```
<!doctype html>
<html>
   <body>
   
      <h1>Hello {{ name }}!</h1>
      
   </body>
</html>
```

<div class="open_grepper_editor" id="bkmrk--1" title="Edit & Save To Grepper">  
</div>Next, run the following script from Python shell.

```
from flask import Flask, render_template
app = Flask(__name__)

@app.route('/hello/<user>')
def hello_name(user):
   return render_template('hello.html', name = user)

if __name__ == '__main__':
   app.run(debug = True)
```

<div class="open_grepper_editor" id="bkmrk--2" title="Edit & Save To Grepper">  
</div>As the development server starts running, open the browser and enter URL as − **http://localhost:5000/hello/mvl**

The **variable** part of URL is inserted at **{{ name }}** place holder.

![Web Templating System Example](https://www.tutorialspoint.com/flask/images/web_templating_system_example.jpg)

The **jinja2** template engine uses the following delimiters for escaping from HTML.

- {% ... %} for Statements
- {{ ... }} for Expressions to print to the template output
- {# ... #} for Comments not included in the template output
- \# ... ## for Line Statements

In the following example, use of conditional statement in the template is demonstrated. The URL rule to the **hello()** function accepts the integer parameter. It is passed to the **hello.html** template. Inside it, the value of number received (marks) is compared (greater or less than 50) and accordingly HTML is conditionally rendered.

The Python Script is as follows −

```
from flask import Flask, render_template
app = Flask(__name__)

@app.route('/hello/<int:score>')
def hello_name(score):
   return render_template('hello.html', marks = score)

if __name__ == '__main__':
   app.run(debug = True)
```

<div class="open_grepper_editor" id="bkmrk--4" title="Edit & Save To Grepper">  
</div>HTML template script of **hello.html** is as follows −

```
<!doctype html>
<html>
   <body>
      {% if marks>50 %}
         <h1> Your result is pass!</h1>
      {% else %}
         <h1>Your result is fail</h1>
      {% endif %}
   </body>
</html>
```

<div class="open_grepper_editor" id="bkmrk--5" title="Edit & Save To Grepper">  
</div>Note that the conditional statements **if-else** and **endif** are enclosed in delimiter **{%..%}**.

Run the Python script and visit URL **http://localhost/hello/60** and then **http://localhost/hello/30** to see the output of HTML changing conditionally.

The Python loop constructs can also be employed inside the template. In the following script, the **result()** function sends a dictionary object to template **results.html** when URL **http://localhost:5000/result** is opened in the browser.

The Template part of **result.html** employs a **for loop** to render key and value pairs of dictionary object **result{}** as cells of an HTML table.

Run the following code from Python shell.

```
from flask import Flask, render_template
app = Flask(__name__)

@app.route('/result')
def result():
   dict = {'phy':50,'che':60,'maths':70}
   return render_template('result.html', result = dict)

if __name__ == '__main__':
   app.run(debug = True)
```

<div class="open_grepper_editor" id="bkmrk--6" title="Edit & Save To Grepper">  
</div>Save the following HTML script as **result.html** in the templates folder.

```
<!doctype html>
<html>
   <body>
      <table border = 1>
         {% for key, value in result.items() %}
            <tr>
               <th> {{ key }} </th>
               <td> {{ value }} </td>
            </tr>
         {% endfor %}
      </table>
   </body>
</html>
```

<div class="open_grepper_editor" id="bkmrk--7" title="Edit & Save To Grepper">  
</div>Here, again the Python statements corresponding to the **For** loop are enclosed in {%..%} whereas, the expressions **key and value** are put inside **{{ }}**.

After the development starts running, open **http://localhost:5000/result** in the browser to get the following output.

![Table Template Example](https://www.tutorialspoint.com/flask/images/table_template_example.jpg)

</body></html>

# Flask – Static Files

A web application often requires a static file such as a **javascript** file or a **CSS** file supporting the display of a web page. Usually, the web server is configured to serve them for you, but during the development, these files are served from *static* folder in your package or next to your module and it will be available at ***/static*** on the application.

A special endpoint ‘static’ is used to generate URL for static files.

In the following example, a **javascript** function defined in **hello.js** is called on **OnClick** event of HTML button in **index.html**, which is rendered on **‘/’** URL of the Flask application.

```
from flask import Flask, render_template
app = Flask(__name__)

@app.route("/")
def index():
   return render_template("index.html")

if __name__ == '__main__':
   app.run(debug = True)
```

<div class="open_grepper_editor" id="bkmrk-" title="Edit & Save To Grepper">  
</div>The HTML script of **index.html** is given below.

```
<html>
   <head>
      <script type = "text/javascript" 
         src = "{{ url_for('static', filename = 'hello.js') }}" ></script>
   </head>
   
   <body>
      <input type = "button" onclick = "sayHello()" value = "Say Hello" />
   </body>
</html>
```

<div class="open_grepper_editor" id="bkmrk--0" title="Edit & Save To Grepper">  
</div>**hello.js** contains **sayHello()** function.

```
function sayHello() {
   alert("Hello World")
}
```

</body></html>

# Flask – Request Object

The data from a client’s web page is sent to the server as a global request object. In order to process the request data, it should be imported from the Flask module.

Important attributes of request object are listed below −

- **Form** − It is a dictionary object containing key and value pairs of form parameters and their values.
- **args** − parsed contents of query string which is part of URL after question mark (?).
- **Cookies** − dictionary object holding Cookie names and values.
- **files** − data pertaining to uploaded file.
- **method** − current request method.

# Flask – Sending Form Data to Template

We have already seen that the http method can be specified in URL rule. The **Form** data received by the triggered function can collect it in the form of a dictionary object and forward it to a template to render it on a corresponding web page.

In the following example, **‘/’** URL renders a web page (student.html) which has a form. The data filled in it is posted to the **‘/result’** URL which triggers the **result()** function.

The **results()** function collects form data present in **request.form** in a dictionary object and sends it for rendering to **result.html**.

The template dynamically renders an HTML table of **form** data.

Given below is the Python code of application −

```
from flask import Flask, render_template, request
app = Flask(__name__)

@app.route('/')
def student():
   return render_template('student.html')

@app.route('/result',methods = ['POST', 'GET'])
def result():
   if request.method == 'POST':
      result = request.form
      return render_template("result.html",result = result)

if __name__ == '__main__':
   app.run(debug = True)
```

<div class="open_grepper_editor" id="bkmrk-" title="Edit & Save To Grepper">  
</div>Given below is the HTML script of **student.html**.

```
<html>
   <body>
      <form action = "http://localhost:5000/result" method = "POST">
         <p>Name <input type = "text" name = "Name" /></p>
         <p>Physics <input type = "text" name = "Physics" /></p>
         <p>Chemistry <input type = "text" name = "chemistry" /></p>
         <p>Maths <input type ="text" name = "Mathematics" /></p>
         <p><input type = "submit" value = "submit" /></p>
      </form>
   </body>
</html>
```

<div class="open_grepper_editor" id="bkmrk--0" title="Edit & Save To Grepper">  
</div>Code of template **(result.html)** is given below −

```
<!doctype html>
<html>
   <body>
      <table border = 1>
         {% for key, value in result.items() %}
            <tr>
               <th> {{ key }} </th>
               <td> {{ value }} </td>
            </tr>
         {% endfor %}
      </table>
   </body>
</html>
```

<div class="open_grepper_editor" id="bkmrk--1" title="Edit & Save To Grepper">  
</div>Run the Python script and enter the URL **http://localhost:5000/** in the browser.

![Submit Marks](https://www.tutorialspoint.com/flask/images/submit_marks.jpg)

When the **Submit** button is clicked, form data is rendered on **result.html** in the form of HTML table.

![Marks Table](https://www.tutorialspoint.com/flask/images/marks_table.jpg)

</body></html>

# Flask – Cookies

A cookie is stored on a client’s computer in the form of a text file. Its purpose is to remember and track data pertaining to a client’s usage for better visitor experience and site statistics.

A **Request object** contains a cookie’s attribute. It is a dictionary object of all the cookie variables and their corresponding values, a client has transmitted. In addition to it, a cookie also stores its expiry time, path and domain name of the site.

In Flask, cookies are set on response object. Use **make\_response()** function to get response object from return value of a view function. After that, use the **set\_cookie()** function of response object to store a cookie.

Reading back a cookie is easy. The **get()** method of **request.cookies** attribute is used to read a cookie.

In the following Flask application, a simple form opens up as you visit **‘/’** URL.

```
@app.route('/')
def index():
   return render_template('index.html')
```

<div class="open_grepper_editor" id="bkmrk-" title="Edit & Save To Grepper">  
</div>This HTML page contains one text input.

```
<html>
   <body>
      <form action = "/setcookie" method = "POST">
         <p><h3>Enter userID</h3></p>
         <p><input type = 'text' name = 'nm'/></p>
         <p><input type = 'submit' value = 'Login'/></p>
      </form>
   </body>
</html>
```

<div class="open_grepper_editor" id="bkmrk--0" title="Edit & Save To Grepper">  
</div>The Form is posted to **‘/setcookie’** URL. The associated view function sets a Cookie name **userID** and renders another page.

```
@app.route('/setcookie', methods = ['POST', 'GET'])
def setcookie():
   if request.method == 'POST':
   user = request.form['nm']
   
   resp = make_response(render_template('readcookie.html'))
   resp.set_cookie('userID', user)
   
   return resp
```

<div class="open_grepper_editor" id="bkmrk--1" title="Edit & Save To Grepper">  
</div>**‘readcookie.html’** contains a hyperlink to another view function **getcookie()**, which reads back and displays the cookie value in browser.

```
@app.route('/getcookie')
def getcookie():
   name = request.cookies.get('userID')
   return '<h1>welcome '+name+'</h1>'
```

<div class="open_grepper_editor" id="bkmrk--2" title="Edit & Save To Grepper">  
</div>Run the application and visit **http://localhost:5000/**

![ReadCookie HTML](https://www.tutorialspoint.com/flask/images/readcookie_html.jpg)

The result of setting a cookie is displayed like this −

![Result of Setting Cookie](https://www.tutorialspoint.com/flask/images/result_of_setting_cookie.jpg)

The output of read back cookie is shown below.

![Reading Cookie Back](https://www.tutorialspoint.com/flask/images/reading_cookie_back.jpg)

</body></html>

# Flask – Sessions

Like Cookie, Session data is stored on client. Session is the time interval when a client logs into a server and logs out of it. The data, which is needed to be held across this session, is stored in the client browser.

A session with each client is assigned a **Session ID**. The Session data is stored on top of cookies and the server signs them cryptographically. For this encryption, a Flask application needs a defined **SECRET\_KEY**.

Session object is also a dictionary object containing key-value pairs of session variables and associated values.

For example, to set a **‘username’** session variable use the statement −

```
Session[‘username’] = ’admin’
```

<div class="open_grepper_editor" id="bkmrk-" title="Edit & Save To Grepper">  
</div>To release a session variable use **pop()** method.

```
session.pop('username', None)
```

<div class="open_grepper_editor" id="bkmrk--0" title="Edit & Save To Grepper">  
</div>The following code is a simple demonstration of session works in Flask. URL **‘/’** simply prompts user to log in, as session variable **‘username’** is not set.

```
@app.route('/')
def index():
   if 'username' in session:
      username = session['username']
         return 'Logged in as ' + username + '<br>' + \
         "<b><a href = '/logout'>click here to log out</a></b>"
   return "You are not logged in <br><a href = '/login'></b>" + \
      "click here to log in</b></a>"
```

<div class="open_grepper_editor" id="bkmrk--1" title="Edit & Save To Grepper">  
</div>As user browses to ‘/login’ the login() view function, because it is called through GET method, opens up a login form.

A Form is posted back to **‘/login’** and now session variable is set. Application is redirected to **‘/’**. This time session variable **‘username’** is found.

```
@app.route('/login', methods = ['GET', 'POST'])
def login():
   if request.method == 'POST':
      session['username'] = request.form['username']
      return redirect(url_for('index'))
   return '''
	
   <form action = "" method = "post">
      <p><input type = text name = username/></p>
      <p<<input type = submit value = Login/></p>
   </form>
	
   '''
```

<div class="open_grepper_editor" id="bkmrk--2" title="Edit & Save To Grepper">  
</div>The application also contains a **logout()** view function, which pops out **‘username’** session variable. Hence, **‘/’** URL again shows the opening page.

```
@app.route('/logout')
def logout():
   # remove the username from the session if it is there
   session.pop('username', None)
   return redirect(url_for('index'))
```

<div class="open_grepper_editor" id="bkmrk--3" title="Edit & Save To Grepper">  
</div>Run the application and visit the homepage. (Ensure to set **secret\_key** of the application)

```
from flask import Flask, session, redirect, url_for, escape, request
app = Flask(__name__)
app.secret_key = 'any random string’
```

<div class="open_grepper_editor" id="bkmrk--4" title="Edit & Save To Grepper">  
</div>The output will be displayed as shown below. Click the link **“click here to log in”**.

![Login Page Using Session](https://www.tutorialspoint.com/flask/images/login_page_using_session.jpg)

The link will be directed to another screen. Type ‘admin’.

![Another Login Screen](https://www.tutorialspoint.com/flask/images/another_login_screen.jpg)

The screen will show you the message, **‘Logged in as admin’**.

![Logged in as admin](https://www.tutorialspoint.com/flask/images/logged_in_as_admin.jpg)

# Flask – Redirect & Errors

Flask class has a **redirect()** function. When called, it returns a response object and redirects the user to another target location with specified status code.

Prototype of **redirect()** function is as below −

```
Flask.redirect(location, statuscode, response)
```

<div class="open_grepper_editor" id="bkmrk-" title="Edit & Save To Grepper">  
</div>In the above function −

- **location** parameter is the URL where response should be redirected.
- **statuscode** sent to browser’s header, defaults to 302.
- **response** parameter is used to instantiate response.

The following status codes are standardized −

- HTTP\_300\_MULTIPLE\_CHOICES
- HTTP\_301\_MOVED\_PERMANENTLY
- HTTP\_302\_FOUND
- HTTP\_303\_SEE\_OTHER
- HTTP\_304\_NOT\_MODIFIED
- HTTP\_305\_USE\_PROXY
- HTTP\_306\_RESERVED
- HTTP\_307\_TEMPORARY\_REDIRECT

The **default status** code is **302**, which is for **‘found’**.

In the following example, the **redirect()** function is used to display the login page again when a login attempt fails.

```
from flask import Flask, redirect, url_for, render_template, request
# Initialize the Flask application
app = Flask(__name__)

@app.route('/')
def index():
   return render_template('log_in.html')

@app.route('/login',methods = ['POST', 'GET']) 
def login(): 
   if request.method == 'POST' and request.form['username'] == 'admin' :
      return redirect(url_for('success'))
   else:
      return redirect(url_for('index'))

@app.route('/success')
def success():
   return 'logged in successfully'
	
if __name__ == '__main__':
   app.run(debug = True)
```

<div class="open_grepper_editor" id="bkmrk--0" title="Edit & Save To Grepper">  
</div>Flask class has **abort()** function with an error code.

```
Flask.abort(code)
```

<div class="open_grepper_editor" id="bkmrk--1" title="Edit & Save To Grepper">  
</div>The **Code** parameter takes one of following values −

- **400** − for Bad Request
- **401** − for Unauthenticated
- **403** − for Forbidden
- **404** − for Not Found
- **406** − for Not Acceptable
- **415** − for Unsupported Media Type
- **429** − Too Many Requests

Let us make a slight change in the **login()** function in the above code. Instead of re-displaying the login page, if **‘Unauthourized’** page is to be displayed, replace it with call to **abort(401)**.

```
from flask import Flask, redirect, url_for, render_template, request, abort
app = Flask(__name__)

@app.route('/')
def index():
   return render_template('log_in.html')

@app.route('/login',methods = ['POST', 'GET'])
def login():
   if request.method == 'POST':
      if request.form['username'] == 'admin' :
         return redirect(url_for('success'))
      else:
         abort(401)
   else:
      return redirect(url_for('index'))

@app.route('/success')
def success():
   return 'logged in successfully'

if __name__ == '__main__':
   app.run(debug = True)
```

# Flask – Message Flashing

A good GUI based application provides feedback to a user about the interaction. For example, the desktop applications use dialog or message box and JavaScript uses alerts for similar purpose.

Generating such informative messages is easy in Flask web application. Flashing system of Flask framework makes it possible to create a message in one view and render it in a view function called **next**.

A Flask module contains **flash()** method. It passes a message to the next request, which generally is a template.

```
flash(message, category)
```

<div class="open_grepper_editor" id="bkmrk-" title="Edit & Save To Grepper">  
</div>Here,

- **message** parameter is the actual message to be flashed.
- **category** parameter is optional. It can be either ‘error’, ‘info’ or ‘warning’.

In order to remove message from session, template calls **get\_flashed\_messages()**.

```
get_flashed_messages(with_categories, category_filter)
```

<div class="open_grepper_editor" id="bkmrk--0" title="Edit & Save To Grepper">  
</div>Both parameters are optional. The first parameter is a tuple if received messages are having category. The second parameter is useful to display only specific messages.

The following flashes received messages in a template.

```
{% with messages = get_flashed_messages() %}
   {% if messages %}
      {% for message in messages %}
         {{ message }}
      {% endfor %}
   {% endif %}
{% endwith %}
```

<div class="open_grepper_editor" id="bkmrk--1" title="Edit & Save To Grepper">  
</div>Let us now see a simple example, demonstrating the flashing mechanism in Flask. In the following code, a **‘/’** URL displays link to the login page, with no message to flash.

```
@app.route('/')
def index():
   return render_template('index.html')
```

<div class="open_grepper_editor" id="bkmrk--2" title="Edit & Save To Grepper">  
</div>The link leads a user to **‘/login’** URL which displays a login form. When submitted, the **login()** view function verifies a username and password and accordingly flashes a **‘success’** message or creates **‘error’** variable.

```
@app.route('/login', methods = ['GET', 'POST'])
def login():
   error = None
   
   if request.method == 'POST':
      if request.form['username'] != 'admin' or \
         request.form['password'] != 'admin':
         error = 'Invalid username or password. Please try again!'
      else:
         flash('You were successfully logged in')
         return redirect(url_for('index'))
   return render_template('login.html', error = error)
```

<div class="open_grepper_editor" id="bkmrk--3" title="Edit & Save To Grepper">  
</div>In case of **error**, the login template is redisplayed with error message.

## Login.html

```
<!doctype html>
<html>
   <body>
      <h1>Login</h1>

      {% if error %}
         <p><strong>Error:</strong> {{ error }}
      {% endif %}
      
      <form action = "" method = post>
         <dl>
            <dt>Username:</dt>
            <dd>
               <input type = text name = username 
                  value = "{{request.form.username }}">
            </dd>
            <dt>Password:</dt>
            <dd><input type = password name = password></dd>
         </dl>
         <p><input type = submit value = Login></p>
      </form>
   </body>
</html>
```

<div class="open_grepper_editor" id="bkmrk--4" title="Edit & Save To Grepper">  
</div>On the other hand, if **login** is successful, a success message is flashed on the index template.

## Index.html

```
<!doctype html>
<html>
   <head>
      <title>Flask Message flashing</title>
   </head>
   <body>
      {% with messages = get_flashed_messages() %}
         {% if messages %}
            <ul>
               {% for message in messages %}
               <li<{{ message }}</li>
               {% endfor %}
            </ul>
         {% endif %}
      {% endwith %}
		
      <h1>Flask Message Flashing Example</h1>
      <p>Do you want to <a href = "{{ url_for('login') }}">
         <b>log in?</b></a></p>
   </body>
</html>
```

<div class="open_grepper_editor" id="bkmrk--5" title="Edit & Save To Grepper">  
</div>A complete code for Flask message flashing example is given below −

## Flash.py

```
from flask import Flask, flash, redirect, render_template, request, url_for
app = Flask(__name__)
app.secret_key = 'random string'

@app.route('/')
def index():
   return render_template('index.html')

@app.route('/login', methods = ['GET', 'POST'])
def login():
   error = None
   
   if request.method == 'POST':
      if request.form['username'] != 'admin' or \
         request.form['password'] != 'admin':
         error = 'Invalid username or password. Please try again!'
      else:
         flash('You were successfully logged in')
         return redirect(url_for('index'))
			
   return render_template('login.html', error = error)

if __name__ == "__main__":
   app.run(debug = True)
```

<div class="open_grepper_editor" id="bkmrk--6" title="Edit & Save To Grepper">  
</div>After executing the above codes, you will see the screen as shown below.

![Flask Message Flashing Example](https://www.tutorialspoint.com/flask/images/flask_message_flashing_example.jpg)

When you click on the link, you will be directed to the Login page.

Enter the Username and password.

![Login Page](https://www.tutorialspoint.com/flask/images/login_page.jpg)

Click **Login**. A message will be displayed “You were successfully logged in” .

![Successfully Logged in Page](https://www.tutorialspoint.com/flask/images/successfully_logged_in_page.jpg)

</body></html>

# Flask – File Uploading

Handling file upload in Flask is very easy. It needs an HTML form with its enctype attribute set to ‘multipart/form-data’, posting the file to a URL. The URL handler fetches file from **request.files\[\]** object and saves it to the desired location.

Each uploaded file is first saved in a temporary location on the server, before it is actually saved to its ultimate location. Name of destination file can be hard-coded or can be obtained from filename property of **request.files\[file\]** object. However, it is recommended to obtain a secure version of it using the **secure\_filename()** function.

It is possible to define the path of default upload folder and maximum size of uploaded file in configuration settings of Flask object.

<table class="table table-bordered" id="bkmrk-app.config%5B%E2%80%98upload_f"><tbody><tr><td>app.config\[‘UPLOAD\_FOLDER’\]</td><td>Defines path for upload folder</td></tr><tr><td>app.config\[‘MAX\_CONTENT\_PATH’\]</td><td>Specifies maximum size of file yo be uploaded – in bytes</td></tr></tbody></table>

The following code has **‘/upload’** URL rule that displays **‘upload.html’** from the templates folder, and **‘/upload-file’** URL rule that calls **uploader()** function handling upload process.

**‘upload.html’** has a file chooser button and a submit button.

```
<html>
   <body>
      <form action = "http://localhost:5000/uploader" method = "POST" 
         enctype = "multipart/form-data">
         <input type = "file" name = "file" />
         <input type = "submit"/>
      </form>
   </body>
</html>
```

<div class="open_grepper_editor" id="bkmrk-" title="Edit & Save To Grepper">  
</div>You will see the screen as shown below.

![Flask File Uploading](https://www.tutorialspoint.com/flask/images/flask_file_uploading.jpg)

Click **Submit** after choosing file. Form’s post method invokes **‘/upload\_file’** URL. The underlying function **uploader()** does the save operation.

Following is the Python code of Flask application.

```
from flask import Flask, render_template, request
from werkzeug import secure_filename
app = Flask(__name__)

@app.route('/upload')
def upload_file():
   return render_template('upload.html')
	
@app.route('/uploader', methods = ['GET', 'POST'])
def upload_file():
   if request.method == 'POST':
      f = request.files['file']
      f.save(secure_filename(f.filename))
      return 'file uploaded successfully'
		
if __name__ == '__main__':
   app.run(debug = True)
```

</body></html>

# Flask – Extensions

Flask is often referred to as a micro framework, because a core functionality includes WSGI and routing based on **Werkzeug** and template engine based on **Jinja2**. In addition, Flask framework has support for cookie and sessions as well as web helpers like **JSON**, static files etc. Obviously, this is not enough for the development of a full-fledged web application. This is where the Flask extensions come in picture. Flask extensions give extensibility to Flask framework.

There are a large number of Flask extensions available. A Flask extension is a Python module, which adds specific type of support to the Flask application. Flask Extension Registry is a directory of extensions available. The required extension can be downloaded by **pip** utility.

In this tutorial, we will discuss the following important Flask extensions −

- **Flask Mail** − provides SMTP interface to Flask application
- **Flask WTF** − adds rendering and validation of WTForms
- **Flask SQLAlchemy** − adds SQLAlchemy support to Flask application
- **Flask Sijax** − Interface for Sijax - Python/jQuery library that makes AJAX easy to use in web applications

Each type of extension usually provides extensive documentation about its usage. Since an extension is a Python module, it needs to be imported for it to be used. Flask extensions are generally named as flask-foo. To import,

```
from flask_foo import [class, function]
```

<div class="open_grepper_editor" id="bkmrk-" title="Edit & Save To Grepper">  
</div>For versions of Flask later than 0.7, you can also use the syntax −

```
from flask.ext import foo
```

<div class="open_grepper_editor" id="bkmrk--0" title="Edit & Save To Grepper">  
</div>For this usage, a compatibility module needs to be activated. It can be installed by running flaskext\_compat.py

```
import flaskext_compat
flaskext_compat.activate()
from flask.ext import foo
```

# Flask – Mail

A web based application is often required to have a feature of sending mail to the users/clients. **Flask-Mail** extension makes it very easy to set up a simple interface with any email server.

At first, Flask-Mail extension should be installed with the help of pip utility.

```
pip install Flask-Mail
```

<div class="open_grepper_editor" id="bkmrk-" title="Edit & Save To Grepper">  
</div>Then Flask-Mail needs to be configured by setting values of the following application parameters.

<table class="table table-bordered" id="bkmrk-sr.no-parameters-%26-d"><tbody><tr><th width="10%">Sr.No</th><th class="ts">Parameters &amp; Description</th></tr><tr><td class="ts">1</td><td>**MAIL\_SERVER**

Name/IP address of email server

</td></tr><tr><td class="ts">2</td><td>**MAIL\_PORT**

Port number of server used

</td></tr><tr><td class="ts">3</td><td>**MAIL\_USE\_TLS**

Enable/disable Transport Security Layer encryption

</td></tr><tr><td class="ts">4</td><td>**MAIL\_USE\_SSL**

Enable/disable Secure Sockets Layer encryption

</td></tr><tr><td class="ts">5</td><td>**MAIL\_DEBUG**

Debug support. Default is Flask application’s debug status

</td></tr><tr><td class="ts">6</td><td>**MAIL\_USERNAME**

User name of sender

</td></tr><tr><td class="ts">7</td><td>**MAIL\_PASSWORD**

password of sender

</td></tr><tr><td class="ts">8</td><td>**MAIL\_DEFAULT\_SENDER**

sets default sender

</td></tr><tr><td class="ts">9</td><td>**MAIL\_MAX\_EMAILS**

Sets maximum mails to be sent

</td></tr><tr><td class="ts">10</td><td>**MAIL\_SUPPRESS\_SEND**

Sending suppressed if app.testing set to true

</td></tr><tr><td class="ts">11</td><td>**MAIL\_ASCII\_ATTACHMENTS**

If set to true, attached filenames converted to ASCII

</td></tr></tbody></table>

The flask-mail module contains definitions of the following important classes.

## Mail class

It manages email-messaging requirements. The class constructor takes the following form −

```
flask-mail.Mail(app = None)
```

<div class="open_grepper_editor" id="bkmrk--0" title="Edit & Save To Grepper">  
</div>The Constructor takes the Flask application object as a parameter.

## Methods of Mail class

<table class="table table-bordered" id="bkmrk-sr.no-methods-%26-desc"><tbody><tr><th width="10%">Sr.No</th><th class="ts">Methods &amp; Description</th></tr><tr><td class="ts">1</td><td>**send()**

Sends contents of Message class object

</td></tr><tr><td class="ts">2</td><td>**connect()**

Opens connection with mail host

</td></tr><tr><td class="ts">3</td><td>**send\_message()**

Sends message object

</td></tr></tbody></table>

## Message class

It encapsulates an email message. Message class constructor has several parameters −

```
flask-mail.Message(subject, recipients, body, html, sender, cc, bcc, 
   reply-to, date, charset, extra_headers, mail_options, rcpt_options)
```

<div class="open_grepper_editor" id="bkmrk--1" title="Edit & Save To Grepper">  
</div>## Message class methods

**attach()** − adds an attachment to message. This method takes the following parameters −

- **filename** − name of file to attach
- **content\_type** − MIME type of file
- **data** − raw file data
- **disposition** − content disposition, if any.

**add\_recipient()** − adds another recipient to message

In the following example, SMTP server of Google’s gmail service is used as MAIL\_SERVER for Flask-Mail configuration.

**Step 1** − Import Mail and Message class from flask-mail module in the code.

```
from flask_mail import Mail, Message
```

<div class="open_grepper_editor" id="bkmrk--2" title="Edit & Save To Grepper">  
</div>**Step 2** − Then Flask-Mail is configured as per following settings.

```
app.config['MAIL_SERVER']='smtp.gmail.com'
app.config['MAIL_PORT'] = 465
app.config['MAIL_USERNAME'] = 'yourId@gmail.com'
app.config['MAIL_PASSWORD'] = '*****'
app.config['MAIL_USE_TLS'] = False
app.config['MAIL_USE_SSL'] = True
```

<div class="open_grepper_editor" id="bkmrk--3" title="Edit & Save To Grepper">  
</div>**Step 3** − Create an instance of Mail class.

```
mail = Mail(app)
```

<div class="open_grepper_editor" id="bkmrk--4" title="Edit & Save To Grepper">  
</div>**Step 4** − Set up a Message object in a Python function mapped by URL rule **(‘/’)**.

```
@app.route("/")
def index():
   msg = Message('Hello', sender = 'yourId@gmail.com', recipients = ['id1@gmail.com'])
   msg.body = "This is the email body"
   mail.send(msg)
   return "Sent"
```

<div class="open_grepper_editor" id="bkmrk--5" title="Edit & Save To Grepper">  
</div>**Step 5** − The entire code is given below. Run the following script in Python Shell and visit **http://localhost:5000/.**

```
from flask import Flask
from flask_mail import Mail, Message

app =Flask(__name__)
mail=Mail(app)

app.config['MAIL_SERVER']='smtp.gmail.com'
app.config['MAIL_PORT'] = 465
app.config['MAIL_USERNAME'] = 'yourId@gmail.com'
app.config['MAIL_PASSWORD'] = '*****'
app.config['MAIL_USE_TLS'] = False
app.config['MAIL_USE_SSL'] = True
mail = Mail(app)

@app.route("/")
def index():
   msg = Message('Hello', sender = 'yourId@gmail.com', recipients = ['id1@gmail.com'])
   msg.body = "Hello Flask message sent from Flask-Mail"
   mail.send(msg)
   return "Sent"

if __name__ == '__main__':
   app.run(debug = True)
```

<div class="open_grepper_editor" id="bkmrk--6" title="Edit & Save To Grepper">  
</div>Note that the built-insecurity features in Gmail service may block this login attempt. You may have to decrease the security level. Please log in to your Gmail account and visit [this](https://www.google.com/settings/security/lesssecureapps) link to decrease the security.

![Decrease the Security](https://www.tutorialspoint.com/flask/images/decrease_the_security.jpg)

# Flask – WTF

One of the essential aspects of a web application is to present a user interface for the user. HTML provides a **&lt;form&gt;** tag, which is used to design an interface. A **Form’s** elements such as text input, radio, select etc. can be used appropriately.

Data entered by a user is submitted in the form of Http request message to the server side script by either GET or POST method.

- The Server side script has to recreate the form elements from http request data. So in effect, form elements have to be defined twice – once in HTML and again in the server side script.
- Another disadvantage of using HTML form is that it is difficult (if not impossible) to render the form elements dynamically. HTML itself provides no way to validate a user’s input.

This is where **WTForms**, a flexible form, rendering and validation library comes handy. Flask-WTF extension provides a simple interface with this **WTForms** library.

Using **Flask-WTF**, we can define the form fields in our Python script and render them using an HTML template. It is also possible to apply validation to the **WTF** field.

Let us see how this dynamic generation of HTML works.

First, Flask-WTF extension needs to be installed.

```
pip install flask-WTF
```

<div class="open_grepper_editor" id="bkmrk-" title="Edit & Save To Grepper">  
</div>The installed package contains a **Form** class, which has to be used as a parent for user- defined form.

**WTforms** package contains definitions of various form fields. Some **Standard form fields** are listed below.

<table class="table table-bordered" id="bkmrk-sr.no-standard-form-"><tbody><tr><th width="10%">Sr.No</th><th class="ts">Standard Form Fields &amp; Description</th></tr><tr><td class="ts">1</td><td>**TextField**

Represents &lt;input type = 'text'&gt; HTML form element

</td></tr><tr><td class="ts">2</td><td>**BooleanField**

Represents &lt;input type = 'checkbox'&gt; HTML form element

</td></tr><tr><td class="ts">3</td><td>**DecimalField**

Textfield for displaying number with decimals

</td></tr><tr><td class="ts">4</td><td>**IntegerField**

TextField for displaying integer

</td></tr><tr><td class="ts">5</td><td>**RadioField**

Represents &lt;input type = 'radio'&gt; HTML form element

</td></tr><tr><td class="ts">6</td><td>**SelectField**

Represents select form element

</td></tr><tr><td class="ts">7</td><td>**TextAreaField**

Represents &lt;testarea&gt; html form element

</td></tr><tr><td class="ts">8</td><td>**PasswordField**

Represents &lt;input type = 'password'&gt; HTML form element

</td></tr><tr><td class="ts">9</td><td>**SubmitField**

Represents &lt;input type = 'submit'&gt; form element

</td></tr></tbody></table>

For example, a form containing a text field can be designed as below −

```
from flask_wtf import Form
from wtforms import TextField

class ContactForm(Form):
   name = TextField("Name Of Student")
```

<div class="open_grepper_editor" id="bkmrk--0" title="Edit & Save To Grepper">  
</div>In addition to the **‘name’** field, a hidden field for CSRF token is created automatically. This is to prevent **Cross Site Request Forgery** attack.

When rendered, this will result into an equivalent HTML script as shown below.

```
<input id = "csrf_token" name = "csrf_token" type = "hidden" />
<label for = "name">Name Of Student</label><br>
<input id = "name" name = "name" type = "text" value = "" />
```

<div class="open_grepper_editor" id="bkmrk--1" title="Edit & Save To Grepper">  
</div>A user-defined form class is used in a Flask application and the form is rendered using a template.

```
from flask import Flask, render_template
from forms import ContactForm
app = Flask(__name__)
app.secret_key = 'development key'

@app.route('/contact')
def contact():
   form = ContactForm()
   return render_template('contact.html', form = form)

if __name__ == '__main__':
   app.run(debug = True)
```

<div class="open_grepper_editor" id="bkmrk--2" title="Edit & Save To Grepper">  
</div>WTForms package also contains validator class. It is useful in applying validation to form fields. Following list shows commonly used validators.

<table class="table table-bordered" id="bkmrk-sr.no-validators-cla"><tbody><tr><th width="10%">Sr.No</th><th class="ts">Validators Class &amp; Description</th></tr><tr><td class="ts">1</td><td>**DataRequired**

Checks whether input field is empty

</td></tr><tr><td class="ts">2</td><td>**Email**

Checks whether text in the field follows email ID conventions

</td></tr><tr><td class="ts">3</td><td>**IPAddress**

Validates IP address in input field

</td></tr><tr><td class="ts">4</td><td>**Length**

Verifies if length of string in input field is in given range

</td></tr><tr><td class="ts">5</td><td>**NumberRange**

Validates a number in input field within given range

</td></tr><tr><td class="ts">6</td><td>**URL**

Validates URL entered in input field

</td></tr></tbody></table>

We shall now apply **‘DataRequired’** validation rule for the **name** field in contact form.

```
name = TextField("Name Of Student",[validators.Required("Please enter your name.")])
```

<div class="open_grepper_editor" id="bkmrk--3" title="Edit & Save To Grepper">  
</div>The **validate()** function of form object validates the form data and throws the validation errors if validation fails. The **Error** messages are sent to the template. In the HTML template, error messages are rendered dynamically.

```
{% for message in form.name.errors %}
   {{ message }}
{% endfor %}
```

<div class="open_grepper_editor" id="bkmrk--4" title="Edit & Save To Grepper">  
</div>The following example demonstrates the concepts given above. The design of **Contact form** is given below **(forms.py)**.

```
from flask_wtf import Form
from wtforms import TextField, IntegerField, TextAreaField, SubmitField, RadioField,
   SelectField

from wtforms import validators, ValidationError

class ContactForm(Form):
   name = TextField("Name Of Student",[validators.Required("Please enter 
      your name.")])
   Gender = RadioField('Gender', choices = [('M','Male'),('F','Female')])
   Address = TextAreaField("Address")
   
   email = TextField("Email",[validators.Required("Please enter your email address."),
      validators.Email("Please enter your email address.")])
   
   Age = IntegerField("age")
   language = SelectField('Languages', choices = [('cpp', 'C++'), 
      ('py', 'Python')])
   submit = SubmitField("Send")
```

<div class="open_grepper_editor" id="bkmrk--5" title="Edit & Save To Grepper">  
</div>Validators are applied to the **Name** and **Email** fields.

Given below is the Flask application script **(formexample.py)**.

```
from flask import Flask, render_template, request, flash
from forms import ContactForm
app = Flask(__name__)
app.secret_key = 'development key'

@app.route('/contact', methods = ['GET', 'POST'])
def contact():
   form = ContactForm()
   
   if request.method == 'POST':
      if form.validate() == False:
         flash('All fields are required.')
         return render_template('contact.html', form = form)
      else:
         return render_template('success.html')
      elif request.method == 'GET':
         return render_template('contact.html', form = form)

if __name__ == '__main__':
   app.run(debug = True)
```

<div class="open_grepper_editor" id="bkmrk--6" title="Edit & Save To Grepper">  
</div>The Script of the template **(contact.html)** is as follows −

```
<!doctype html>
<html>
   <body>
      <h2 style = "text-align: center;">Contact Form</h2>
		
      {% for message in form.name.errors %}
         <div>{{ message }}</div>
      {% endfor %}
      
      {% for message in form.email.errors %}
         <div>{{ message }}</div>
      {% endfor %}
      
      <form action = "http://localhost:5000/contact" method = post>
         <fieldset>
            <legend>Contact Form</legend>
            {{ form.hidden_tag() }}
            
            <div style = font-size:20px; font-weight:bold; margin-left:150px;>
               {{ form.name.label }}<br>
               {{ form.name }}
               <br>
               
               {{ form.Gender.label }} {{ form.Gender }}
               {{ form.Address.label }}<br>
               {{ form.Address }}
               <br>
               
               {{ form.email.label }}<br>
               {{ form.email }}
               <br>
               
               {{ form.Age.label }}<br>
               {{ form.Age }}
               <br>
               
               {{ form.language.label }}<br>
               {{ form.language }}
               <br>
               {{ form.submit }}
            </div>
            
         </fieldset>
      </form>
   </body>
</html>
```

<div class="open_grepper_editor" id="bkmrk--7" title="Edit & Save To Grepper">  
</div>Run **formexample.py** in Python shell and visit URL **http://localhost:5000/contact**. The **Contact** form will be displayed as shown below.

![Form Example](https://www.tutorialspoint.com/flask/images/form_example.jpg)

If there are any errors, the page will look like this −

![Form Error Page](https://www.tutorialspoint.com/flask/images/form_error_page.jpg)

If there are no errors, **‘success.html’** will be rendered.

![Form Success Page](https://www.tutorialspoint.com/flask/images/form_success_page.jpg)

</body></html>

# Flask – SQLite

Python has an in-built support for **SQlite**. SQlite3 module is shipped with Python distribution. For a detailed tutorial on using SQLite database in Python, please refer to [this link](https://www.tutorialspoint.com/sqlite/sqlite_python.htm). In this section we shall see how a Flask application interacts with SQLite.

Create an SQLite database **‘database.db’** and create a students’ table in it.

```
import sqlite3

conn = sqlite3.connect('database.db')
print "Opened database successfully";

conn.execute('CREATE TABLE students (name TEXT, addr TEXT, city TEXT, pin TEXT)')
print "Table created successfully";
conn.close()
```

<div class="open_grepper_editor" id="bkmrk-" title="Edit & Save To Grepper">  
</div>Our Flask application has three **View** functions.

First **new\_student()** function is bound to the URL rule **(‘/addnew’)**. It renders an HTML file containing student information form.

```
@app.route('/enternew')
def new_student():
   return render_template('student.html')
```

<div class="open_grepper_editor" id="bkmrk--0" title="Edit & Save To Grepper">  
</div>The HTML script for **‘student.html’** is as follows −

```
<html>
   <body>
      <form action = "{{ url_for('addrec') }}" method = "POST">
         <h3>Student Information</h3>
         Name<br>
         <input type = "text" name = "nm" /></br>
         
         Address<br>
         <textarea name = "add" ></textarea><br>
         
         City<br>
         <input type = "text" name = "city" /><br>
         
         PINCODE<br>
         <input type = "text" name = "pin" /><br>
         <input type = "submit" value = "submit" /><br>
      </form>
   </body>
</html>
```

<div class="open_grepper_editor" id="bkmrk--1" title="Edit & Save To Grepper">  
</div>As it can be seen, form data is posted to the **‘/addrec’** URL which binds the **addrec()** function.

This **addrec()** function retrieves the form’s data by **POST** method and inserts in students table. Message corresponding to success or error in insert operation is rendered to **‘result.html’**.

```
@app.route('/addrec',methods = ['POST', 'GET'])
def addrec():
   if request.method == 'POST':
      try:
         nm = request.form['nm']
         addr = request.form['add']
         city = request.form['city']
         pin = request.form['pin']
         
         with sql.connect("database.db") as con:
            cur = con.cursor()
            cur.execute("INSERT INTO students (name,addr,city,pin) 
               VALUES (?,?,?,?)",(nm,addr,city,pin) )
            
            con.commit()
            msg = "Record successfully added"
      except:
         con.rollback()
         msg = "error in insert operation"
      
      finally:
         return render_template("result.html",msg = msg)
         con.close()
```

<div class="open_grepper_editor" id="bkmrk--2" title="Edit & Save To Grepper">  
</div>The HTML script of **result.html** contains an escaping statement **{{msg}}** that displays the result of **Insert** operation.

```
<!doctype html>
<html>
   <body>
      result of addition : {{ msg }}
      <h2><a href = "\">go back to home page</a></h2>
   </body>
</html>
```

<div class="open_grepper_editor" id="bkmrk--3" title="Edit & Save To Grepper">  
</div>The application contains another **list()** function represented by **‘/list’** URL. It populates **‘rows’** as a **MultiDict** object containing all records in the students table. This object is passed to the **list.html** template.

```
@app.route('/list')
def list():
   con = sql.connect("database.db")
   con.row_factory = sql.Row
   
   cur = con.cursor()
   cur.execute("select * from students")
   
   rows = cur.fetchall(); 
   return render_template("list.html",rows = rows)
```

<div class="open_grepper_editor" id="bkmrk--4" title="Edit & Save To Grepper">  
</div>This **list.html** is a template, which iterates over the row set and renders the data in an HTML table.

```
<!doctype html>
<html>
   <body>
      <table border = 1>
         <thead>
            <td>Name</td>
            <td>Address>/td<
            <td>city</td>
            <td>Pincode</td>
         </thead>
         
         {% for row in rows %}
            <tr>
               <td>{{row["name"]}}</td>
               <td>{{row["addr"]}}</td>
               <td> {{ row["city"]}}</td>
               <td>{{row['pin']}}</td>	
            </tr>
         {% endfor %}
      </table>
      
      <a href = "/">Go back to home page</a>
   </body>
</html>
```

<div class="open_grepper_editor" id="bkmrk--5" title="Edit & Save To Grepper">  
</div>Finally, the **‘/’** URL rule renders a **‘home.html’** which acts as the entry point of the application.

```
@app.route('/')
def home():
   return render_template('home.html')
```

<div class="open_grepper_editor" id="bkmrk--6" title="Edit & Save To Grepper">  
</div>Here is the complete code of **Flask-SQLite** application.

```
from flask import Flask, render_template, request
import sqlite3 as sql
app = Flask(__name__)

@app.route('/')
def home():
   return render_template('home.html')

@app.route('/enternew')
def new_student():
   return render_template('student.html')

@app.route('/addrec',methods = ['POST', 'GET'])
def addrec():
   if request.method == 'POST':
      try:
         nm = request.form['nm']
         addr = request.form['add']
         city = request.form['city']
         pin = request.form['pin']
         
         with sql.connect("database.db") as con:
            cur = con.cursor()
            
            cur.execute("INSERT INTO students (name,addr,city,pin) 
               VALUES (?,?,?,?)",(nm,addr,city,pin) )
            
            con.commit()
            msg = "Record successfully added"
      except:
         con.rollback()
         msg = "error in insert operation"
      
      finally:
         return render_template("result.html",msg = msg)
         con.close()

@app.route('/list')
def list():
   con = sql.connect("database.db")
   con.row_factory = sql.Row
   
   cur = con.cursor()
   cur.execute("select * from students")
   
   rows = cur.fetchall();
   return render_template("list.html",rows = rows)

if __name__ == '__main__':
   app.run(debug = True)
```

<div class="open_grepper_editor" id="bkmrk--7" title="Edit & Save To Grepper">  
</div>Run this script from Python shell and as the development server starts running. Visit **http://localhost:5000/** in browser which displays a simple menu like this −

![Simple Menu](https://www.tutorialspoint.com/flask/images/simple_menu.jpg)

Click **‘Add New Record’** link to open the **Student Information** Form.

![Adding New Record](https://www.tutorialspoint.com/flask/images/adding_new_record.jpg)

Fill the form fields and submit it. The underlying function inserts the record in the students table.

![Record Successfully Added](https://www.tutorialspoint.com/flask/images/record_successfully_added.jpg)

Go back to the home page and click **‘Show List’** link. The table showing the sample data will be displayed.

![Table Showing Sample Data](https://www.tutorialspoint.com/flask/images/table_showing_sample_data.jpg)

</body></html>

# Flask – SQLAlchemy

Using raw SQL in Flask web applications to perform CRUD operations on database can be tedious. Instead, **SQLAlchemy**, a Python toolkit is a powerful **OR Mapper** that gives application developers the full power and flexibility of SQL. Flask-SQLAlchemy is the Flask extension that adds support for SQLAlchemy to your Flask application.

**What is ORM (Object Relation Mapping)?**

Most programming language platforms are object oriented. Data in RDBMS servers on the other hand is stored as tables. Object relation mapping is a technique of mapping object parameters to the underlying RDBMS table structure. An ORM API provides methods to perform CRUD operations without having to write raw SQL statements.

In this section, we are going to study the ORM techniques of Flask-SQLAlchemy and build a small web application.

**Step 1** − Install Flask-SQLAlchemy extension.

```
pip install flask-sqlalchemy
```

<div class="open_grepper_editor" id="bkmrk-" title="Edit & Save To Grepper">  
</div>**Step 2** − You need to import SQLAlchemy class from this module.

```
from flask_sqlalchemy import SQLAlchemy
```

<div class="open_grepper_editor" id="bkmrk--0" title="Edit & Save To Grepper">  
</div>**Step 3** − Now create a Flask application object and set URI for the database to be used.

```
app = Flask(__name__)
app.config['SQLALCHEMY_DATABASE_URI'] = 'sqlite:///students.sqlite3'
```

<div class="open_grepper_editor" id="bkmrk--1" title="Edit & Save To Grepper">  
</div>**Step 4** − Then create an object of SQLAlchemy class with application object as the parameter. This object contains helper functions for ORM operations. It also provides a parent Model class using which user defined models are declared. In the snippet below, a **students** model is created.

```
db = SQLAlchemy(app)
class students(db.Model):
   id = db.Column('student_id', db.Integer, primary_key = True)
   name = db.Column(db.String(100))
   city = db.Column(db.String(50))  
   addr = db.Column(db.String(200))
   pin = db.Column(db.String(10))

def __init__(self, name, city, addr,pin):
   self.name = name
   self.city = city
   self.addr = addr
   self.pin = pin
```

<div class="open_grepper_editor" id="bkmrk--2" title="Edit & Save To Grepper">  
</div>**Step 5** − To create / use database mentioned in URI, run the **create\_all()** method.

```
db.create_all()
```

<div class="open_grepper_editor" id="bkmrk--3" title="Edit & Save To Grepper">  
</div>The **Session** object of **SQLAlchemy** manages all persistence operations of **ORM** object.

The following session methods perform CRUD operations −

- **db.session.add**(model object) − inserts a record into mapped table
- **db.session.delete**(model object) − deletes record from table
- **model.query.all()** − retrieves all records from table (corresponding to SELECT query).

You can apply a filter to the retrieved record set by using the filter attribute. For instance, in order to retrieve records with **city = ’Hyderabad’** in students table, use following statement −

```
Students.query.filter_by(city = ’Hyderabad’).all()
```

<div class="open_grepper_editor" id="bkmrk--4" title="Edit & Save To Grepper">  
</div>With this much of background, now we shall provide view functions for our application to add a student data.

The entry point of the application is **show\_all()** function bound to **‘/’** URL. The Record set of students table is sent as parameter to the HTML template. The Server side code in the template renders the records in HTML table form.

```
@app.route('/')
def show_all():
   return render_template('show_all.html', students = students.query.all() )
```

<div class="open_grepper_editor" id="bkmrk--5" title="Edit & Save To Grepper">  
</div>The HTML script of the template **(‘show\_all.html’)** is like this −

```

<html lang = "en">
   <head></head>
   <body>
      <h3>
         <a href = "{{ url_for('show_all') }}">Comments - Flask 
            SQLAlchemy example</a>
      </h3>
      
      <hr/>
      {%- for message in get_flashed_messages() %}
         {{ message }}
      {%- endfor %}
		
      <h3>Students (<a href = "{{ url_for('new') }}">Add Student
         </a>)</h3>
      
      <table>
         <thead>
            <tr>
               <th>Name</th>
               <th>City</th>
               <th>Address</th>
               <th>Pin</th>
            </tr>
         </thead>

         <tbody>
            {% for student in students %}
               <tr>
                  <td>{{ student.name }}</td>
                  <td>{{ student.city }}</td>
                  <td>{{ student.addr }}</td>
                  <td>{{ student.pin }}</td>
               </tr>
            {% endfor %}
         </tbody>
      </table>
   </body>
</html>
```

<div class="open_grepper_editor" id="bkmrk--6" title="Edit & Save To Grepper">  
</div>The above page contains a hyperlink to **‘/new’** URL mapping **new()** function. When clicked, it opens a Student Information form. The data is posted to the same URL in **POST** method.

## new.html

```

<html>
   <body>
      <h3>Students - Flask SQLAlchemy example</h3>
      <hr/>
      
      {%- for category, message in get_flashed_messages(with_categories = true) %}
         <div class = "alert alert-danger">
            {{ message }}
         </div>
      {%- endfor %}
      
      <form action = "{{ request.path }}" method = "post">
         <label for = "name">Name</label><br>
         <input type = "text" name = "name" placeholder = "Name" /><br>
         <label for = "email">City</label><br>
         <input type = "text" name = "city" placeholder = "city" /><br>
         <label for = "addr">addr</label><br>
         <textarea name = "addr" placeholder = "addr"></textarea><br>
         <label for = "PIN">City</label><br>
         <input type = "text" name = "pin" placeholder = "pin" /><br>
         <input type = "submit" value = "Submit" />
      </form>
   </body>
</html>
```

<div class="open_grepper_editor" id="bkmrk--7" title="Edit & Save To Grepper">  
</div>When the http method is detected as POST, the form data is added in the students table and the application returns to homepage showing the added data.

```
@app.route('/new', methods = ['GET', 'POST'])
def new():
   if request.method == 'POST':
      if not request.form['name'] or not request.form['city'] or not request.form['addr']:
         flash('Please enter all the fields', 'error')
      else:
         student = students(request.form['name'], request.form['city'],
            request.form['addr'], request.form['pin'])
         
         db.session.add(student)
         db.session.commit()
         
         flash('Record was successfully added')
         return redirect(url_for('show_all'))
   return render_template('new.html')
```

<div class="open_grepper_editor" id="bkmrk--8" title="Edit & Save To Grepper">  
</div>Given below is the complete code of application **(app.py)**.

```
from flask import Flask, request, flash, url_for, redirect, render_template
from flask_sqlalchemy import SQLAlchemy

app = Flask(__name__)
app.config['SQLALCHEMY_DATABASE_URI'] = 'sqlite:///students.sqlite3'
app.config['SECRET_KEY'] = "random string"

db = SQLAlchemy(app)

class students(db.Model):
   id = db.Column('student_id', db.Integer, primary_key = True)
   name = db.Column(db.String(100))
   city = db.Column(db.String(50))
   addr = db.Column(db.String(200)) 
   pin = db.Column(db.String(10))

def __init__(self, name, city, addr,pin):
   self.name = name
   self.city = city
   self.addr = addr
   self.pin = pin

@app.route('/')
def show_all():
   return render_template('show_all.html', students = students.query.all() )

@app.route('/new', methods = ['GET', 'POST'])
def new():
   if request.method == 'POST':
      if not request.form['name'] or not request.form['city'] or not request.form['addr']:
         flash('Please enter all the fields', 'error')
      else:
         student = students(request.form['name'], request.form['city'],
            request.form['addr'], request.form['pin'])
         
         db.session.add(student)
         db.session.commit()
         flash('Record was successfully added')
         return redirect(url_for('show_all'))
   return render_template('new.html')

if __name__ == '__main__':
   db.create_all()
   app.run(debug = True)
```

<div class="open_grepper_editor" id="bkmrk--9" title="Edit & Save To Grepper">  
</div>Run the script from Python shell and enter **http://localhost:5000/** in the browser.

![Flask SQLAlchemy Example](https://www.tutorialspoint.com/flask/images/flask_sqlalchemy_example.jpg)

Click the **‘Add Student’** link to open **Student information** form.

![Add Student](https://www.tutorialspoint.com/flask/images/add_student.jpg)

Fill the form and submit. The home page reappears with the submitted data.

We can see the output as shown below.

![Flask SQLAlchemy Example Output](https://www.tutorialspoint.com/flask/images/flask_sqlalchemy_example_output.jpg)

</body></html>

# Flask – Sijax

**Sijax** stands for **‘Simple Ajax’** and it is a **Python/jQuery** library designed to help you easily bring **Ajax** to your application. It uses **jQuery.ajax** to make AJAX requests.

## Installation

Installation of Flask-Sijax is easy.

```
pip install flask-sijax
```

<div class="open_grepper_editor" id="bkmrk-" title="Edit & Save To Grepper">  
</div>## Configuration

- **SIJAX\_STATIC\_PATH** − the static path where you want the Sijax javascript files to be mirrored. The default location is **static/js/sijax**. In this folder, **sijax.js** and **json2.js** files are kept.
- **SIJAX\_JSON\_URI** − the URI to load the json2.js static file from

Sijax uses **JSON** to pass the data between the browser and the server. This means that the browsers need either to support **JSON** natively or get **JSON** support from the **json2.js** file.

Functions registered that way cannot provide **Sijax** functionality, because they cannot be accessed using a **POST** method by default (and Sijax uses POST requests).

To make a **View** function capable of handling **Sijax** requests, make it accessible via POST using **@app.route('/url', methods = \['GET', 'POST'\])** or use the **@flask\_sijax.route** helper decorator like this −

```
@flask_sijax.route(app, '/hello')
```

<div class="open_grepper_editor" id="bkmrk--0" title="Edit & Save To Grepper">  
</div>Every Sijax handler function (like this one) receives at least one parameter automatically, much like Python passes ‘self’ to the object methods. The **‘obj\_response’** parameter is the function's way of talking back to the browser.

```
def say_hi(obj_response):
   obj_response.alert('Hi there!')
```

<div class="open_grepper_editor" id="bkmrk--1" title="Edit & Save To Grepper">  
</div>When Sijax request is detected, Sijax handles it like this −

```
g.sijax.register_callback('say_hi', say_hi)
   return g.sijax.process_request()
```

<div class="open_grepper_editor" id="bkmrk--2" title="Edit & Save To Grepper">  
</div>## Sijax Application

A minimal Sijax application code looks as follows −

```
import os
from flask import Flask, g
from flask_sijax import sijax

path = os.path.join('.', os.path.dirname(__file__), 'static/js/sijax/')
app = Flask(__name__)

app.config['SIJAX_STATIC_PATH'] = path
app.config['SIJAX_JSON_URI'] = '/static/js/sijax/json2.js'
flask_sijax.Sijax(app)

@app.route('/')
def index():
   return 'Index'
	
@flask_sijax.route(app, '/hello')
def hello():
   def say_hi(obj_response):
      obj_response.alert('Hi there!')
   if g.sijax.is_sijax_request:
      # Sijax request detected - let Sijax handle it
      g.sijax.register_callback('say_hi', say_hi)
      return g.sijax.process_request()
      return _render_template('sijaxexample.html')

if __name__ == '__main__':
   app.run(debug = True)
```

<div class="open_grepper_editor" id="bkmrk--3" title="Edit & Save To Grepper">  
</div>When a Sijax requests (a special **jQuery.ajax()** request) to the server, this request is detected on the server by **g.sijax.is\_sijax\_request()**, in which case you let **Sijax** handle the request.

All the functions registered using **g.sijax.register\_callback()** are exposed for calling from the browser.

Calling **g.sijax.process\_request()** tells Sijax to execute the appropriate (previously registered) function and return the response to the browser.

# Flask – Deployment

## Externally Visible Server

A Flask application on the development server is accessible only on the computer on which the development environment is set up. This is a default behavior, because in debugging mode, a user can execute arbitrary code on the computer.

If **debug** is disabled, the development server on local computer can be made available to the users on network by setting the host name as **‘0.0.0.0’**.

```
app.run(host = ’0.0.0.0’)
```

<div class="open_grepper_editor" id="bkmrk-" title="Edit & Save To Grepper">  
</div>Thereby, your operating system listens to all public IPs.

## Deployment

To switch over from a development environment to a full-fledged production environment, an application needs to be deployed on a real web server. Depending upon what you have, there are different options available to deploy a Flask web application.

For small application, you can consider deploying it on any of the following hosted platforms, all of which offer free plan for small application.

- Heroku
- dotcloud
- webfaction

Flask application can be deployed on these cloud platforms. In addition, it is possible to deploy Flask app on Google cloud platform. Localtunnel service allows you to share your application on localhost without messing with DNS and firewall settings.

If you are inclined to use a dedicated web server in place of above mentioned shared platforms, following options are there to explore.

## mod\_wsgi

**mod\_wsgi** is an Apache module that provides a WSGI compliant interface for hosting Python based web applications on Apache server.

## Installing mod\_wsgi

To install an official release direct from PyPi, you can run −

```
pip install mod_wsgi
```

<div class="open_grepper_editor" id="bkmrk--0" title="Edit & Save To Grepper">  
</div>To verify that the installation was successful, run the mod\_wsgi-express script with the start-server command −

```
mod_wsgi-express start-server
```

<div class="open_grepper_editor" id="bkmrk--1" title="Edit & Save To Grepper">  
</div>This will start up Apache/mod\_wsgi on port 8000. You can then verify that the installation worked by pointing your browser at −

```
http://localhost:8000/
```

<div class="open_grepper_editor" id="bkmrk--2" title="Edit & Save To Grepper">  
</div>## Creating .wsgi file

There should be a **yourapplication.wsgi** file. This file contains the code **mod\_wsgi,** which executes on startup to get the application object. For most applications, the following file should be sufficient −

```
from yourapplication import app as application
```

<div class="open_grepper_editor" id="bkmrk--3" title="Edit & Save To Grepper">  
</div>Make sure that **yourapplication** and all the libraries that are in use are on the python load path.

## Configuring Apache

You need to tell **mod\_wsgi,** the location of your application.

```
<VirtualHost *>
   ServerName example.com
   WSGIScriptAlias / C:\yourdir\yourapp.wsgi

   <Directory C:\yourdir>
      Order deny,allow
      Allow from all
   </Directory>

</VirtualHost>
```

<div class="open_grepper_editor" id="bkmrk--4" title="Edit & Save To Grepper">  
</div>## Standalone WSGI containers

There are many popular servers written in Python that contains WSGI applications and serve HTTP.

- Gunicorn
- Tornado
- Gevent
- Twisted Web

# Flask – FastCGI

FastCGI is another deployment option for Flask application on web servers like nginix, lighttpd, and Cherokee.

## Configuring FastCGI

First, you need to create the **FastCGI** server file. Let us call it **yourapplication.fcgi**.

```
from flup.server.fcgi import WSGIServer
from yourapplication import app

if __name__ == '__main__':
   WSGIServer(app).run()
```

<div class="open_grepper_editor" id="bkmrk-" title="Edit & Save To Grepper">  
</div>**nginx** and older versions of **lighttpd** need a socket to be explicitly passed to communicate with the **FastCGI** server. For that to work, you need to pass the path to the socket to the **WSGIServer**.

```
WSGIServer(application, bindAddress = '/path/to/fcgi.sock').run()
```

<div class="open_grepper_editor" id="bkmrk--0" title="Edit & Save To Grepper">  
</div>## Configuring Apache

For a basic Apache deployment, your **.fcgi** file will appear in your application URL e.g. **example.com/yourapplication.fcgi/hello/**. There are few ways to configure your application so that **yourapplication.fcgi** does not appear in the URL.

```
<VirtualHost *>
   ServerName example.com
   ScriptAlias / /path/to/yourapplication.fcgi/
</VirtualHost>
```

<div class="open_grepper_editor" id="bkmrk--1" title="Edit & Save To Grepper">  
</div>## Configuring lighttpd

Basic configuration of **lighttpd** looks like this −

```
fastcgi.server = ("/yourapplication.fcgi" => ((
   "socket" => "/tmp/yourapplication-fcgi.sock",
   "bin-path" => "/var/www/yourapplication/yourapplication.fcgi",
   "check-local" => "disable",
   "max-procs" => 1
)))

alias.url = (
   "/static/" => "/path/to/your/static"
)

url.rewrite-once = (
   "^(/static($|/.*))$" => "$1",
   "^(/.*)$" => "/yourapplication.fcgi$1"
)
```

<div class="open_grepper_editor" id="bkmrk--2" title="Edit & Save To Grepper">  
</div>Remember to enable the **FastCGI**, alias and rewrite modules. This configuration binds the application to **/yourapplication**.

# Writing your first Django app, part 2

Let’s learn by example.

Throughout this tutorial, we’ll walk you through the creation of a basic poll application.

It’ll consist of two parts:

A public site that lets people view polls and vote in them.
An admin site that lets you add, change, and delete polls.
We’ll assume you have Django installed already. You can tell Django is installed and which version by running the following command in a shell prompt (indicated by the $ prefix):

/ 
$ python -m django --version
If Django is installed, you should see the version of your installation. If it isn’t, you’ll get an error telling “No module named django”.

This tutorial is written for Django 4.1, which supports Python 3.8 and later. If the Django version doesn’t match, you can refer to the tutorial for your version of Django by using the version switcher at the bottom right corner of this page, or update Django to the newest version. If you’re using an older version of Python, check What Python version can I use with Django? to find a compatible version of Django.

See How to install Django for advice on how to remove older versions of Django and install a newer one.

# Database setup

Now, open up `<span class="pre">mysite/settings.py</span>`. It’s a normal Python module with module-level variables representing Django settings.

By default, the configuration uses SQLite. If you’re new to databases, or you’re just interested in trying Django, this is the easiest choice. SQLite is included in Python, so you won’t need to install anything else to support your database. When starting your first real project, however, you may want to use a more scalable database like PostgreSQL, to avoid database-switching headaches down the road.

If you wish to use another database, install the appropriate [<span class="std std-ref">database bindings</span>](https://docs.djangoproject.com/en/4.1/topics/install/#database-installation) and change the following keys in the [`<span class="pre">DATABASES</span>`](https://docs.djangoproject.com/en/4.1/ref/settings/#std-setting-DATABASES) `<span class="pre">'default'</span>` item to match your database connection settings:

- [`<span class="pre">ENGINE</span>`](https://docs.djangoproject.com/en/4.1/ref/settings/#std-setting-DATABASE-ENGINE) – Either `<span class="pre">'django.db.backends.sqlite3'</span>`, `<span class="pre">'django.db.backends.postgresql'</span>`, `<span class="pre">'django.db.backends.mysql'</span>`, or `<span class="pre">'django.db.backends.oracle'</span>`. Other backends are [<span class="std std-ref">also available</span>](https://docs.djangoproject.com/en/4.1/ref/databases/#third-party-notes).
- [`<span class="pre">NAME</span>`](https://docs.djangoproject.com/en/4.1/ref/settings/#std-setting-NAME) – The name of your database. If you’re using SQLite, the database will be a file on your computer; in that case, [`<span class="pre">NAME</span>`](https://docs.djangoproject.com/en/4.1/ref/settings/#std-setting-NAME) should be the full absolute path, including filename, of that file. The default value, `<span class="pre">BASE_DIR</span> <span class="pre">/</span> <span class="pre">'db.sqlite3'</span>`, will store the file in your project directory.

If you are not using SQLite as your database, additional settings such as [`<span class="pre">USER</span>`](https://docs.djangoproject.com/en/4.1/ref/settings/#std-setting-USER), [`<span class="pre">PASSWORD</span>`](https://docs.djangoproject.com/en/4.1/ref/settings/#std-setting-PASSWORD), and [`<span class="pre">HOST</span>`](https://docs.djangoproject.com/en/4.1/ref/settings/#std-setting-HOST) must be added. For more details, see the reference documentation for [`<span class="pre">DATABASES</span>`](https://docs.djangoproject.com/en/4.1/ref/settings/#std-setting-DATABASES).

> For databases other than SQLite
> 
> If you’re using a database besides SQLite, make sure you’ve created a database by this point. Do that with “`<span class="pre">CREATE</span> <span class="pre">DATABASE</span> <span class="pre">database_name;</span>`” within your database’s interactive prompt.
> 
> Also make sure that the database user provided in `<span class="pre">mysite/settings.py</span>` has “create database” privileges. This allows automatic creation of a [<span class="std std-ref">test database</span>](https://docs.djangoproject.com/en/4.1/topics/testing/overview/#the-test-database) which will be needed in a later tutorial.
> 
> If you’re using SQLite, you don’t need to create anything beforehand - the database file will be created automatically when it is needed.

While you’re editing mysite/settings.py, set TIME\_ZONE to your time zone.

Also, note the INSTALLED\_APPS setting at the top of the file. That holds the names of all Django applications that are activated in this Django instance. Apps can be used in multiple projects, and you can package and distribute them for use by others in their projects.

By default, INSTALLED\_APPS contains the following apps, all of which come with Django:

django.contrib.admin – The admin site. You’ll use it shortly.  
django.contrib.auth – An authentication system.  
django.contrib.contenttypes – A framework for content types.  
django.contrib.sessions – A session framework.  
django.contrib.messages – A messaging framework.  
django.contrib.staticfiles – A framework for managing static files.  
These applications are included by default as a convenience for the common case.

Some of these applications make use of at least one database table, though, so we need to create the tables in the database before we can use them. To do that, run the following command:

<div class="console-block" id="bkmrk-%24-python-manage.py-m"><section class="c-content-unix" id="bkmrk-%24-python-manage.py-m-0">```
$ python manage.py migrate

```

The [`<span class="pre">migrate</span>`](https://docs.djangoproject.com/en/4.1/ref/django-admin/#django-admin-migrate) command looks at the [`<span class="pre">INSTALLED_APPS</span>`](https://docs.djangoproject.com/en/4.1/ref/settings/#std-setting-INSTALLED_APPS) setting and creates any necessary database tables according to the database settings in your `<span class="pre">mysite/settings.py</span>` file and the database migrations shipped with the app (we’ll cover those later). You’ll see a message for each migration it applies. If you’re interested, run the command-line client for your database and type `<span class="pre">\dt</span>` (PostgreSQL), `<span class="pre">SHOW</span> <span class="pre">TABLES;</span>` (MariaDB, MySQL), `<span class="pre">.tables</span>` (SQLite), or `<span class="pre">SELECT</span> <span class="pre">TABLE_NAME</span> <span class="pre">FROM</span> <span class="pre">USER_TABLES;</span>` (Oracle) to display the tables Django created.

<span style="color: rgb(224, 62, 45);">For the minimalists</span>

<span style="color: rgb(224, 62, 45);">Like we said above, the default applications are included for the common case, but not everybody needs them. If you don’t need any or all of them, feel free to comment-out or delete the appropriate line(s) from [`<span class="pre">INSTALLED_APPS</span>`](https://docs.djangoproject.com/en/4.1/ref/settings/#std-setting-INSTALLED_APPS) before running [`<span class="pre">migrate</span>`](https://docs.djangoproject.com/en/4.1/ref/django-admin/#django-admin-migrate). The [`<span class="pre">migrate</span>`](https://docs.djangoproject.com/en/4.1/ref/django-admin/#django-admin-migrate) command will only run migrations for apps in [`<span class="pre">INSTALLED_APPS</span>`](https://docs.djangoproject.com/en/4.1/ref/settings/#std-setting-INSTALLED_APPS).</span>

</section></div><div class="console-block" id="bkmrk-"><section class="c-content-unix" id="bkmrk--0"><div class="highlight-console notranslate"><div class="highlight"></div></div></section></div>

# Creating models

Now we’ll define your models – essentially, your database layout, with additional metadata.

> Philosophy
> 
> A model is the single, definitive source of information about your data. It contains the essential fields and behaviors of the data you’re storing. Django follows the [<span class="std std-ref">DRY Principle</span>](https://docs.djangoproject.com/en/4.1/misc/design-philosophies/#dry). The goal is to define your data model in one place and automatically derive things from it.
> 
> This includes the migrations - unlike in Ruby On Rails, for example, migrations are entirely derived from your models file, and are essentially a history that Django can roll through to update your database schema to match your current models.

In our poll app, we’ll create two models: `<span class="pre">Question</span>` and `<span class="pre">Choice</span>`. A `<span class="pre">Question</span>` has a question and a publication date. A `<span class="pre">Choice</span>` has two fields: the text of the choice and a vote tally. Each `<span class="pre">Choice</span>` is associated with a `<span class="pre">Question</span>`.

These concepts are represented by Python classes. Edit the `<span class="pre">polls/models.py</span>` file so it looks like this:

<div class="literal-block-wrapper docutils container" id="bkmrk-polls%2Fmodels.py%C2%B6"><div class="literal-block-wrapper docutils container"><div class="code-block-caption"><span class="caption-text">`<span class="pre">polls/models.py</span>`</span>[¶](https://docs.djangoproject.com/en/4.1/intro/tutorial02/#id2 "Permalink to this code")</div><div class="highlight-python notranslate"><div class="highlight"></div></div></div></div>```
from django.db import models


class Question(models.Model):
    question_text = models.CharField(max_length=200)
    pub_date = models.DateTimeField('date published')


class Choice(models.Model):
    question = models.ForeignKey(Question, on_delete=models.CASCADE)
    choice_text = models.CharField(max_length=200)
    votes = models.IntegerField(default=0)
```

Here, each model is represented by a class that subclasses [`<span class="pre">django.db.models.Model</span>`](https://docs.djangoproject.com/en/4.1/ref/models/instances/#django.db.models.Model "django.db.models.Model"). Each model has a number of class variables, each of which represents a database field in the model.

Each field is represented by an instance of a [`<span class="pre">Field</span>`](https://docs.djangoproject.com/en/4.1/ref/models/fields/#django.db.models.Field "django.db.models.Field") class – e.g., [`<span class="pre">CharField</span>`](https://docs.djangoproject.com/en/4.1/ref/models/fields/#django.db.models.CharField "django.db.models.CharField") for character fields and [`<span class="pre">DateTimeField</span>`](https://docs.djangoproject.com/en/4.1/ref/models/fields/#django.db.models.DateTimeField "django.db.models.DateTimeField") for datetimes. This tells Django what type of data each field holds.

The name of each [`<span class="pre">Field</span>`](https://docs.djangoproject.com/en/4.1/ref/models/fields/#django.db.models.Field "django.db.models.Field") instance (e.g. `<span class="pre">question_text</span>` or `<span class="pre">pub_date</span>`) is the field’s name, in machine-friendly format. You’ll use this value in your Python code, and your database will use it as the column name.

You can use an optional first positional argument to a [`<span class="pre">Field</span>`](https://docs.djangoproject.com/en/4.1/ref/models/fields/#django.db.models.Field "django.db.models.Field") to designate a human-readable name. That’s used in a couple of introspective parts of Django, and it doubles as documentation. If this field isn’t provided, Django will use the machine-readable name. In this example, we’ve only defined a human-readable name for `<span class="pre">Question.pub_date</span>`. For all other fields in this model, the field’s machine-readable name will suffice as its human-readable name.

Some [`<span class="pre">Field</span>`](https://docs.djangoproject.com/en/4.1/ref/models/fields/#django.db.models.Field "django.db.models.Field") classes have required arguments. [`<span class="pre">CharField</span>`](https://docs.djangoproject.com/en/4.1/ref/models/fields/#django.db.models.CharField "django.db.models.CharField"), for example, requires that you give it a [`<span class="pre">max_length</span>`](https://docs.djangoproject.com/en/4.1/ref/models/fields/#django.db.models.CharField.max_length "django.db.models.CharField.max_length"). That’s used not only in the database schema, but in validation, as we’ll soon see.

A [`<span class="pre">Field</span>`](https://docs.djangoproject.com/en/4.1/ref/models/fields/#django.db.models.Field "django.db.models.Field") can also have various optional arguments; in this case, we’ve set the [`<span class="pre">default</span>`](https://docs.djangoproject.com/en/4.1/ref/models/fields/#django.db.models.Field.default "django.db.models.Field.default") value of `<span class="pre">votes</span>` to 0.

Finally, note a relationship is defined, using [`<span class="pre">ForeignKey</span>`](https://docs.djangoproject.com/en/4.1/ref/models/fields/#django.db.models.ForeignKey "django.db.models.ForeignKey"). That tells Django each `<span class="pre">Choice</span>` is related to a single `<span class="pre">Question</span>`. Django supports all the common database relationships: many-to-one, many-to-many, and one-to-one.

# Activating models

That small bit of model code gives Django a lot of information. With it, Django is able to:

- Create a database schema (`<span class="pre">CREATE</span> <span class="pre">TABLE</span>` statements) for this app.
- Create a Python database-access API for accessing `<span class="pre">Question</span>` and `<span class="pre">Choice</span>` objects.

But first we need to tell our project that the `<span class="pre">polls</span>` app is installed.

> Philosophy
> 
> Django apps are “pluggable”: You can use an app in multiple projects, and you can distribute apps, because they don’t have to be tied to a given Django installation.

To include the app in our project, we need to add a reference to its configuration class in the [`<span class="pre">INSTALLED_APPS</span>`](https://docs.djangoproject.com/en/4.1/ref/settings/#std-setting-INSTALLED_APPS) setting. The `<span class="pre">PollsConfig</span>` class is in the `<span class="pre">polls/apps.py</span>` file, so its dotted path is `<span class="pre">'polls.apps.PollsConfig'</span>`. Edit the `<span class="pre">mysite/settings.py</span>` file and add that dotted path to the [`<span class="pre">INSTALLED_APPS</span>`](https://docs.djangoproject.com/en/4.1/ref/settings/#std-setting-INSTALLED_APPS) setting. It’ll look like this:

<div class="literal-block-wrapper docutils container" id="bkmrk-mysite%2Fsettings.py%C2%B6"><div class="literal-block-wrapper docutils container"><div class="code-block-caption"><span class="caption-text">`<span class="pre">mysite/settings.py</span>`</span>[¶](https://docs.djangoproject.com/en/4.1/intro/tutorial02/#id3 "Permalink to this code")</div><div class="highlight-python notranslate"><div class="highlight"></div></div></div></div>```
INSTALLED_APPS = [
    'polls.apps.PollsConfig',
    'django.contrib.admin',
    'django.contrib.auth',
    'django.contrib.contenttypes',
    'django.contrib.sessions',
    'django.contrib.messages',
    'django.contrib.staticfiles',
]
```

Now Django knows to include the `<span class="pre">polls</span>` app. Let’s run another command:

<div class="console-block" id="bkmrk-%EF%85%BC%2F%EF%85%B9%C2%A0%EF%85%BA-%24-python-manag"><label for="c-tab-1-unix" title="Linux/macOS">/</label> <label for="c-tab-1-win" title="Windows"></label><section class="c-content-unix" id="bkmrk-%24-python-manage.py-m">```
$ python manage.py makemigrations polls
```

</section></div>You should see something similar to the following:

```
Migrations for 'polls':
  polls/migrations/0001_initial.py
    - Create model Question
    - Create model Choice
```

By running `<span class="pre">makemigrations</span>`, you’re telling Django that you’ve made some changes to your models (in this case, you’ve made new ones) and that you’d like the changes to be stored as a *migration*.

Migrations are how Django stores changes to your models (and thus your database schema) - they’re files on disk. You can read the migration for your new model if you like; it’s the file `<span class="pre">polls/migrations/0001_initial.py</span>`. Don’t worry, you’re not expected to read them every time Django makes one, but they’re designed to be human-editable in case you want to manually tweak how Django changes things.

There’s a command that will run the migrations for you and manage your database schema automatically - that’s called [`<span class="pre">migrate</span>`](https://docs.djangoproject.com/en/4.1/ref/django-admin/#django-admin-migrate), and we’ll come to it in a moment - but first, let’s see what SQL that migration would run. The [`<span class="pre">sqlmigrate</span>`](https://docs.djangoproject.com/en/4.1/ref/django-admin/#django-admin-sqlmigrate) command takes migration names and returns their SQL:

<div class="console-block" id="bkmrk-%EF%85%BC%2F%EF%85%B9%C2%A0%EF%85%BA-%24-python-manag-0"><label for="c-tab-2-unix" title="Linux/macOS">/</label> <label for="c-tab-2-win" title="Windows"></label><section class="c-content-unix" id="bkmrk-%24-python-manage.py-s">```
$ python manage.py sqlmigrate polls 0001
```

</section></div>You should see something similar to the following (we’ve reformatted it for readability):

```
BEGIN;
--
-- Create model Question
--
CREATE TABLE "polls_question" (
    "id" bigint NOT NULL PRIMARY KEY GENERATED BY DEFAULT AS IDENTITY,
    "question_text" varchar(200) NOT NULL,
    "pub_date" timestamp with time zone NOT NULL
);
--
-- Create model Choice
--
CREATE TABLE "polls_choice" (
    "id" bigint NOT NULL PRIMARY KEY GENERATED BY DEFAULT AS IDENTITY,
    "choice_text" varchar(200) NOT NULL,
    "votes" integer NOT NULL,
    "question_id" bigint NOT NULL
);
ALTER TABLE "polls_choice"
  ADD CONSTRAINT "polls_choice_question_id_c5b4b260_fk_polls_question_id"
    FOREIGN KEY ("question_id")
    REFERENCES "polls_question" ("id")
    DEFERRABLE INITIALLY DEFERRED;
CREATE INDEX "polls_choice_question_id_c5b4b260" ON "polls_choice" ("question_id");

COMMIT;
```

Note the following:

- The exact output will vary depending on the database you are using. The example above is generated for PostgreSQL.
- Table names are automatically generated by combining the name of the app (`<span class="pre">polls</span>`) and the lowercase name of the model – `<span class="pre">question</span>` and `<span class="pre">choice</span>`. (You can override this behavior.)
- Primary keys (IDs) are added automatically. (You can override this, too.)
- By convention, Django appends `<span class="pre">"_id"</span>` to the foreign key field name. (Yes, you can override this, as well.)
- The foreign key relationship is made explicit by a `<span class="pre">FOREIGN</span> <span class="pre">KEY</span>` constraint. Don’t worry about the `<span class="pre">DEFERRABLE</span>` parts; it’s telling PostgreSQL to not enforce the foreign key until the end of the transaction.
- It’s tailored to the database you’re using, so database-specific field types such as `<span class="pre">auto_increment</span>` (MySQL), `<span class="pre">bigint</span> <span class="pre">PRIMARY</span> <span class="pre">KEY</span> <span class="pre">GENERATED</span> <span class="pre">BY</span> <span class="pre">DEFAULT</span> <span class="pre">AS</span> <span class="pre">IDENTITY</span>` (PostgreSQL), or `<span class="pre">integer</span> <span class="pre">primary</span> <span class="pre">key</span> <span class="pre">autoincrement</span>` (SQLite) are handled for you automatically. Same goes for the quoting of field names – e.g., using double quotes or single quotes.
- The [`<span class="pre">sqlmigrate</span>`](https://docs.djangoproject.com/en/4.1/ref/django-admin/#django-admin-sqlmigrate) command doesn’t actually run the migration on your database - instead, it prints it to the screen so that you can see what SQL Django thinks is required. It’s useful for checking what Django is going to do or if you have database administrators who require SQL scripts for changes.

If you’re interested, you can also run [`<span class="pre">python</span> <span class="pre">manage.py</span> <span class="pre">check</span>`](https://docs.djangoproject.com/en/4.1/ref/django-admin/#django-admin-check); this checks for any problems in your project without making migrations or touching the database.

Now, run [`<span class="pre">migrate</span>`](https://docs.djangoproject.com/en/4.1/ref/django-admin/#django-admin-migrate) again to create those model tables in your database:

<div class="console-block" id="bkmrk-%EF%85%BC%2F%EF%85%B9%C2%A0%EF%85%BA-%24-python-manag-1"><label for="c-tab-3-unix" title="Linux/macOS">/</label> <label for="c-tab-3-win" title="Windows"></label><section class="c-content-unix" id="bkmrk-%24-python-manage.py-m-0">```
$ python manage.py migrate
Operations to perform:
  Apply all migrations: admin, auth, contenttypes, polls, sessions
Running migrations:
  Rendering model states... DONE
  Applying polls.0001_initial... OK
```

</section></div>The [`<span class="pre">migrate</span>`](https://docs.djangoproject.com/en/4.1/ref/django-admin/#django-admin-migrate) command takes all the migrations that haven’t been applied (Django tracks which ones are applied using a special table in your database called `<span class="pre">django_migrations</span>`) and runs them against your database - essentially, synchronizing the changes you made to your models with the schema in the database.

Migrations are very powerful and let you change your models over time, as you develop your project, without the need to delete your database or tables and make new ones - it specializes in upgrading your database live, without losing data. We’ll cover them in more depth in a later part of the tutorial, but for now, remember the three-step guide to making model changes:

- Change your models (in `<span class="pre">models.py</span>`).
- Run [`<span class="pre">python</span> <span class="pre">manage.py</span> <span class="pre">makemigrations</span>`](https://docs.djangoproject.com/en/4.1/ref/django-admin/#django-admin-makemigrations) to create migrations for those changes
- Run [`<span class="pre">python</span> <span class="pre">manage.py</span> <span class="pre">migrate</span>`](https://docs.djangoproject.com/en/4.1/ref/django-admin/#django-admin-migrate) to apply those changes to the database.

The reason that there are separate commands to make and apply migrations is because you’ll commit migrations to your version control system and ship them with your app; they not only make your development easier, they’re also usable by other developers and in production.

Read the [<span class="doc">django-admin documentation</span>](https://docs.djangoproject.com/en/4.1/ref/django-admin/) for full information on what the `<span class="pre">manage.py</span>` utility can do.

# Creating a project

If this is your first time using Django, you’ll have to take care of some initial setup. Namely, you’ll need to auto-generate some code that establishes a Django [<span class="xref std std-term">project</span>](https://docs.djangoproject.com/en/4.1/glossary/#term-project) – a collection of settings for an instance of Django, including database configuration, Django-specific options and application-specific settings.

From the command line, `<span class="pre">cd</span>` into a directory where you’d like to store your code, then run the following command:

<div class="console-block" id="bkmrk-%24-django-admin-start"><section class="c-content-unix" id="bkmrk-%24-django-admin-start-0">```
$ django-admin startproject mysite
```

</section></div>This will create a `<span class="pre">mysite</span>` directory in your current directory. If it didn’t work, see [<span class="std std-ref">Problems running django-admin</span>](https://docs.djangoproject.com/en/4.1/faq/troubleshooting/#troubleshooting-django-admin).

> Note
> 
> You’ll need to avoid naming projects after built-in Python or Django components. In particular, this means you should avoid using names like `<span class="pre">django</span>` (which will conflict with Django itself) or `<span class="pre">test</span>` (which conflicts with a built-in Python package).

> Where should this code live?
> 
> If your background is in plain old PHP (with no use of modern frameworks), you’re probably used to putting code under the web server’s document root (in a place such as `<span class="pre">/var/www</span>`). With Django, you don’t do that. It’s not a good idea to put any of this Python code within your web server’s document root, because it risks the possibility that people may be able to view your code over the web. That’s not good for security.
> 
> Put your code in some directory **outside** of the document root, such as `<span class="pre">/home/mycode</span>`.

Let’s look at what [`<span class="pre">startproject</span>`](https://docs.djangoproject.com/en/4.1/ref/django-admin/#django-admin-startproject) created:

```
mysite/
    manage.py
    mysite/
        __init__.py
        settings.py
        urls.py
        asgi.py
        wsgi.py
```

These files are:

<div class="section" id="bkmrk-the-outer%C2%A0mysite%2F%C2%A0ro">- The outer `<span class="pre">mysite/</span>` root directory is a container for your project. Its name doesn’t matter to Django; you can rename it to anything you like.
- `<span class="pre">manage.py</span>`: A command-line utility that lets you interact with this Django project in various ways. You can read all the details about `<span class="pre">manage.py</span>` in [<span class="doc">django-admin and manage.py</span>](https://docs.djangoproject.com/en/4.1/ref/django-admin/).
- The inner `<span class="pre">mysite/</span>` directory is the actual Python package for your project. Its name is the Python package name you’ll need to use to import anything inside it (e.g. `<span class="pre">mysite.urls</span>`).
- `<span class="pre">mysite/__init__.py</span>`: An empty file that tells Python that this directory should be considered a Python package. If you’re a Python beginner, read [<span class="xref std std-ref">more about packages</span>](https://docs.python.org/3/tutorial/modules.html#tut-packages "(in Python v3.11)") in the official Python docs.
- `<span class="pre">mysite/settings.py</span>`: Settings/configuration for this Django project. [<span class="doc">Django settings</span>](https://docs.djangoproject.com/en/4.1/topics/settings/) will tell you all about how settings work.
- `<span class="pre">mysite/urls.py</span>`: The URL declarations for this Django project; a “table of contents” of your Django-powered site. You can read more about URLs in [<span class="doc">URL dispatcher</span>](https://docs.djangoproject.com/en/4.1/topics/http/urls/).
- `<span class="pre">mysite/asgi.py</span>`: An entry-point for ASGI-compatible web servers to serve your project. See [<span class="doc">How to deploy with ASGI</span>](https://docs.djangoproject.com/en/4.1/howto/deployment/asgi/) for more details.
- `<span class="pre">mysite/wsgi.py</span>`: An entry-point for WSGI-compatible web servers to serve your project. See [<span class="doc">How to deploy with WSGI</span>](https://docs.djangoproject.com/en/4.1/howto/deployment/wsgi/) for more details.

</div><div class="section" id="bkmrk-"><div class="section"><span id="bkmrk--0"></span></div></div>

# The development server

Let’s verify your Django project works. Change into the outer `<span class="pre">mysite</span>` directory, if you haven’t already, and run the following commands:

<div class="console-block" id="bkmrk-%24-python-manage.py-r"><section class="c-content-unix" id="bkmrk-%24-python-manage.py-r-0">```
$ python manage.py runserver
```

</section></div>You’ll see the following output on the command line:

```
Performing system checks...

System check identified no issues (0 silenced).

You have unapplied migrations; your app may not work properly until they are applied.
Run 'python manage.py migrate' to apply them.

February 16, 2023 - 15:50:53
Django version 4.1, using settings 'mysite.settings'
Starting development server at <a class="reference external" href="http://127.0.0.1:8000/">http://127.0.0.1:8000/</a>
Quit the server with CONTROL-C.
```

> Note
> 
> Ignore the warning about unapplied database migrations for now; we’ll deal with the database shortly.

You’ve started the Django development server, a lightweight web server written purely in Python. We’ve included this with Django so you can develop things rapidly, without having to deal with configuring a production server – such as Apache – until you’re ready for production.

Now’s a good time to note: **don’t** use this server in anything resembling a production environment. It’s intended only for use while developing. (We’re in the business of making web frameworks, not web servers.)

Now that the server’s running, visit [http://127.0.0.1:8000/](http://127.0.0.1:8000/) with your web browser. You’ll see a “Congratulations!” page, with a rocket taking off. It worked!

> Changing the port
> 
> By default, the [`<span class="pre">runserver</span>`](https://docs.djangoproject.com/en/4.1/ref/django-admin/#django-admin-runserver) command starts the development server on the internal IP at port 8000.
> 
> If you want to change the server’s port, pass it as a command-line argument. For instance, this command starts the server on port 8080:
> 
> <div class="console-block" id="bkmrk-%24-python-manage.py-r-1"><label for="c-tab-3-unix" title="Linux/macOS">  
> </label><section class="c-content-unix" id="bkmrk-%24-python-manage.py-r-2">```
> $ python manage.py runserver 8080
> ```
> 
> </section></div>If you want to change the server’s IP, pass it along with the port. For example, to listen on all available public IPs (which is useful if you are running Vagrant or want to show off your work on other computers on the network), use:
> 
> <div class="console-block" id="bkmrk-%24-python-manage.py-r-3"><label for="c-tab-4-unix" title="Linux/macOS">  
> </label><section class="c-content-unix" id="bkmrk-%24-python-manage.py-r-4">```
> $ python manage.py runserver 0.0.0.0:8000
> ```
> 
> </section></div>Full docs for the development server can be found in the [`<span class="pre">runserver</span>`](https://docs.djangoproject.com/en/4.1/ref/django-admin/#django-admin-runserver) reference.

> Automatic reloading of [`<span class="pre">runserver</span>`](https://docs.djangoproject.com/en/4.1/ref/django-admin/#django-admin-runserver)
> 
> The development server automatically reloads Python code for each request as needed. You don’t need to restart the server for code changes to take effect. However, some actions like adding files don’t trigger a restart, so you’ll have to restart the server in these cases.