Amazon Web Services - Route 53
Amazon Route 53 is a highly available and scalable Domain Name System (DNS) web service. It is designed for developers and corporates to route the end users to Internet applications by translating human readable names like www.mydomain.com, into the numeric IP addresses like 192.0.2.1 that computers use to connect to each other.
How to Configure Amazon Route 53?
Following are the steps to configure Route 53.
Step 1 − Open the Amazon Route 53 console using this link − https://console.aws.amazon.com/route53/.
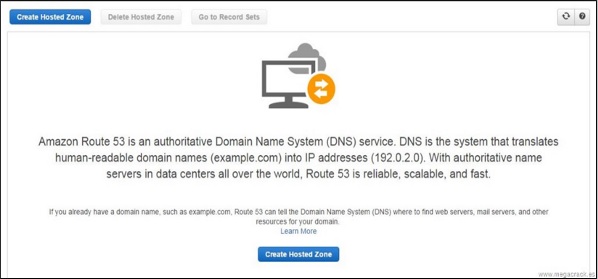
Step 2 − Click create hosted zone option on the top left corner of the navigation bar.

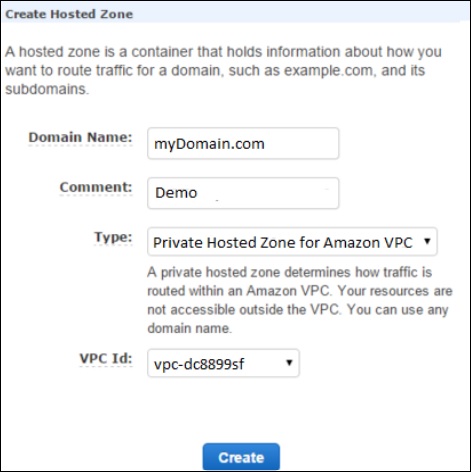
Step 3 − A form page opens. Provide the required details such as domain name and comments, then click the Create button.
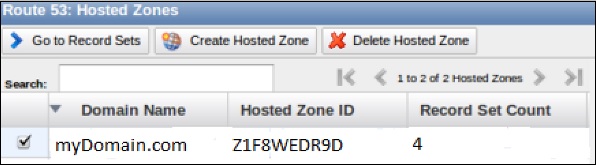
Step 4 − Hosted zone for the domain will be created. There will be four DNS endpoints called delegation set and these endpoints must be updated in the domain names Nameserver settings.
Step 5 − If it is godaddy.com then select domain’s control panel and update the Route 53 DNS endpoints. Delete the rest default values. It will take 2-3 minutes to update.
Step 6 − Go back to Route 53 console and select the go to record sets option. This will show you the list of record sets. By default, there are two record sets of type NS & SOA.
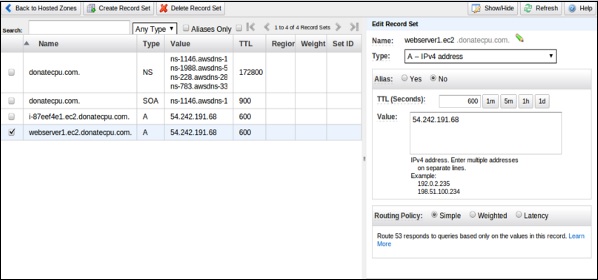
Step 7 − To create your record set, select the create record set option. Fill the required details such as: Name, Type, Alias, TTL seconds, Value, Routing policy, etc. Click the Save record set button.
Step 8 − Create one more record set for some other region so that there are two record sets with the same domain name pointing to different IP addresses with your selected routing policy.
Once completed, the user requests will be routed based on the network policy.
Features of Route 53
-
Easy to register your domain − We can purchase all level of domains like .com, .net, .org, etc. directly from Route 53.
-
Highly reliable − Route 53 is built using AWS infrastructure. Its distributed nature towards DNS servers help to ensure a consistent ability to route applications of end users.
-
Scalable − Route 53 is designed in such a way that it automatically handles large volume queries without the user’s interaction.
-
Can be used with other AWS Services − Route 53 also works with other AWS services. It can be used to map domain names to our Amazon EC2 instances, Amazon S3 buckets, Amazon and other AWS resources.
-
Easy to use − It is easy to sign-up, easy to configure DNS settings, and provides quick response to DNS queries.
-
Health Check: Route 53 monitors the health of the application. If an outage is detected, then it automatically redirects the users to a healthy resource.
-
Cost-Effective − Pay only for the domain service and the number of queries that the service answers for each domain.
-
Secure − By integrating Route 53 with AWS (IAM), there is complete control over every user within the AWS account, such as deciding which user can access which part of Route 53.